
Chapter 6: Fool’s Paradise is the 6th story mission in Final Fantasy 7 (VII) Rebirth. This walkthrough will guide you through all objectives of the Fool’s Paradise Main Mission.
Area: Costa del Sol
Objectives:
- A Moment’s Rest
- The Royal Coast
- Costa del Sol Resort
- Paradise Awaits
- Unarmed
- Beach Boys
- Card Carnival
- Pirate’s Rampage
- A Change of Pace
- Fun While It Lasts
- Run Wild
- Royal Coast Concert
- Wheelie Rendezvous
- Cactuar Caper
- Hojo’s Mojo
- Mad Science
- When Evening Comes
- Hotelward Bound
- On the Road Again
A Moment’s Rest
At the start of the chapter, you are off the ship in Costa del Sol. The party needs to make their way into town to look for a hotel to stay at. You can first head to the Discovery location Tourist Information Center. Speak with the attendant at the desk and ask for information on “Hotels in the area”.

The Royal Coast
The Royal Coast is the nearer of the two hotels, right in the middle of the resort. Head inside and speak with the receptionist.

Costa del Sol Resort
The Costa del Sol Resort is further along the path, head along and speak with their receptionist as well.

You can also interact with Yuffie who is marked as the Discovery point Vanishing Act for a relationship interaction.

Paradise Awaits
Johnny appears and offers you a place to stay, so follow him through the path nearby to his hotel.
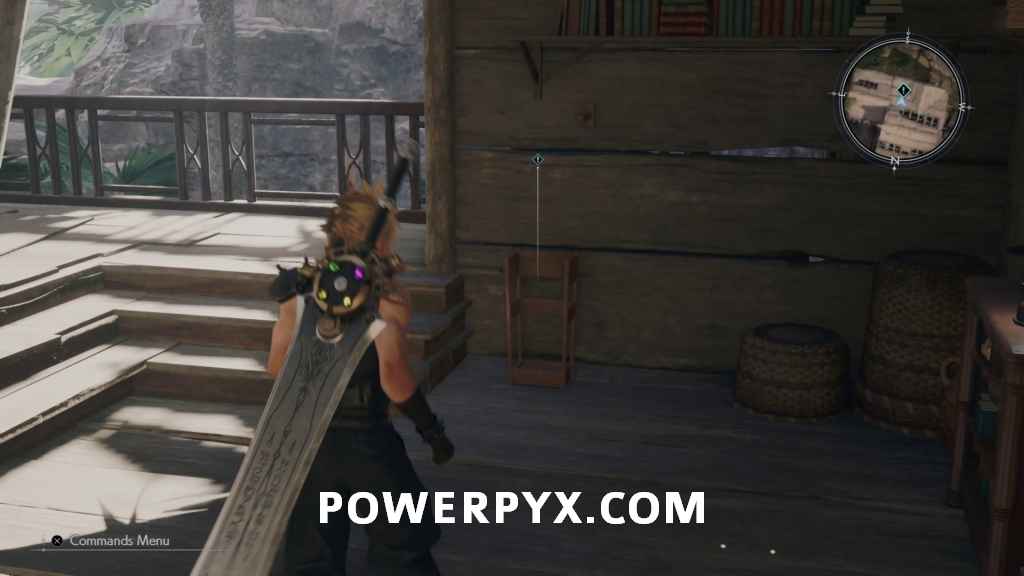
Unarmed
You need to drop your weapon to be able to participate in beach activities, so head into the marked room and interact with the spot to place Cloud’s sword in the room.
Beach Boys
Cloud is on his own for now, so head back along the path to the main resort area. On the way you’ll be stopped and told about the companion card program, which you need to utilize to purchase some beachwear for Cloud. There are two activities you can choose from, and you need to do well enough in at least one of them to get one card to trade.
Card Carnival
Card Carnival is started by speaking with Regina who is on the lower dock level.

Card Carnival
Refer to Card Carnival Challenge Solutions.
Pirate’s Rampage
Pirate’s Rampage is started by speaking with Barret who is along the northmost path. This is a shooting gallery minigame. The goal is to shoot as many targets as possible within the time limit while maintaining good accuracy.

Once you have received at least one of the cards from either of these activities, you can trade for clothing from one of the marked Discovery locations Beachwear Exchange Booth. Then interact with one of the changing rooms to put one of the outfits on Cloud. If you don’t get both outfits now you can purchase the other later for Gil.

Once you’re ready head down to the marked spot and say you’re ready to go down to the beach.
A Change of Pace
After a scene, you’ll be switched to Aerith back at Johnny’s hotel. Head out of the room and knock on the other door to meet up with Tifa.
Fun While It Lasts
Now Aerith, Tifa, and Red are hanging out for a bit, you are doing effectively the same thing as with Cloud, but need to get at least one ticket for each Tifa and Aerith to exchange for outfits. This means you need to complete either Run Wild or Cactuar Caper for an outfit for Aerith, and either Royal Coast Concert or Wheelie Rendezvous for an outfit for Tifa.
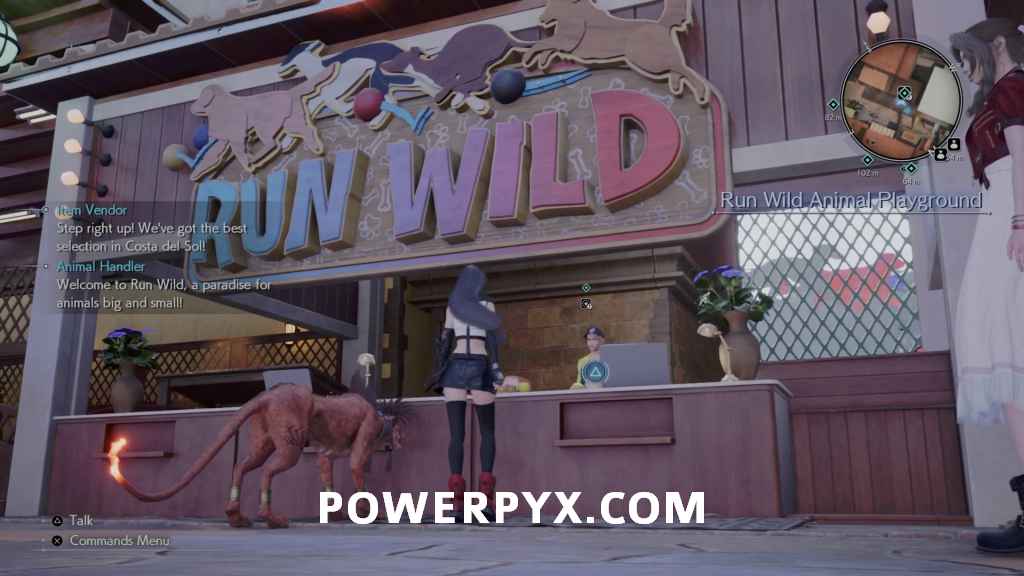
Run Wild
Run Wild is started from the Run Wild Animal Playground booth along the southwestmost road of the town. This is another minigame. You will run around as Red XIII on a soccer field and must score goals.
Royal Coast Concert
The Royal Coast Concert is a piano performance, which you can participate in by heading inside the Royal Coast hotel.

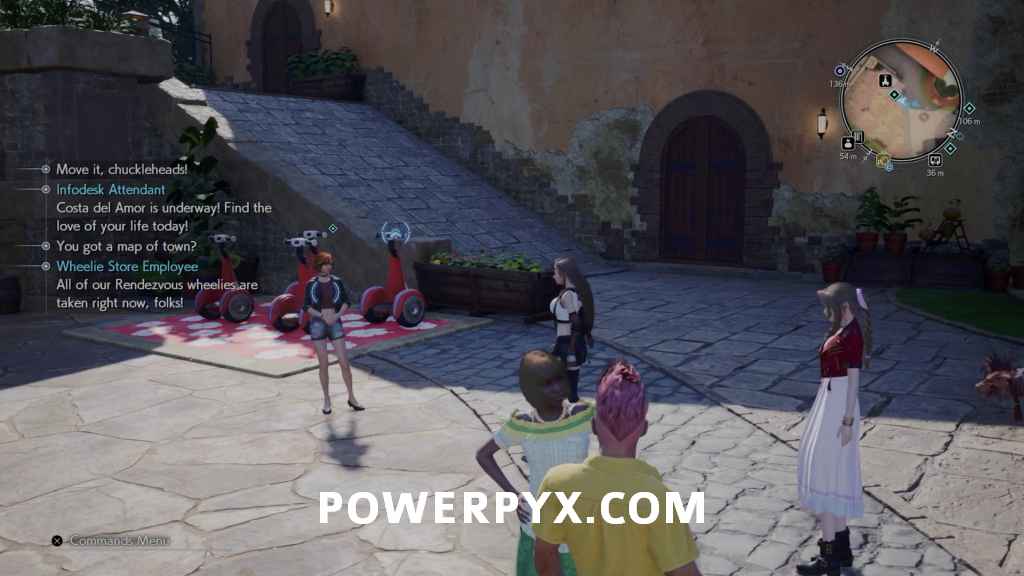
Wheelie Rendezvous
Wheelie Rendezvous is an activity you can start by interacting with the employee near the red Wheelie spot near the entrance to Costa del Sol.
Wheelie Rendezvous
You must locate 6 Wheelies and bring them back to their station. Refer to Wheelie Locations Guide.
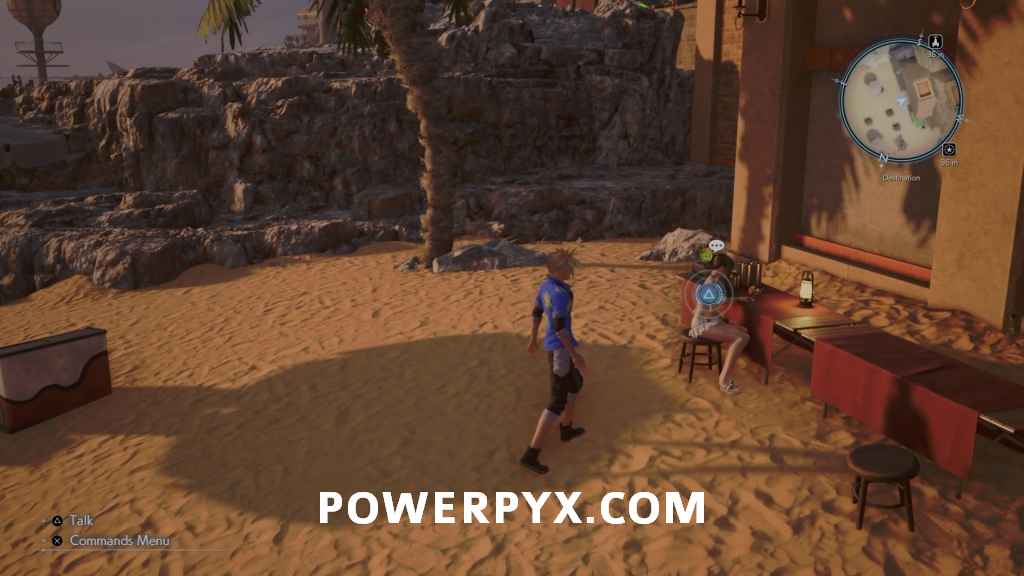
Cactuar Caper
Cactuar Caper is an activity you can start by going near the girl close to the stairs leading down to the Card Carnival booth.

You must photograph 4 Cactuars around Costa del Sol. Refer to Cactuar Photo Locations Guide.
After completing activities to get at least one card for each character, you can trade for outfits in the same way as Cloud, then change and head down to the beach. If you miss out on outfits you can also purchase them later for Gil.
Hojo’s Mojo
After the initial scenes at the beach follow behind where Hojo has appeared up on the deck on the other side of the beach.
Mad Science
After some more scenes, you will be picking between which of your teammates to assist. This determines who you want fight with in the boss battle that happens shortly, but doesn’t have any other significant effects.

After you pick you can make changes to your party if needed, then run over to attack the enemies. These will be the same ones you fought on the ship in the prior chapter, so nothing out of the ordinary yet.
Boss Fight: Grasptropod

- Weaknesses / Status Ailments: Lightning
- Lesser Resistances: Ice
- Greater Resistances:
- Immunities: Proportional Damage, Berserk, Slow, Stop, Poison, Silence, Sleep, Stone, Petrify, Morphable Items
- Absorbed Elements: —
- Items Dropped: —
- Rare Items Dropped: —
- Stealable Items: —
- Assess Info: Inflicting enough damage or landing synergy skills and synergy abilities will pressure it. After a certain amount of time, it will use missiles and drones to capture targets. After using Breakneck Spin, it will overheat, rendering it temporarily inoperative.
For this battle, you will start with either Tifa and Red XIII or Barret and Aerith depending on the choice you made on the beach prior to fighting off the fiends. It doesn’t really matter which you pick as shortly into this battle, one of your party members will be abducted, followed by the second after. At half health, the boss will also abduct Cloud but this is story-related so don’t worry, you’ll get him back soon enough.
Grasptropod shouldn’t cause too many issues because it pressures easily, particularly if you use Lightning spells or abilities. One thing to watch our for is its poison mist, which it spews either in an arc in front of it or releasing it 360 degrees around it. On both occasions, keep far back out the way or you will be poisoned (which you can heal with an Antidote item or Chakra Materia). If you haven’t used Synergy skills much, now is the time to try because not only will they pressure it, but it will build the ATB of two characters at once so you can build up Synergy Abilities to cause more and sustained pressure. Build up the Stagger bar and hit it with everything you have. After a certain point, it will use Breakneck Spin which causes a lot of damage and leaves Grasptropod mostly resistant to damage, so just stay out of the way because afterwards it will overheat, allowing you to get in a lot of damage trouble-free. It has fairly low HP so as long as you keep Cloud’s health up, it should go down quickly.
Hard Tips: Whichever party you pick, make sure to put Elemental-Lightning on Cloud, the others don’t really matter. As most of this fight will be with just Cloud, try to keep an ATB in case you get heavily damaged by one of the unblockable attacks so that you can heal up. Having a Ribbon on Cloud can help with the poison and other detrimental statuses.
When Evening Comes
After the boss fight and scenes you will be back on the beach. You can speak with each of your party members here for a relationship interaction. Tifa is sitting at the bar directly beside where you start.
Aerith is standing down near the water.

Red is sitting to the right of the stage platform.
Barret is sitting on the steps leading back up to the resort.

Hotelward Bound
Once you’re ready to continue head up the stairs and confirm to Barret that you’re ready to head back to the hotel.
On the Road Again
The next, head out from the hotel toward the objective. You’ll be stopped by Yuffie on the way out, who insists on joining the party. You can respond how you like, though say you want her to join for an increase to her relationship level, after which you will complete the chapter.
This finishes Chapter 6: Fool’s Paradise in Final Fantasy VII Rebirth.
Next Up: Chapter 7: Those Left Behind
For all other Mission Walkthroughs, check out our complete Final Fantasy 7 (VII) Rebirth Walkthrough.
Leave a Reply