
Gilgamesh is the secret superboss in Final Fantasy VII Rebirth. Defeating him unlocks the Bladesman of Legend trophy. This guide will show you where to find Gilgamesh and how to defeat him.
Gilgamesh – Location:
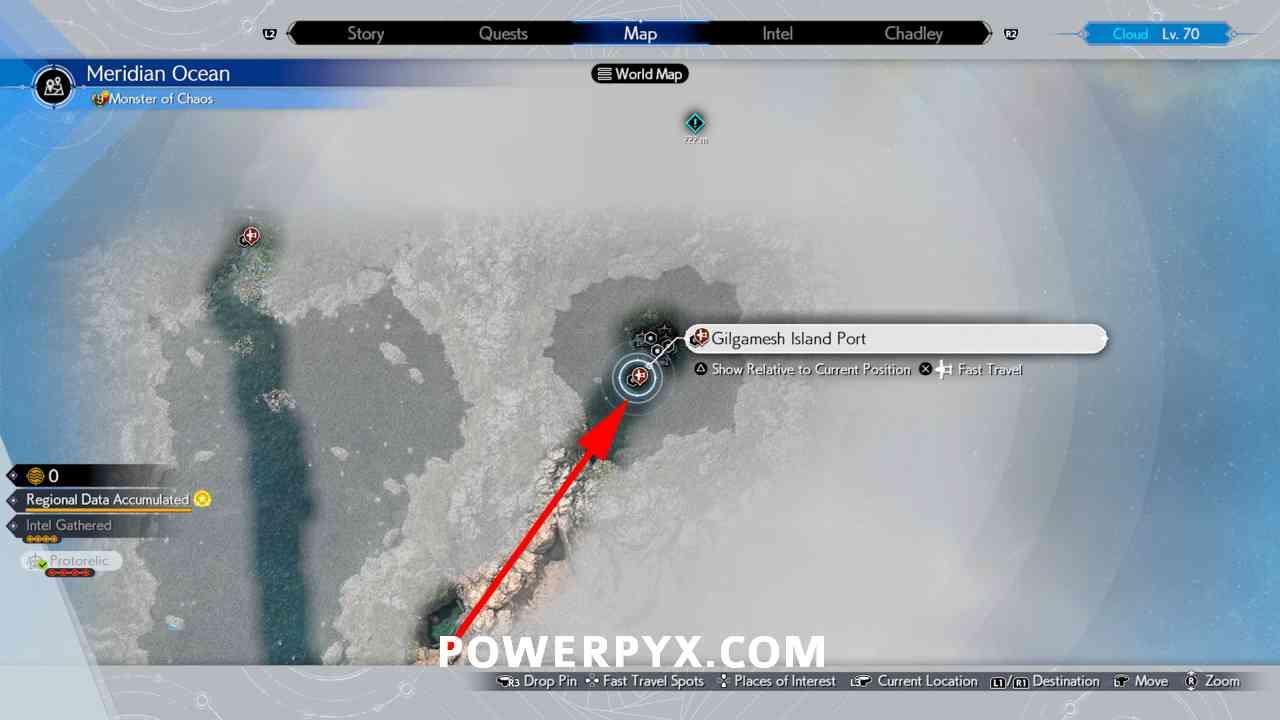
Gilgamesh is located on “Gilgamesh Island” in the northeast corner of Meridian Ocean. The first time you can reach this area is in Chapter 13. It’s only accessible after completing all Protorelics (Phenomenon Intel) in all Regions.
After finding all Protorelics, Chadley will give you a call to tell you a new location has appeared. This will Gilgamesh Island. You can then board the Tiny Bronco (water plane) at the port in Costa del Sol and drive to the northeast edge of Meridian Ocean. There you’ll see a Torii Gate in the water that leads through a cave to Gilgamesh Island.


Upon your arrival you will see a cutscene with Gilgamesh. You must then complete 3 more Phenomenon Intel on the island. All of them are double summon bosses you have encountered before in VR missions.
Beating them is difficult. If you struggle with this you can finish the story first, then you unlock Chapter Select and can clean up any side content from Chapter 13 until you reach Level 70. Along the way you will level up Materia which will make the fights easier. After you are fully leveled up come back for this in Chapter Select (your level transfers over).
Gilgamesh – Prerequisite Fights:
Remember you can change the difficulty to easy in the game settings if you have trouble with these fights! All 3 fights are on Gilgamesh Island and are needed to unlock the gate to Gilgamesh. You must have unlocked every Summon Materia by beating these bosses in Chadley’s Combat Simulator one time. They are all automatically from story progress and available by the time you reach Chapter 13. If you haven’t fought them yet you must talk to Chadley in Costa del Sol to do so.
Titan + Bahamut Arisen – Phenomenon Intel: The Bladesman of Legend (southeast on Gilgamesh Island)
Have Tifa on your team and use her Unbridled Strength ability twice in a row to buff her with Rise and Fall. Then press  to use Rise and Fall and immediately use Unbridled Strength again, rinse and repeat. When the opponent gets staggered, Tifa’s Rise and Fall & Omnistrike will increase the Stagger %, then use everyone’s Limit Breaks or Spells/ATB Commands for massive damage.
Phoenix + Kujata – Phenomenon Intel: The Genji Armaments (west on Gilgamesh Island)
Defeat Kujata to break the tether to Phoenix, then Phoenix will revive Kujata. Then kill Phoenix to stop him from reviving Kujata, and finally kill Kujata once more.
Alexander + Odin – Phenomenon Intel: Shrine of the Full Moon (north on Gilgamesh Island)
Defeat Odin first, his Zantetsuken can instant kill the entire team. A team of Cloud, Yuffie, Tifa will work well here. Play mainly as Yuffie, playing at range makes it easy to dodge Odin’s attacks (Yuffie is agile and good at dodging). Start by casting Haste (Time Materia) on Yuffie to recharge ATB faster. The way Odin’s Zantetsuken works is that there’s a hidden scale between him getting weakened when you hit him with lots of ATB Abilities, or him using Zantetsuken if he lands too many hits on you. You need to evade almost all his attacks, and keep hitting him constantly with ranged ATB Abilities and Spells to swing the hidden scale towards weakening him, thus keeping him from using Zantetsuken. Equip everyone on your team with a Revival Earring, these can be bought infinitely from vending machines, for example from the one in Cosmo Canyon at Kamaria’s Ranch. These will autorevive you when your HP goes to 0. Additionally, have Phoenix as your summoning materia, you can use his Reraise to give yourself an autorevive. Also equip Cloud’s weapon “Umbral Blade” and its weapon ability “Reprieve”, this lets you survive a death blow with 1 HP. You will also want the Materia “Reraise” which you can craft at Chadley at any of his spawn locations (for example in Cosmo Canyon at Kamaria’s Ranch). This Materia lets you cast an autorevive on a character, which lets you survive Zantetsuken. Equip all 3 characters with Revive Materia, which are also bought from the vending machine in Cosmo Canyon at Kamaria’s Ranch. The first Zantetsuken you’ll survive thanks to the Revival Earrings, but keep in mind these are 1 use only and will break upon death. Then you must cast the Reraise Materia to survive.
Gilgamesh – Video Guide:

Gilgamesh – Boss Fight:

After beating the prerequisite fights, the gate on Gilgamesh Island will open. Head inside and go through the building on the right to find Gilgamesh sitting in the garden. After a cutscene the fight begins.
Gilgamesh will seem easy in comparison to the Odin + Alexander double boss. Especially if you play on easy difficulty he shouldn’t pose any challenge. You don’t need any overly specialized loadout for this fight. A team of Cloud, Yuffie, and whoever you want is fine. You can fast travel to a rest bench (e.g. Cosmo Canyon’s Kamaria Ranch) to refill your HP & MP before the fight.
Gilgamesh only deals physical damage so cast Barrier (Barrier Materia) on all characters to take half damage, use a Heal Materia to cast Regen on everyone. He is weak to fire so equip everyone with a Fire Materia.
Use Fire Ninjutsu with Yuffie to exploit his weakness and cast Poison Materia. If he uses Genji Shield he will get a bunch of buffs and remove Poison, but if you have Subversion on Cloud you can use Dispel to remove all these. Try to perfect block his blockable attacks to pressure him, but make sure to dodge away from his unblockable attacks (indicated by the red exclamation mark next to the attack name) as these can be very damaging.
Continue this cycle and he will introduce new weapons and attacks, so be careful of these. When his health gets low, he will constantly be counting down from five to do Ultimate Illusion over and over, so you will want to try finish him off as quickly as you can. Refresh Barrier for these to limit their damage, but if you’re full HP you should be able to tank these ultimates without Barrier.
For more guides check out Final Fantasy VII Rebirth Wiki.
Leave a Reply