
The Party Never Stops is a side quest in Final Fantasy 7 (VII) Remake. This walkthrough will guide you through all objectives of The Party Never Stops Side Mission (Odd Job).
The Party Never Stops becomes available in Chapter 9, after you complete the ‘Underground Colosseum’ main objective AND made the choices listed in the requirements below.
Side Quest: The Party Never Stops
Chapter: 9
Area: Sector 6 Slums – Wall Market
Quest Giver: Clothing Store Owner’s Son
Requirement: Make the following choices in Chapter 9:
- Sam Dialogue (Chocobo Cowboy): When describing Tifa to him pick “She’s in great Shape”.
- In Wall Market, complete the Johnny Discovery Event (where he runs away from you). After catching him pick his first dialogue “Yeah”.
- In Wall Market, talk to the guy standing in front of the hotel, select dialogue “How much?” (back at the start of Wall Market)
- In Wall Market, talk to hotel receptionist, select dialogue “Yes”.
- After this head to the next main objective at Corneo’s mansion where you meet the Trio.
- When Sam does the coin flip, pick “No deal.”.
- Pick the cheapest massage “Poor Man’s Course – 100G”
- When Aerith asks how you like her outfit “It’s alright”.
- Complete ‘The Underground Colosseum’ main objective.
Reward: Turbo Ether, HP and MP restored
Mission Info: Drag the clothing store worker’s inebriated father out of Drunkard’s Den and back to the shop.
Objectives:
- Go to Drunkard’s Den and speak to the drunk father
- Go to the Materia Vendor to find the drunk father’s ‘inspiration’
- Go to the inn and use Assess Materia on vending machine
- Go back to the Materia Vendor
- Go to the restaurant and give the owner advice
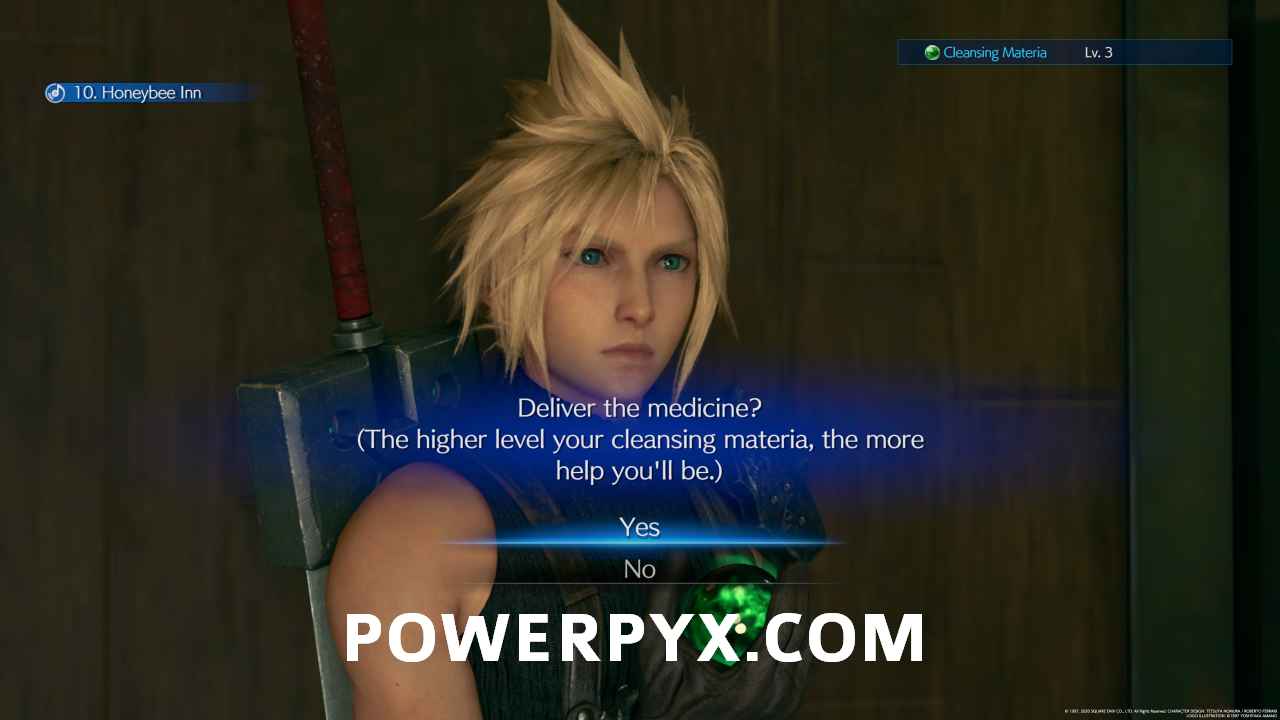
- Go to the Pharmacist and agree to deliver medicine
- Find the sick people and give them medicine
- Return to the Pharmacist and collect the VIP Card
- Go back to the drunk father and give him the VIP Card
- Return to the Clothes Shop Owner’s Son
Starting Location: The Party Never Stops
Warning: This Side Quest requires specific choices in Chapter 9, see the requirements listed above and replicate them exactly. If you make different choices you get two alternate quests instead The Price of Thievery, Shears’ Counterattack (click on them for their requirements). These optional quests are also needed for the “Best in the Business” trophy, which you can do after the story in chapter select. Since they cancel out the alternate Chapter 9 quests you can only do one or the other on the 1st playthrough.


Go to Drunkard’s Den and speak to the drunk father
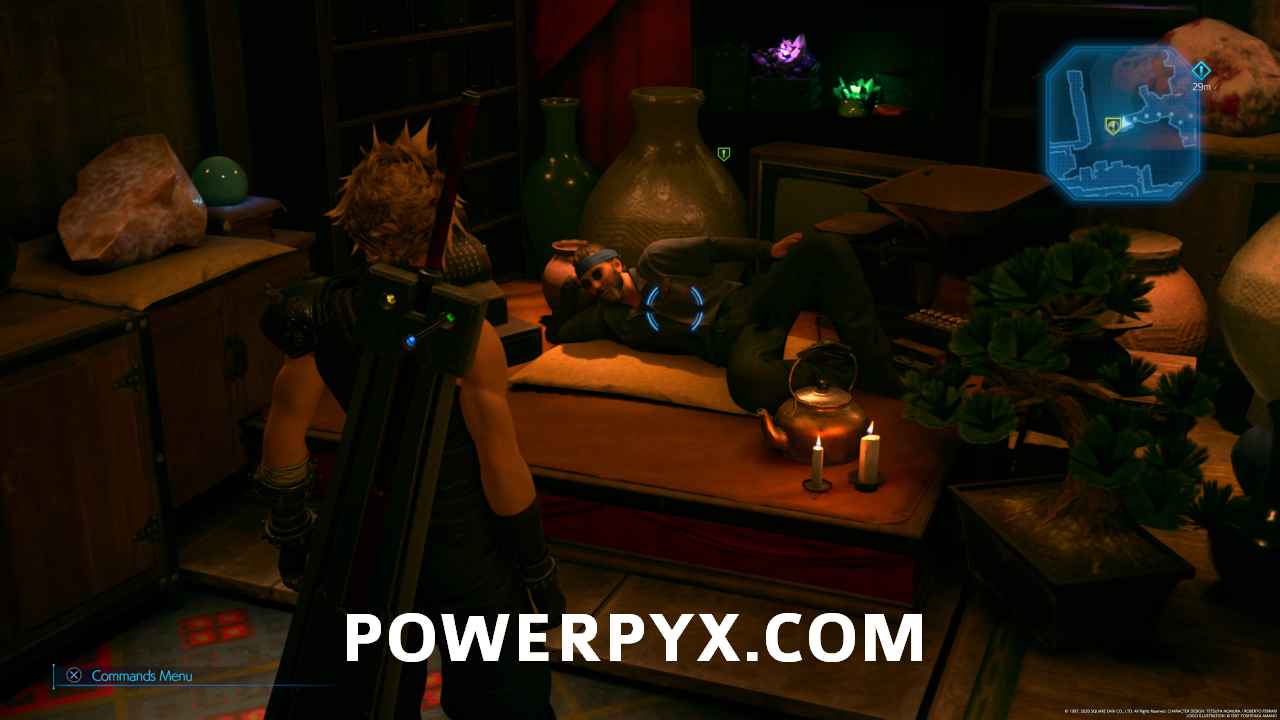
As soon as you exit the clothing store, Johnny will run up to you and excitedly offer to take you to the Drunkard’s Den. Follow him and go inside to talk to the drunk father, who is to the right of the bar slouched on a stool over a table.


Go to the Materia Vendor to find the drunk father’s ‘inspiration’
Head over to the Materia Shop and speak to the Vendor, who is lying down like he wants to be drawn like one of your French girls. He’ll ask you to go and fetch an item from a vending machine at the inn.

Go to the inn and use Assess Materia on vending machine
Go to the inn and use the secret vending machine. The game tells you that you can use your Assess Materia to get secret times, and the higher level it is (i.e. the more enemies you’ve Assessed), the luckier you may be. Up to this point I’d used it on every enemy I could and had a total of 55, and on multiple reloads I got the same items every time.
The first time you use the vending machine, you get Vitalbrew, the second time you get Crimson Spike, then finally The Sauce.


Go back to the Materia Vendor
Return to the Materia Vendor and he’ll take the three items off you and tell you to go to the Restaurant.
Go to the restaurant and give the owner advice
Go to the restaurant and the owner will ask for advice on how best to fix his food. The higher level your Fire, Lightning or Ice Materia is, the better item you’ll get. Choose either the Stove, the Fridge or the Power Supply as the end result is exactly the same (doesn’t matter which dialogue you pick). If your highest Materia Level is 2 (Fira, Blizzara, Thundara) you’ll receive a Remedy. If it is 3 (Firaga, Blizzaga, Thundaga) then you’ll get a Moogle Medal. Either way, you’ll also get a Medicine Voucher which is what you really came here for.


Find the Pharmacist and agree to deliver medicine
After Johnny runs from the restaurant with a sick stomach, you’ll find him just around the corner on the floor with a Pharmacist stood over him. Talk to the Pharmacist and you’ll be taken inside and asked to deliver medicine, with how helpful you’ll be determined by your Cleansing Materia level. If it’s Level 1, you need to find 1 person, Level 2 then 2 people, and Level 3 all 3 people.


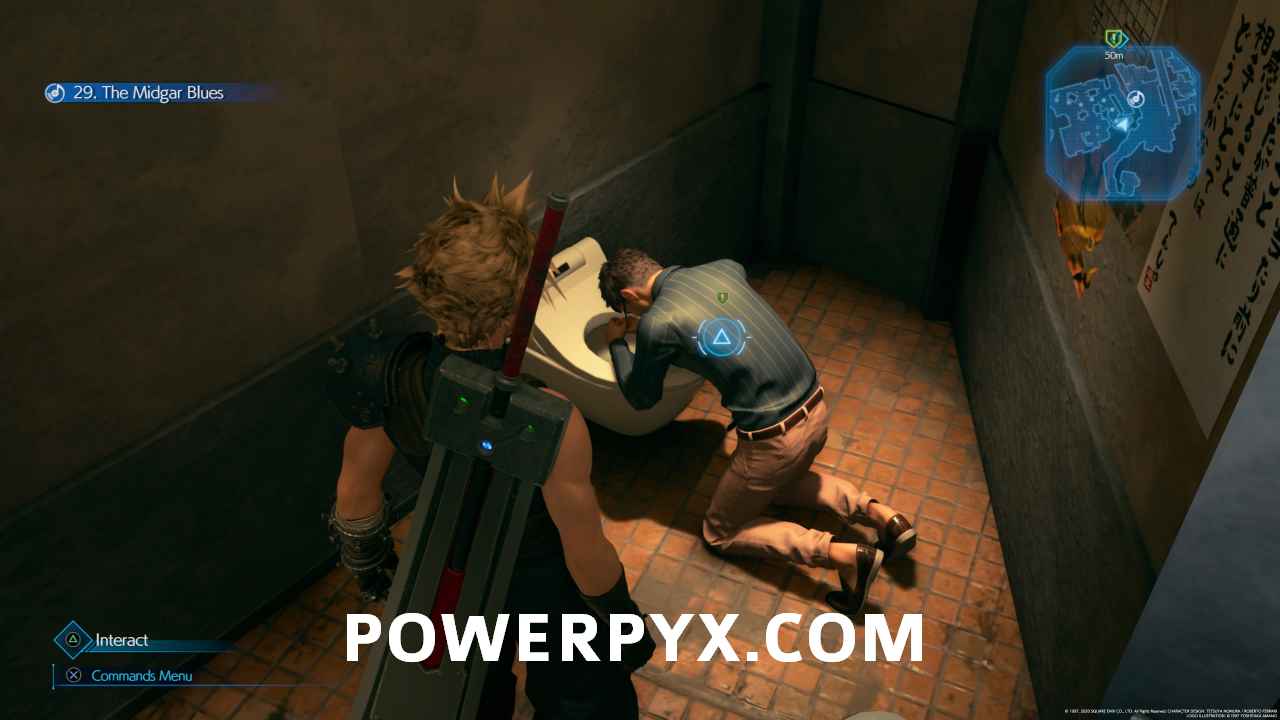
Find the sick people and give them medicine
Now you have to find up to 3 sick people around Wall Market. The Pharmacist gives you hints about where to go. You actually only need to find one person to start the next step of the quest, but if you find the others they give you items.
Sick Person Location #1: This unfortunate soul is kneeling over a toilet bowl in the bathroom of the Drunkard’s Den (the bar where you originally spoke to the Clothing Store Owner’s Father).
Pharmacist’s Hint: If I had to guess where a sick person’d end up, I’d say the toilet. Maybe in a shop nearby?

Sick Person Location #2: The second person is keeled over against an alley wall. The clue says he’s behind the gym, but he’s actually behind the clothing shop (where you started this quest). The entrance to the alley is to the north of the shop.
Pharmacist’s Hint: You might find the second customer with the drunks usually passed out behind the gym.


Sick Person Location #3: The third person is hunched over with his hands on his knees in the alley south of the massage parlor (again, not ‘right behind’ – this Pharmacist would be useless as a treasure hunter). Turn to the right at the fork once you enter the alley.
Pharmacist’s Hint: The third wandered down the wrong side street, I’m thinking. There’s a real narrow alley right behind the massage parlor. Only the locals seem to know it’s even there.


Return to the Pharmacist and receive the VIP Card
Go back to the Pharmacist at the Item Shop and he’ll give you the VIP Card to give to the drunk father.


Go back to the drunk father at Drunkard’s Den and give him the VIP Card
Return to the Drunkard’s Den and to the drunk father who is still where he was at the start of this quest. He’ll take the VIP Card and tell you to go back to his son.


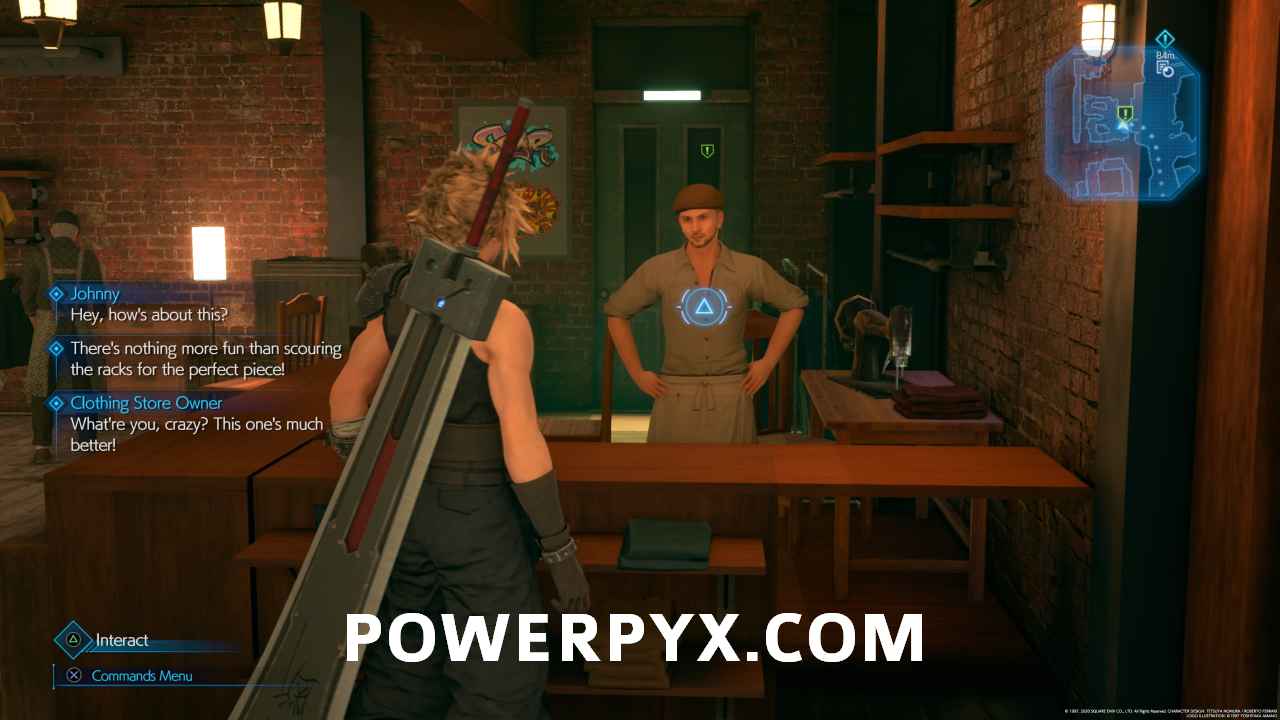
Return to the Clothes Shop Owner
Go back to the Clothes Shop Owner and finally this zig-zag of a fetch quest is at an end. He will give you a Turbo Ether and restore your HP and MP.

This finishes The Party Never Stops side quest in Final Fantasy VII Remake. Now the mission A Dynamite Body becomes available.
Important for Best in the Business Trophy: To get this quest you must complete the Johnny Discovery Event in Chapter 9 Wall Market which locks you out of the 2 alternate Side Quests The Price of Thievery, Shears’ Counterattack. After the story you unlock Chapter Select and can get these 2 alternate quests via chapter select without having to replay the entire game. Once you did all 26 side quests you get trophy “Best in the Business”. You can’t get all 26 side quests in a single playthrough.
Next Up: A Dynamite Body
For all other Side Quest Walkthroughs, check out our complete Final Fantasy 7 (VII) Walkthrough.
janel huseyin says
did every thing this says . but johnny never shows up after i visit the clothing store
PowerPyx says
So you are able to start the quest, correct?
But once the quest has started Johnny doesn’t appear so you can’t advance the quest at all? That sounds like a bug to me.
As soon as you accept the quest and step out of the Clothing Store, there will be a forced cutscene with Johnny (at least that’s how it’s supposed to be).
When you caught Johnny in the Discovery Event earlier in Chapter 9 did you pick his 1st dialogue choice “Yeah”? Perhaps selecting “No” might void something.
I’ll also have video walkthroughs for each side quest up in a few days.
John says
Same. Followed the description, but I don’t get a cutscene with the clothing store assistant after beating the Coliseum rounds. Something is evidently not triggering.
MikeRuiger says
John happened to start or get the purple quest for me before starting anything I was just running around uncovering the map. Had not even been to dons house yet.
Bryan says
Just save before going to the mission and than load it..what u choose is doesn’t matter
Brett McIntyre says
I can’t bribe the guy standing in front of the hotel, he just keeps saying “please come back later”
Brett McIntyre says
Please help
Brett McIntyre says
Never mind, I figured it out. I was at the Honey Bee Inn. Not this little hotel I just found
Matthew Mccay says
I got the quest without
In Wall Market, complete the Johnny Discovery Event (where he runs away from you). After catching him pick his first dialogue “Yeah”.
I ignored him
In Wall Market, talk to the guy standing in front of the hotel, select dialogue “How much?”
I told him to piss off (basically)
In Wall Market, talk to hotel receptionist, select dialogue “Yes”.
Didn’t sleep the night
When Sam does the coin flip, pick “No deal.”.
Selected heads
Pick the cheapest massage “Poor Man’s Course – 100G”
Selected the middle one (1000?)
When Aerith asks how you like her outfit “It’s alright”.
Said what would i know
AHA says
I literally did none of the “required” choices shown above, but I still got this quest. I think a bit more research needs to go into that portion.
For Tifa, I said “she’s a good fighter.”
For Johnny, I said “No.”
For the Hotel guy, I said something along the lines of “not interested.”
For Sam, I picked Heads.
For Madam L, I chose the Luxury Massage.
For Aerith’s outfit, I said “it looks comfortable.”
PowerPyx says
There are definitely many combinations of choices that get you the quest.
What’s outlined in the requirements at the top is just what I picked and what worked for me. We still need to narrow down if there’s only a single choice that matters.
If anyone else has gotten it with different choices, please write your choice here like AHA did and we can narrow it down further 🙂
Doing / not doing the Johnny event seems to have the biggest impact though.
Syber says
Idk how to give medicine to the 3rd guy. My cure materia is maxed and equipped but Cloud just tells the dude “nothing I can do for ya”
FromChaos says
I can’t seem to give medicine to any sick people. Cloud tells them all that he can’t help…
ET says
For the guys that can’t get the side quests to pop, just make sure you finish the “Parting Ways” quest by speaking to Chocobo Sam again after giving Aerith away to Madam M. The quests will pop thereafter. Also verified the reqs above.
mediumvillain says
On my most recent playthrough of the chapter (to get Aerith’s dress for only doing 3 side quests in Chapter 8):
– Ignored Johnny
– Ignored the hotel
– Went straight to Corneo’s
– Picked tails on the coin toss
– Picked the 1000 gil massage option
– Told Aerith her outfit is “alright”
And I got the Chocobo Sam side quests w Johnny & the arena fight against the Bombs.
On my previous playthrough of the chapter to finish the sidequests & Aerith’s solo arena fights:
– Ignored Johnny
– Ignored the hotel
– Went straight to Corneo’s
– Picked heads on the coin toss
– Picked the 3000 gil massage option
– Told Aerith her outfit looks comfortable
And got the Madam M side quests with the Guardian Angel & the Jury-Rigged Cutter arena fight.
So the only differences were the coin toss, the massage, and what I said to Aerith about her dress. My best guess is that getting Chocobo Sam’s or Madam M’s side quests has to do w the massage option and/or coin toss more than anything else. The first time I played I said “No deal” to the coin toss, picked the cheapest massage, and got the Chocobo Sam quests.
BodyChipper says
Still got this side quest with:
Tifa “is a good fighter”, talked to Johnny, never went to the hotel or talked to anyone in town but Chadley and the weapons shop owner, picked ‘tails’, got the 1000 gil massage and told Aerith her outfit looked comfortable.
larry says
to get all books or manuscript you need to do at least 2 times ch 9 because
THE PARTY NEVER STOP or THE PRICE OF THIEVERY (give u just 1)
SHEAR’S COUNTERATTACK and A DYNAMITE BODY (both give you 1)
larry says
IN HARD MODE
cool_chemist says
I couldn’t help but the notice the hilarious reference to the movie Titanic: “…speak to the Vendor, who is lying down like he wants to be drawn like one of your French girls.” Awesome!
aslsm says
I never use access material what should I do ??
Starcrunch061 says
I got the same three items from the vending machine in the inn, but afterward, it said “you’re the grand prize winner!” and gave me a moogle medal.