
Chapter 8: Budding Bodyguard is the 8th story mission in Final Fantasy 7 (VII) Remake. This walkthrough will guide you through all objectives of the Budding Bodyguard Main Mission.
Budding Bodyguard starts when you complete A Trap Is Sprung.
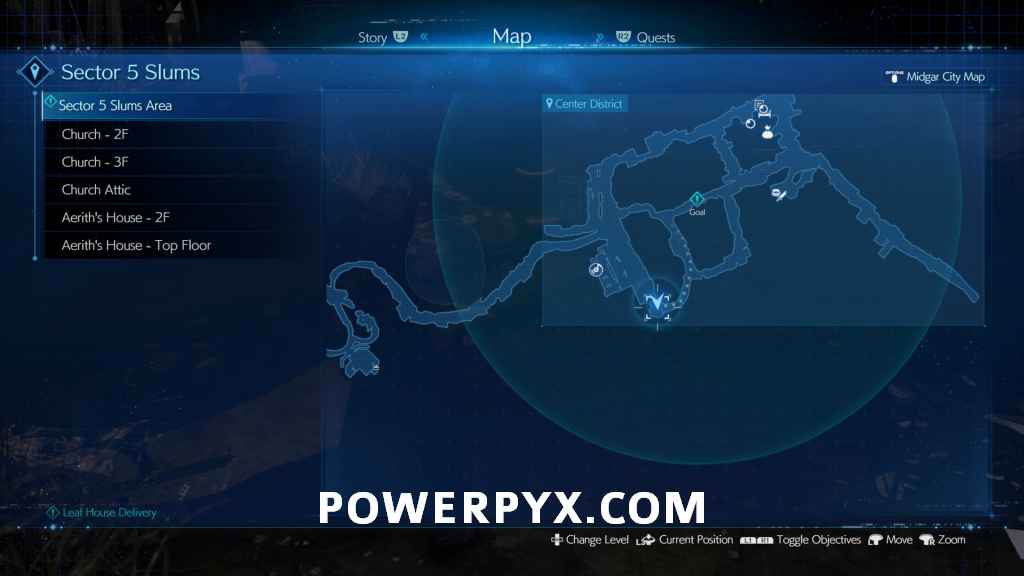
Area: Sector 5 Slums
Requirement: Complete Chapter 7: A Trap Is Sprung
Objectives:
- Second Chance Meeting
- Escape from the Church
- Rescue Aerith
- To the Attick
- Head for the Station
- The Station
- Through the Backstreets
- Avoid the Turk
- Around the Gate
- Discovery: The Gate Won’t Open
- Sector 5 Slums Monitor
- To Aerith’s House
- Leaf House Delivery
- Danger in the Hideout
- Escort the Children
- Requests for the Mercenary
- Discovery: The Language of Flowers
- The Price of Strength
Second Chance Meeting
After the intro scenes, speak to Aerith. You’ll have some more cutscene, then a group of people will come into the church and you’ll need to defeat groups of security officers.
Boss Fight: Reno
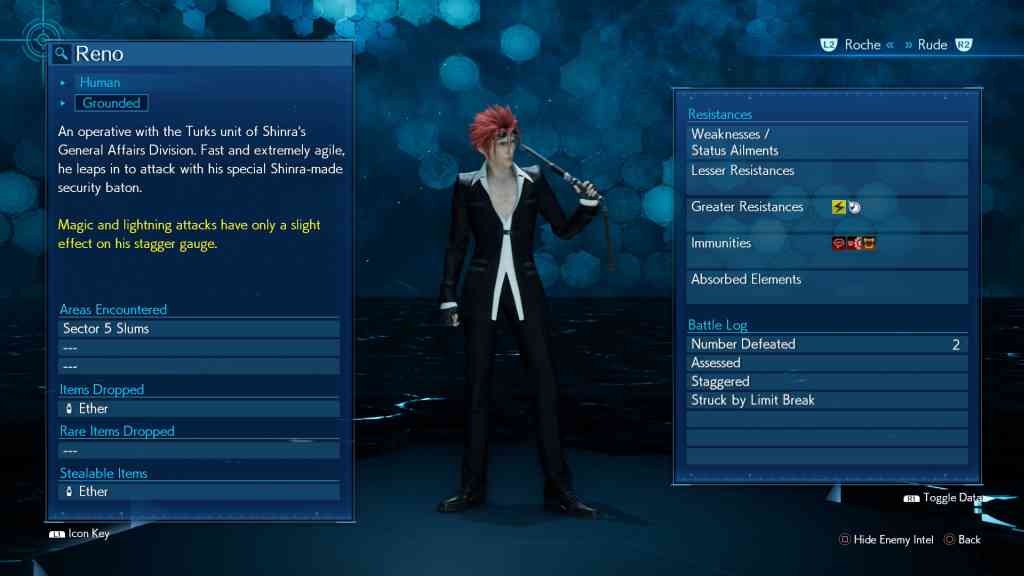

Just like Roche in Chapter 4, this is another ‘duel’ battle. What worked for Roche will work here. Always be in Punisher Mode when you can, holding  to Guard and hit him with your counterattack. Offensive magic is fairly useless in this fight so don’t bother with it.
Block, counter and hit him with Focused Thrust when your ATB charges up in order to build Stagger, then switch to Triple Slash when he’s in Stagger to do good damage. After about half his health is gone he’ll throw out some EM Mines which give off electricity and will stun you if you get hit. Make these your immediate priority and do your best to keep your eye on Reno at the same time and dodge his lunges.
Hard Difficulty Tips: For this one, equip Elemental-Lightning on your armor (not weapon) as his electrified security baton deals Lightning damage, which will be halved (or even immune in the highly unlikely event you’ve leveled it up). This fight is even easier on Hard since your Elemental Materia will be either Level 2 or MAX, meaning his Lightning attacks can’t damage you and may even heal you. Plus you have the most overpowered ability in the game, Counterstance! Use it whenever you have your ATB charged and time it right to deliver crushing blows to him.
Escape from the Church
After defeating Reno you’ll be pulled through a door with Aerith. You’ll be blocked on what directions you can travel, so for now just follow Aerith. When you get to the stairwell that you can go up or down, go down first to find a chest containing a Talisman.

Go up the stairs then across the beam.
Rescue Aerith/To the Attic
Aerith drops down from the beam when soldiers get through the door, so Cloud decides to drop the chandelier in the room to create a diversion. Go forward near the stairs and spot the arrow on the ground pointing out towards the middle of the room. Move into it and you’ll jump and grab the rafters, then you can move around them to get to the chandelier.
Continue on the rafters to the other side to meet back up with Aerith, then follow her around and push the cabinet blocking the way. You can then go up the ladder to get to the attic.
Once in the attic follow the path around, then go towards the left to find a chest containing a Smelling Salts.

Follow Aerith out of the church along the beams to continue.
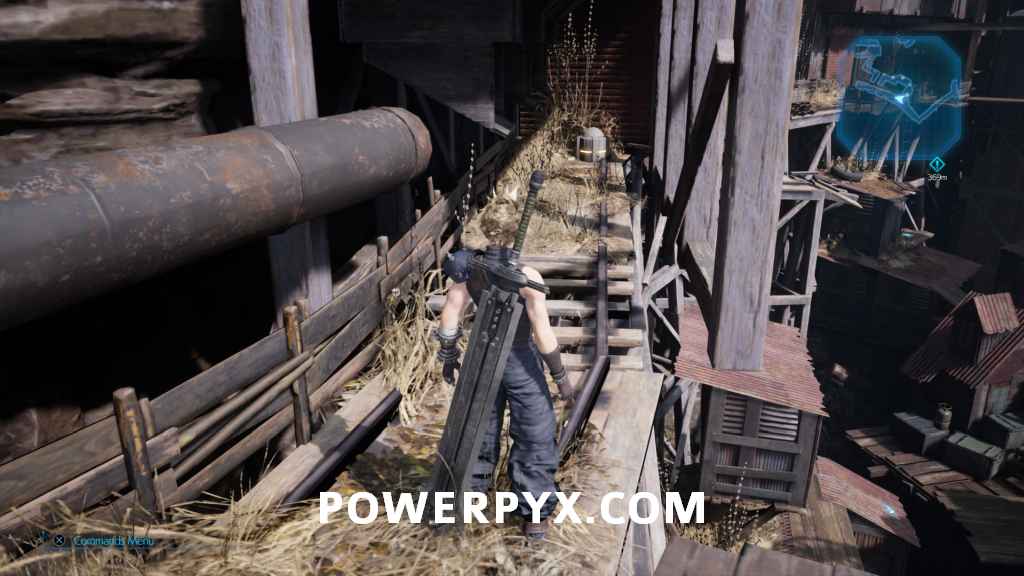
Head for the Station
Aerith wants to go across the rooftops to get to the nearby station, so take the ladder down just beside you. The route along the rooftops is linear, so just follow along on the map. When you reach the larger building go down onto the side section of the rooftop to find a chest containing a Moogle Medal.

Keep following the path, when you climb up the large ladder to the platform covered in dried grass you’re meant to go left to continue, but go right first to find a chest containing an Ether.
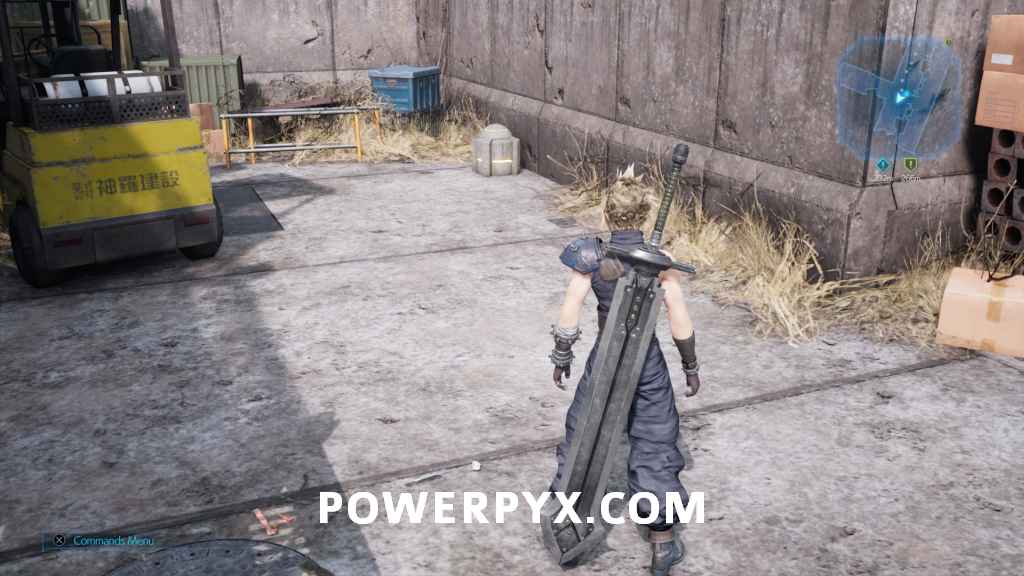
Continue along the path until the end, and after dropping down off the rooftops Aerith will join your party. The path to the Church going back is open, but you can’t get back there right now, so head South towards the objective. In the first more open area you’ll come across a new enemy named Hedgehog Pie. These creatures charge at you to attack you or cast spells but are weak to Ice based attacks.

After defeating it continue up the path into the building, where you’ll find another Hedgehog Pie along with a couple Wererats. When they’re dealt will follow the path forward to the end.
The Station
At the station, there is a train stopped due to the reactor being destroyed. Head towards the end of the platform where you can find a bench to rest at, as well as a vending machine that will be selling Disc 21. Cait Sith’s Theme. After purchasing it, continue forward.

Through the Backstreets/Avoid the Turk
Aerith suggests taking the back path to avoid the Turk that just came in on the helicopter. Continue along the path and deal with the groups of Wererats and Gorgers. When you get to the split in the path, first take the right path going East. The left path leads to a dead-end but there’s nothing to actually get in there currently. When you reach the next area pull the switch Aerith points out.
Around the Gate/Discovery: The Gate Won’t Open
Pulling the switch does nothing, so you need to find a way to get around. Follow the path going left and push the box by Aerith. Continue down the path and in the next area before you can go up the ladder you’ll be attacked with a group of Hedgehog Pies. When they’re dealt with climb the nearby ladder, then take the path leading right. Go across the bars above to get to a chest containing a Caliginous Bracelet.

Go back over the bars or drop down the nearby ladder, then take the path leading left to continue. Continue along and defeat the next group of enemies, then continue West to the objective. When you reach the turn you should see a small platform just off to the side, which you can reach by climbing over more bars. Open the chest on it to receive a Remedy.

Continue forward and open the gate leading forward and you’ll be in the area below where the locked gate was before. In the next area you will find a new enemy, a Smogger. These robots pull in nearby scrap parts to operate and sprays you with poison smog. Hit it with lightning or during its Haywire Haze attack to stagger it. When it is defeated it will also Self Destruct, so be sure not to stand near it when it does this.

After it’s defeated go up the nearby ladder to where the gate from before was and pull the switch to open it. This doesn’t give you anything now, but it is a handy shortcut for when you’re coming through this area again later.
The gate to progess also won’t open, so you need to go around it. First, go up the middle ladder to push the large Shinra container all the way back, then go up the ladder on the left side and go across using the bars. On the other side you can pull the switch to let Aerith through, then continue along the path to the Slums.

Sector 5 Slums Monitor
Follow Aerith into the middle of the area to watch a scene about Reactor 5.
To Aerith’s House
Now you can follow Aerith through town to her house. On the way you’ll be stopped by some children and will go by the Orphanage on the way. After speaking with the adults there you’ll head to Aerith’s House.
Leaf House Delivery
Aerith’s mother suggests waiting until morning for Cloud to head back, as it will be dark if they go now. She wants him to come to help her with the flower delivery to Leaf House, so heads off to find a basket. Go upstairs to the top floor and outside, then go back to the ground floor.
Follow her outside to the garden, and you’ll now get to pick which flowers you take over. There are three different flowers in the area you can pick from, and can pick a total of three times, so grab which you wish. After that head back to the Orphanage. Go to the front door and Aerith will go in with the flowers, then you can go head around the town.
Go down the path directly in front of you from Leaf House, then take the first right. In the middle of this path you can find a chest containing 200 gil.
 |
 |
Continue back down the path you turned off and you can find the Materia shop on the right, where you can also purchase disc 19. Costa del Sol.

Just ahead you can find Chadley who just so happens to be in this area for you to speak to if you complete more Battle Intel or want to do combat simulations. Continue looping around the town clockwise and you go by the Item Shop and Weapons store, then continue around until you get to the Southern corner. Here you can find a chest containing an Echo Mist.
 |
 |
Continue more and you can head into the building to the left. Inside there is a chest that contains a Celeris, and you can then interact with the Jukebox to obtain disc 25. Tango of Tears.
 |
 |
Now that you’ve been all through town, go directly to the center crossing where you were stopped by the boy while going through. He’ll be standing in the path, and you should interact with him. After doing so you can now go back to Leaf House to meet back up with Aerith.
Danger in the Hideout
Oates says there was a man stumbling around who sounds like the hooded man from the apartment back in Sector 7, and you should now follow him with Aerith back in your party.
You’ll reach the children’s hideout and duck through a hole in the fence to an area with monsters in it. Proceed forward and deal with the first group of Hedgehog Pies. Go down the ladder and take out the next group of enemies, then take the South trail at the split to reach a dead end. Here the is a chest that contains a Mega-Potion.

Continue towards the objective and you’ll spot the kids on an island in the middle of the water, blocked from getting back by monsters. Continue along the path and you’ll have two easy groups to deal with, then finally a Smogger and two Hedgehog Pies blocking the children. After defeating these first three enemies a group of four more Hedgehog Pies will jump in next. Finally there will be two Smoggers that appear from the far side of the arena which you need to defeat to rescue the children.

Escort the Children
Cloud jumps over and grabs the kids, then you can start heading back to town. On the way you’ll be attacked again by another Smogger, then another group of Hedgehog Pies. After dealing with them you can head all the way back to town and speak to Oates again.
Before leaving the children’s hideout look to the left where you can find a chest that will contain a Moogle Medal.

When you try to leave a cutscene will occur, and the man with the number on his arm will wander out of the area.
Requests for the Mercenary
Go over to Oates, and he says he’s got requests from people around town that he’d like help with. There are now a total of 6 side quests you can do before heading back over to Aerith’s house to continue the story. They are:
While off doing side quests you can go further into areas around town. Going back through the path you avoided before coming into the station there is a chest halfway down, which contains a Mythril Armlet.
 |
 |
Farther on in the larger area near the station there is a gramaphone running. Speak to the man nearby and he gives you disc 23. Descendant of Shinobi.
 |
 |
On the station platform itself in the South corner, there is a chest that contains 500 gil.
 |
 |
You can also now run all the way back to the church at the far North of the area, and with the Spectres gone you are able to grab the Chakra Materia that you might have noticed your first time through at the start of the chapter.
 |
 |
When going back over by Leaf House you can now go inside. In the room to the left there will be a chest containing an Ether.
 |
 |
When you’ve finished all the side quests and are ready to continue the story, you can head back to Aerith’s house. On the way by Leaf House you’ll be stopped by the lady from earlier who will point out the flower mural they have made based on the flowers you provided, earning the trophy Say It with Flowers.
Before actually going forward it is highly recommended you equip Wind Materia on both Cloud and Aerith, as the upcoming boss fight is weak to wind magic and not much else.
On the way there you’ll run in to bald Turk you spotted before, who’s name is Rude. You go into the nearby open arena, for the second boss fight of this chapter.
Boss Fight: Rude

This is another ‘duel’ fight, but this time you can’t just stand and block hoping to counter. Rude hits a lot harder than Reno, so he’ll knock you flat on your back. Instead, you’re going to want to dodge his lunges to the side with  , then get a quick combo in before dodging again. Meanwhile, have your Wind Materia on Aerith, who is really the key to this fight. Rude will be so preoccupied with Cloud that she can cast Aero/Aerora almost freely (whilst stopping to heal if needs be) and Stagger him. Then unleash your Triple Slash and Punisher combos.
After the cutsene where his glasses break, he’ll use an attack where he punches the ground with his fist and emit a shockwave which can stun you, so it’s best to hang back and dodge backwards. When very low on health, he’ll crouch on the ground and emit a golden glow. Don’t attack him now or he’ll unleash a powerful counter on you, so just hang back and be patient, peppering him with more Aero until he goes down.
Hard Difficulty Tips: The answer should be obvious by now…Counterstance! This will wreck Rude just as it did Roche and Reno. Not only that, but you can put Elemental-Wind on Cloud to give your attacks an extra edge, whilst Aerith can stand back and hit him with Aeroga. Once again, this is the last fight of the chapter so no need to manage your MP, just make sure you leave enough to Cure/Raise in a pinch.
After the boss fight you can head over to Aerith’s house.
Discover: The Language of Flowers
If you’ve done all side quests before this point (and potentially based on flower arrangement?) Aerith stops you and takes you over to the side of the yard for a short cutscene. While you are up there, you can grab the MP Up Materia by the lamp post.

When finished go over to the door to Aerith’s house. You get a final confirmation you’re finished up before going in, if you’re finished up exploring and doing stuff around town then proceed inside.
The Price of Strength
Cloud wakes up during the night, with the intention of sneaking out as Aerith’s mother asked him to. You have to sneak out around all the objects that are now randomly strewn around the floor on this upper level. Bumping into one of them wakes her up and she sends you back to the room.
Head downstairs, then follow the objective out the South-East corner of town where you couldn’t go before, you’ll reach the objective and the chapter will end.
This finishes Chapter 8: Budding Bodyguard in Final Fantasy VII Remake. Now the mission The Town That Never Sleeps starts.
Next Up: Chapter 9: The Town That Never Sleeps
For all other Mission Walkthroughs, check out our complete Final Fantasy 7 (VII) Walkthrough.
Igor says
Hey there, great guide on everything to do with this game. Just wanted some clarification – I skipped one quest during this chapter on my Hard playthrough; I only did the ones relating to manuscripts. Will skipping it in Hard affect my trophy even though I did it during my Normal run? It says failed but there’s a little grey tick next to the quest in the bottom right just as with all the other ones I did do. I’m a bit confused.
PowerPyx says
It shouldn’t affect the trophy for all quests. What difficulty you play them on doesn’t matter. You can see the progress in System Settings > Play Log. When it says 26/26 there the trophy should have popped.
You can use chapter select to replay the missing quest.
Sephiroth says
Depending on how many quests you do will affect the dress you get Aerith to wear in chapter 9, which affects the dress to the nines trophy if u want tog er all 9 dresses
Jon H. says
Has anyone figured out how to get the chest you in Aerith’s room if you bump something while leaving?
Jon H. says
The chest you see in her room.
ieldaproza says
Same. Been looking for the answer to that
Bassman4LF says
It’s acquired in Chapter 13. You can’t get it before then. Hope that helps…
Greywords says
Just a heads up, you suggest putting Elemental-Lightning materia on your armor for the Reno boss fight but on your first time through the game it’s impossible to have armor with linked materia slots by this point.
Vapor says
Yeah i noticed that too and then shortly after of course you get one
Josepsh says
Cheat play on easy ?. .
devil fox says
Great guide but you ^^ didnt catch a chest in the station with 500gil on the right but apart from that spot on ps: (i know it because i was following your guide to dont miss a thing XD but spot a chest that you didnt talk about )