
Chapter 1: The Destruction of Mako Reactor 1 is the 1st story mission in Final Fantasy 7 (VII) Remake. This walkthrough will guide you through all objectives of The Destruction of Mako 1 Main Mission.
Area: Mako Reactor 1
Requirement: N/A
Objectives:
- Enter the Reactor Grounds
- Infiltrate the Reactor
- Follow Barret
- Breach Security
- Reach Mako Storage
- Follow Jessie
- Set the Charge
- Escape the Reactor
- Rendezvous with Barret
- Sprint to Safety
Enter the Reactor Grounds
As soon as you start the game, you are thrust into a fight against two Security Officers, along with the game giving you some tutorial about basic combat. Defeat the two enemies, and you will earn the trophy Warming Up for completing your first battle. Head into the left doorway to follow your allies.
In the next room you will fight two more Security Officers, and the tutorial tells you about the function of the ATB gauge. Attack enemies with  to charge your gauge quicker, then select commands with
  to use your ATB charges on abilities. Defeat these two soldiers then hop the barrier.
Next the game introduces you to guarding (  ) and evading (
  ). Defeat these 3 enemies then head up the stairs. At the top you will be told about chests that can be looted in the game world. These all contain specific items and will be pointed out in the walkthrough. This first chest contains 2 Potions. If you run around the left wall of the stairs you can find another chest behind some movable barricades that contains 2 Grenades.
 |
 |
Continue forward and when you come out onto the balcony the game will tell you about the Shinra Property boxes. These are marked with the Shinra company logo and can be destroyed by attacking them. They drop random items, most commonly Potions or MP items that automatically heal you when you go near them after breaking the box. Sometimes these also drop Moogle Medals which can be traded to someone later in the game. These won’t be pointed out as they are all over the place and they don’t have guaranteed item drops (it’s random what item or if anything at all you get from those crates).

Continue forward towards Wedge for a short cutscene, then go over near Barret for another, opening the door forward.
Infiltrate the Reactor
Go down towards the lower area and the game will now tell you about Lock On, quick is turned on using  , then switched between enemies using left and right on the
  or D-Pad. You will fight a new enemy here called a Guard Dog which have much more health than the normal Security Officers. After dealing with the two of them before progressing through the door go to the left of the area between the fences to find another chest containing an Ether.

Follow Barret
Go through the door and use the elevator on the right side of the room to reach the upper level and follow the group. Head towards the gap in the fence the group has cut, but before you can go through there will be two more Officers and another Guard Dog you need to take out before progressing. Go through the fencer area and other the door on the other side, and you’ll reach another area with two more Officers. Take them out then grab the chest before progressing to get 2 Potions.

Pull the switch to open the door, then follow the group down the path to the right.
Breach Security
Speak to Biggs (the guy by the door control) to have the door open. You end up inside by yourself against 4 Security Officers, and the game introduces you to Cloud’s mode switching ability. Take out all the enemies and the group will get inside with you. Speak to Jessie at the next console to have the next door open. Before hitting the elevator button to progress there is a chest on the left, which contains a Phoenix Down.

After some cutscenes, you exit the elevator and the game now explains the character switching mechanic that allows you to direct or control other party members in battle. Right now you control Barret, who uses his arm cannon for ranged attacks to deal with hard to reach enemies, like the turrets in this room.
Reach Mako Storage
After clearing out the turrets and Monodrive robots in this room you have Barret with you for most of the remainder of the mission. Head down the stairs to continue.
Follow Jessie
In the next area there are a bunch of laser grids you need to get through. If you run into them they damage you slightly, so time your dash through them so as to avoid damage. You can run by holding or  or pressing
  .
.

After the third grid before going down the stairs you can see a bunch of metal boxes on the left with the Shinra logo on them. These can be destroyed like the wooden ones from earlier, also dropping random items.

Continue through the next set of laser grids, then before going down the stairs there is a chest on the right that contains 2 Potions. At the bottom of the stairs before moving towards the enemy you can run around to the right of the stairs to find another chest that contains an Ether.
 |
 |
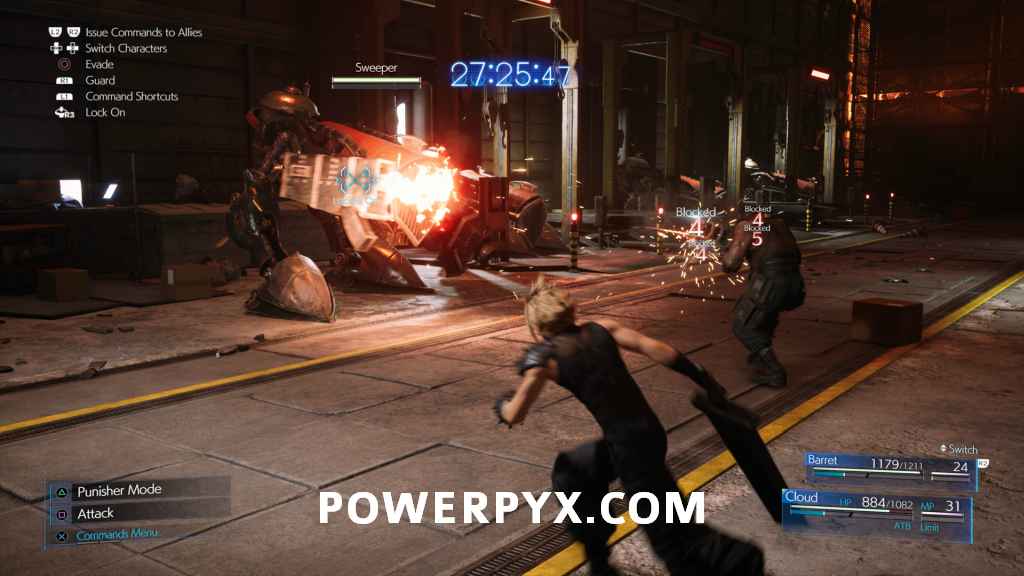
Head forward and you will now be fighting the Sweeper. These are large robots that attack either with their two front cannons or by charging or jumping on you. They are relatively easy to avoid their attacks just by staying to their side, as they have to stop and turn themselves to reposition and attack in a different direction. Make sure to continually use abilities to pressure and then stagger them to deal much more damage.

After it is destroyed follow Jessie through the now open door.
Set the Charge
You are now at the top of the main reactor room. Follow Jessie down the ladder and along the walkways. Before going down the first set of stairs the is a chest at the end of the walkway that contains a Phoenix Down.

Go down the ladder beside Jessie, then go along the path through the first group of Monodrives and the single turret. At the end of the walkway before going down the ladder there will be another group of Monodrives at the dead end, along with a chest that contains an Ether. You can then head down the ladder, then go over to the reactor core for a cutscene. Set the timer to whichever you want, the timer doesn’t start until you defeat the boss and start your escape, and it should take anywhere near 20 minutes.

Boss Fight: Scorpion Sentinel
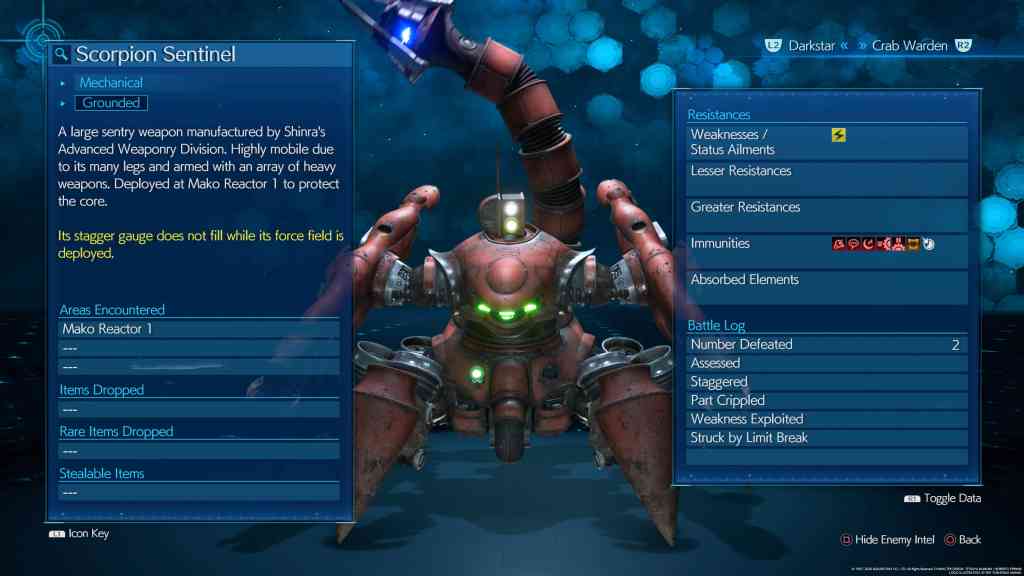

The Scorpion Sentinel is the first boss in the game and is actually one of the tougher ones. To begin with, you should use your Lightning magic to attack it since it’s weak towards that element. It will soon envelop itself in a shield, so you need to take out its Field Generator. It’s best to do this from range with Fire magic or Barret’s attacks since if you get close he’ll hit you with Tail Swipe and Scorpion Strikes.
When the Sentinel’s health hits 75% , it will jump to the wall and attack from range with electric attacks. Use Barret’s Overcharge to do good damage to him along with Cloud’s Fire and he’ll soon jump back down and begin the next phase. Just make sure to avoid the EM Field attack by keeping distance.
Once it’s back on the ground, keep attacking it up close in Cloud’s Punisher Mode, holding to Guard and then counterattack when necessary. Use Focused Thrust and Focused Shot to build its Stagger meter, and once its Staggered hit it with your strongest attacks to do considerable damage.
When it hits half health, it will start using its Tail Laser attack. If this hits you, it will really hurt so the safest option is to run for the debris in the area and hide behind it. You won’t get hurt this way and you can use the waiting time to heal up if necessary. Once the attack is over, then you can pop out and continue the assault with the same tactics as earlier.
As it gets down to 25%, it will start to rotate its attacks more frequently. It likes to launch missiles at you, and it’s actually better to just block them with and take reduced damage than try and dodge them by running since you’ll almost certainly get hit anyway and suffer more damage. It’s still best to use Barret in this situation because of his range keeping you out of harm’s way.
Keep attacking while you can and aim to Stagger it. When its HP gets very low it will start to auto-repair. so aim for both legs to take it down for good. If it grabs you, quickly press  or
or  to switch to your other character and attack so it doesn’t finish the grapple animation.
Hard Difficulty Tips: The good news is that Scorpion Sentinel is actually one of the few bosses which is easier on Hard than it is on Normal. That’s because you now have access to all the end-game weapons and Materia whereas on your first run you just had the bare minimum. However, be mindful that this is your first serious test of whether you’ve got to grips with Hard Mode and the huge jump in damage that bosses can do to you. Remember that healing is always your priority if your health dips into the red, so stick Magnify-Cure on Cloud so that he can heal Barret at the same time too.
Have both characters with Elemental-Lightning on so that your attacks do extra damage to the boss and Stagger it quicker. Then unleash Triple Slash and Maximum Fury on it and it’ll go down surprisingly quickly. You can also use a few Thundaga spells to really hurt it if you have plenty of excess MP, but remain mindful of how much you have left and the fact you’ll need some for the short section after this boss.
Escape the Reactor
With the Scorpion Sentinel destroyed and the bomb now counting down, you and Barret need to escape the reactor. You basically just follow the path back out that you came in from, defeating groups of enemies along the way.
Rendezvous with Barret
Up the ladder, some debris falls on Jessie and you jump over to help her and take a slightly different path back up the reactor. Before you climb the next ladder there is a chest right beside it that contains 2 Potions.

At the top you will be stopped by a group of Officers and Monodrives, and Jessie will run ahead. In the next room you will have to deal with another Sweeper before progressing further. Deal with it in a similar manner to before, then head up the stairs.
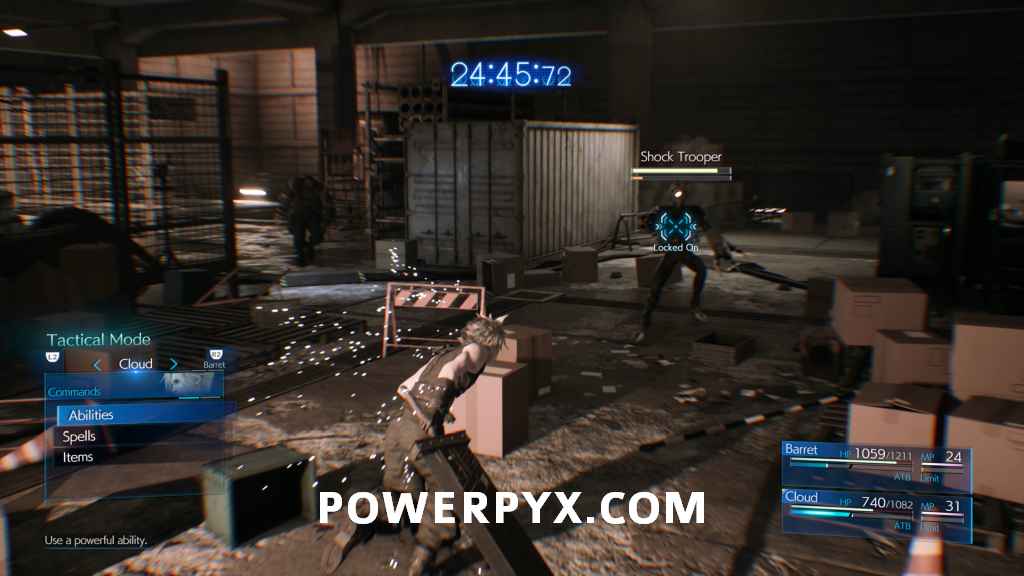
In the area where the lasers were before there will now be a number of Monodrives on the lower floor, then a new human enemy named a Shock Trooper on the upper floor. Shock Troopers jump around a lot and attack you will melee attacks. They automatically avoid most ranged attacks, so you primarily have to deal with them using Cloud. In both these areas there are a number of Shinra boxes and previously broken ones respawn, so make sure to break them to find HP and MP items. On the top floor there will be two Shock Troopers at once, along with two turrets that you should shoot down with Barret. After they’re all defeated go to the elevator at the end to progress.
Sprint to Safety
After a cutscene you will be back with Jessie and Biggs. Follow them along the path for some more cutscenes, and you will reach the end of the chapter.
This finishes Chapter 1: The Destruction of Mako Reactor 1 in Final Fantasy VII Remake. Now the mission Chapter 2: Fateful Encounters starts.
Next Up: Chapter 2: Fateful Encounters
For all other Mission Walkthroughs, check out our complete Final Fantasy 7 (VII) Walkthrough.
cory says
wow I cant even beat chapter 1 boss on hard without items almost impossible
Shane says
Same it is difficult.
Hamza says
Use Barret , hit the head and use thunder magic.
mae sure you charge with the triangle and give a big shot when power is at it s max
beyes says
I completed the first chapter but didn’t get the trophy for doing it. Did not find anyone saying it’s glitched or anything.