PowerPyx.com

PowerPyx

  • Trophy Guides
  • Game Guides
  • Wikis
  • Trophy Lists
  • Next Guides
  • Contact
Show SearchHide Search
Home » Game Guides » Far Cry 5 » Far Cry 5 – Salvation Story Mission Walkthrough

Far Cry 5 – Salvation Story Mission Walkthrough

March 29, 2018 by PowerPyx 1 Comment

Salvation is a Story Mission in Far Cry 5. This walkthrough shows how to complete this Quest.

Region: Henbane River (Faiths’s Region)
Area: Hope County Jail
Quest Giver: Sheriff Whitehorse in Hope County Jail
Requirement: Completed Hope County Jail
Reward: 600 RP
Objectives:
  • Reach the Misery
  • Secure the area
  • Ambush the Priestess
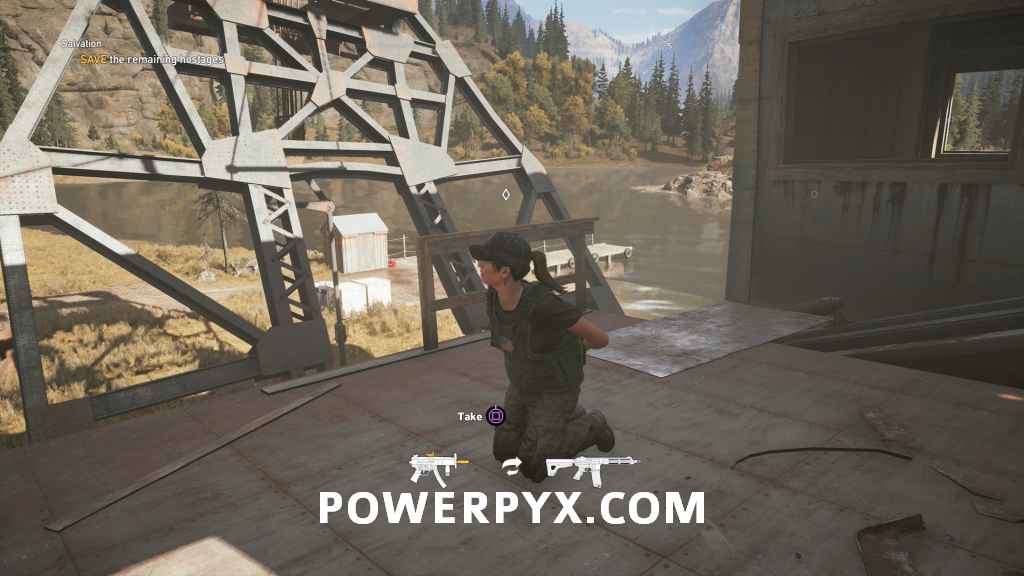
  • Save the remaining hostages

This quest is a hostage rescue mission. Go in with a stealthy loadout. I recommend a bow and putting a silencer on one of your other weapons (which you can buy at the Hope County Jail Vendor by customizing a weapon). If the enemies see you they will execute the hostages.

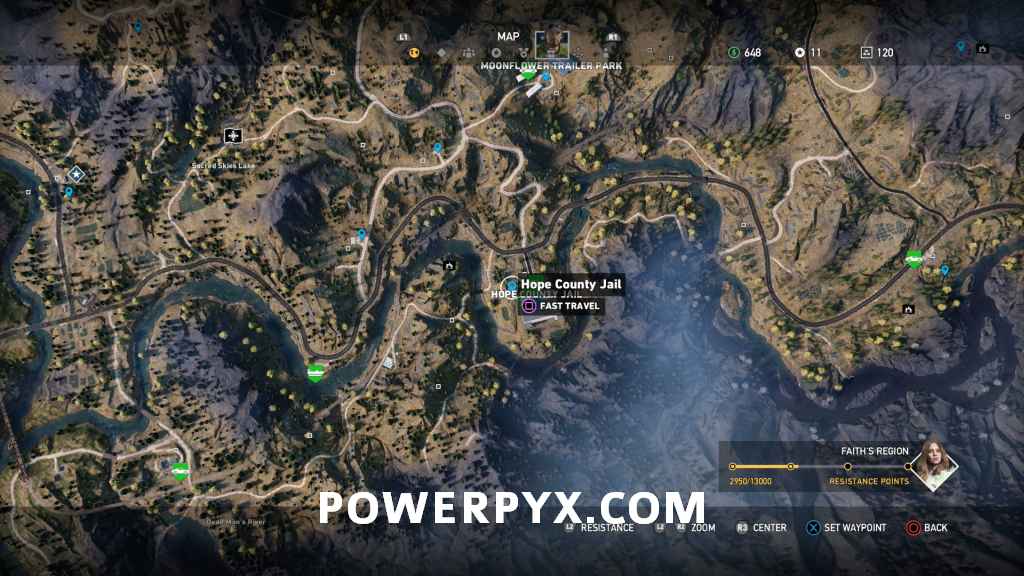
Head to the map location that’s automatically marked on the map for this quest, in the north of Faith’s region.

Use your binoculars (press :up: ) to mark all the enemies and take them out one by one. Take out as many as you can with the bow from afar, then go in and take out the rest with a silenced weapon. They are allowed to be aware of your presence (i.e. see their dead teammates), but the second they actually see you they will execute the hostages. A good way to sneak into the compound is through the big metal wreck that has “Misery” written on it (on the side of the building).

With all enemies defeated the next objective will trigger to ambush the Priestess. The easiest option is to plant some remote explosive on the road where the waypoint is. She will come in a car. Detonate the Remote Explosive when she drives over it.

Now the next objective is to free the remaining hostages (assuming you weren’t noticed and the enemies didn’t slaughter them). The screenshot below has them circled in red color. There are 4 hostages in total.

The first hostage is on the ground floor.

The second hostage is on the 2nd floor.

The third hostage is on the 3rd floor (rooftop).

The fourth hostage is inside a cage above the water. To open it, pull the red lever in the screenshot below (where the pistol is aimed, in front of the cages).

Upon freeing the last hostage the Salvation Story Mission will complete!

For more Walkthroughs, check out our full Far Cry 5 Strategy Guide.

« PrevFar Cry 5 – Hope County Jail Story Mission WalkthroughNext »Far Cry 5 – Sins of the Father Story Mission Walkthrough
Share
Tweet
Shares 0

Filed Under: Far Cry 5, Game Guides

Comments

  1. Mike says

    December 30, 2018 at 3:13 am

    Thanks!!! I looked everywhere but missed that switch -.-

    Reply

Leave a Reply Cancel reply

Your email address will not be published. Required fields are marked *

Youtube 1,020,000Subscriber
Facebook 10,006Fans
Twitter 15,124Followers

Latest Trophy Guides

Hogwarts Legacy Trophy Guide

Dead Space Remake Trophy Guide

Crisis Core -Final Fantasy VII- Reunion Trophy Guide

God of War Ragnarok Trophy Guide

Red Dead Redemption 2 Trophy Guide

Latest Game Wikis

Hogwarts Legacy Wiki

Pokemon Scarlet & Violet Wiki

God of War Ragnarok Wiki

Elden Ring Wiki

Cyberpunk 2077 Wiki

Red Dead Redemption 2 Wiki

Recent Posts

  • Hogwarts Legacy All Demiguise Statue Locations
  • Hogwarts Legacy Scrope’s Last Hope Walkthrough
  • Hogwarts Legacy How to Increase Inventory Size
  • Hogwarts Legacy How to Open Locked Doors
  • Hogwarts Legacy All Puzzles Explained

Far Cry 5 Wiki

  • Wiki Home
  • Story Missions – John
    • Air Raid
    • Grace Under Fire
    • Man’s Best Friend
    • Jumping Ship
    • The Cleansing
    • The Widowmaker
    • Wingman
  • Story Missions – Faith
    • Burn, Baby, Burn
    • Clean Water Act
    • Clinical Study
    • Eco-Warriors
    • False Prophet
    • Friendly Skies
    • Hope County Jail
    • Salvation
    • Sins of the Father
    • War on Drugs
  • Story Missions – Jacob
    • Casualties of War
    • Dinner Time
    • Eviction Notice
    • Make Hope Great Again
    • Missing in Action
    • Only You
    • Radio Silence
    • Search and Rescue
    • The Prodigal Son
  • Side Missions – John
    • Bear Necessities
    • Cow Punching
    • Exodus
    • Free Larry
    • Golden Age Nostalgia
    • Light ‘Em Up
    • No Means No
    • Out of This World
    • Patriot Acts
    • Prairie Oyster Harvest
    • Testy Festy
    • Special Delivery
    • The Judge Moose
    • The Hero’s Journey
    • Valley Armed Convoy
    • Uncrate
    • Water Works
    • What They Carried
  • Side Missions – Faith
    • Blood Dragon 3
    • Broken Path
    • False Idols
    • Fast
    • Furious
    • Our Better Angels
    • Quiet on the Set
    • Ragnar the Terrible
    • Refuel
    • River Armed Convoy
    • The Judge Bear
    • The Judge Cougar
    • Whiskey River
  • Side Missions – Jacob
    • Call of the Wild
    • Gone Fishin’
    • Grill Streak
    • Flavour Country
    • Grand Slam
    • Mint Condition
    • Mountain Armed Convoy
    • Nature Provides
    • Shooting Gallery
    • Static Frequency
    • The Admiral
    • Tools of the Trade
    • Turn the Tables
    • Welcome Party
  • Crafting
    • Jimson Weed
    • Mustard
    • Prairie Fire
    • Prickly Lettuce
  • Animal Locations
  • Outpost Locations
  • Prepper Stash Locations
  • Silver Bar Locations
  • Silo Locations
  • Shrine Locations
  • Wolf Beacon Locations
  • Bobblehead Locations
  • Comic Book Locations
  • Baseball Card Locations
  • Vietnam Lighter Locations
  • Vinyl Crate Locations
  • Whiskey Cask Locations
  • How to Invite Friends to Co-Op
  • Trophy List
  • Trophy Guide
  • Hours of Darkness DLC Trophy Guide
  • Lost on Mars DLC Trophy Guide
  • Dead Living Zombies DLC Trophy Guide
  • Terms of Service
  • Privacy Policy
  • Cookie Policy
  • Review Policy
  • YouTube
  • Facebook
  • Twitter

© 2008-2023 PowerPyx.com, all rights reserved.