PowerPyx.com

PowerPyx

  • Trophy Guides
  • Game Guides
  • Wikis
  • Trophy Lists
  • Next Guides
  • Contact
Show SearchHide Search
Home » Game Guides » Crimson Desert » Crimson Desert All Maze Locations & Solutions

Crimson Desert All Maze Locations & Solutions

March 31, 2026 by Gage Leave a Comment

There are 4 Maze Locations (Winding Paths Challenges) in Crimson Desert. They are part of the Exploration Category. Finishing all Maze Challenges unlocks the Maze Pathfinder trophy & achievement.

All Mazes require solving an environmental puzzle, similar to Ancient Ruins but slightly more complex. Solving the puzzle will activate a nearby Abyss Cresset, rewarding you with an Abyss Artifact and a fast travel point.

They are indicated on the map by white search areas with a question mark icon (“?”), though these search areas can also contain other objects of interest. You can also highlight them with the Lantern (L1 / LB / CTRL) or with Guiding Light (L1+R1 / LB+RB / CTRL + Left Click).

Challenges Overview:

  • Crimson Desert Challenges Guide

Ancient Ruins List:

  • 1 – Maze of Burhum
  • 2 – Maze of Dawnreach
  • 3 – Ancient Rift Maze
  • 4 – Smoking Lands Desert Mouth Maze

Maze 1: Maze of Burhum

This maze is located at the town of Burhum in Crimson Desert region, which will be controlled by an enemy faction the first time you encounter it. You can complete the maze without dealing with them, but it makes it easier as most of the enemies will shoot you with guns and make climbing around the area annoying.


In the area there is the tallest tower where the Cresset and final spot of the maze is located, and one to the southeast you want to deal with first. About midway up the shorter tower, there is a bridge crossing in front of it. On the level of this bridge, look into the shorter tower where there is a hole in the wall. Go inside this room and hit the square button with Force Palm ( :r3: / Mouse Wheel) to activate it, then pick up the Engraved Stone that is revealed.

Now go across the bridge to the taller tower, and climb up one level to the balcony with the beds and covered section. Under the covered section you can find the next button to hit and pick up the Engraved Stone.

Now keep climbing the tower until you reach the level where the basket is hanging off the side and there is another entrance. Go inside and hit the button to get the final Engraved Stone.

Now climb to the very top of the tower where you can find the Cresset. Drop through the hole in the top of the tower, and insert the three stones in the slots to complete the maze.

Maze 2: Maze of Dawnreach

This maze is located at the town of Dawnreach in Crimson Desert region, which will be controlled by an enemy faction the first time you encounter it. You can complete the maze without dealing with them, but it makes it easier if you clear the enemies first.


If you look around the area you can see there are three towers that are leaning against others, and the main mechanic here is pushing the towers back straight using Force Palm. You will need all three levels of Force Palm upgrades to push the towers, because you need to hit it three times in a row.

First on the west side of the buildings you can see two leaning towers.

The northern one you push from the rooftop of the building it is leaning on, then you can climb into a hole in the wall just below the rooftop. Push the button inside using Force Palm to obtain the first Engraved Stone.

The southern tower you push from the wooden walkway, then can walk into the room that is revealed and push the button to receive the Engraved Stone. There are also a bunch of herbs in this room you can pick up.

Now go to the east side of the area where the final leaning tower is. Push it once more using Force Palm and then place the two engraved stones in the walls, which will activate the Cresset, completing the maze.

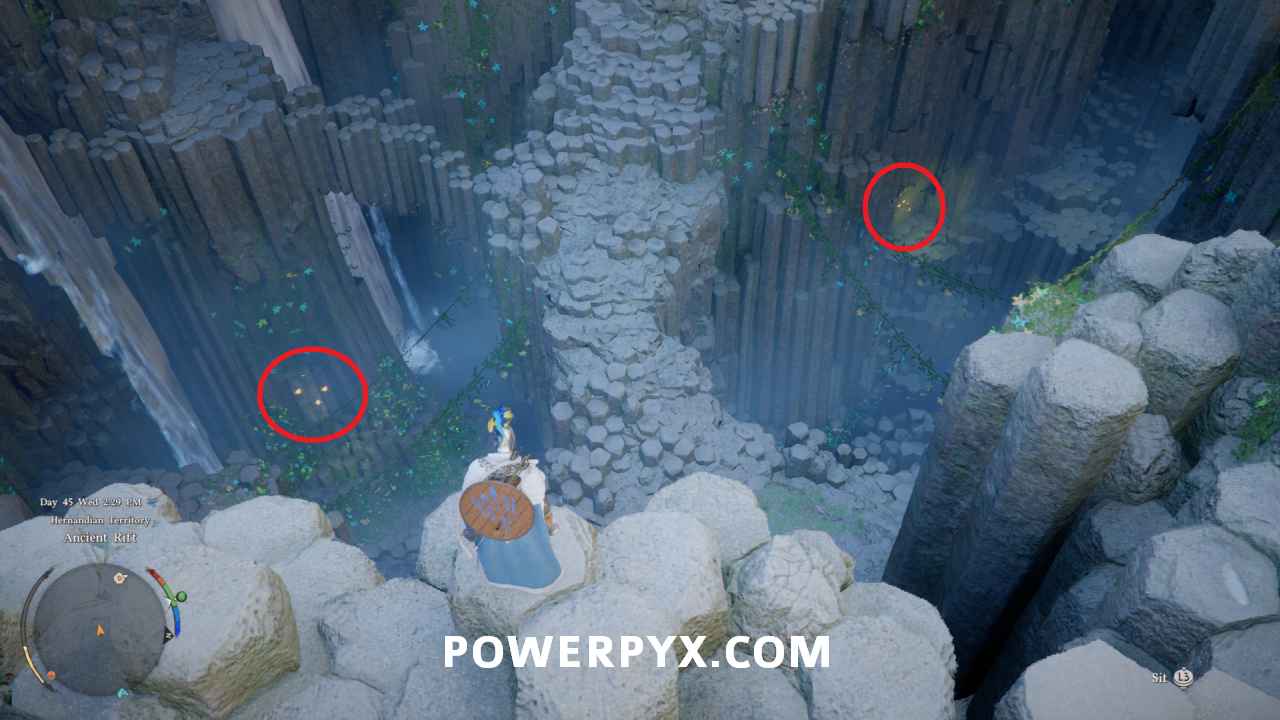
Maze 3: Ancient Rift Maze

This maze is located in the Ancient Rift area, northeast of Trovak Camp in northern Hernand.


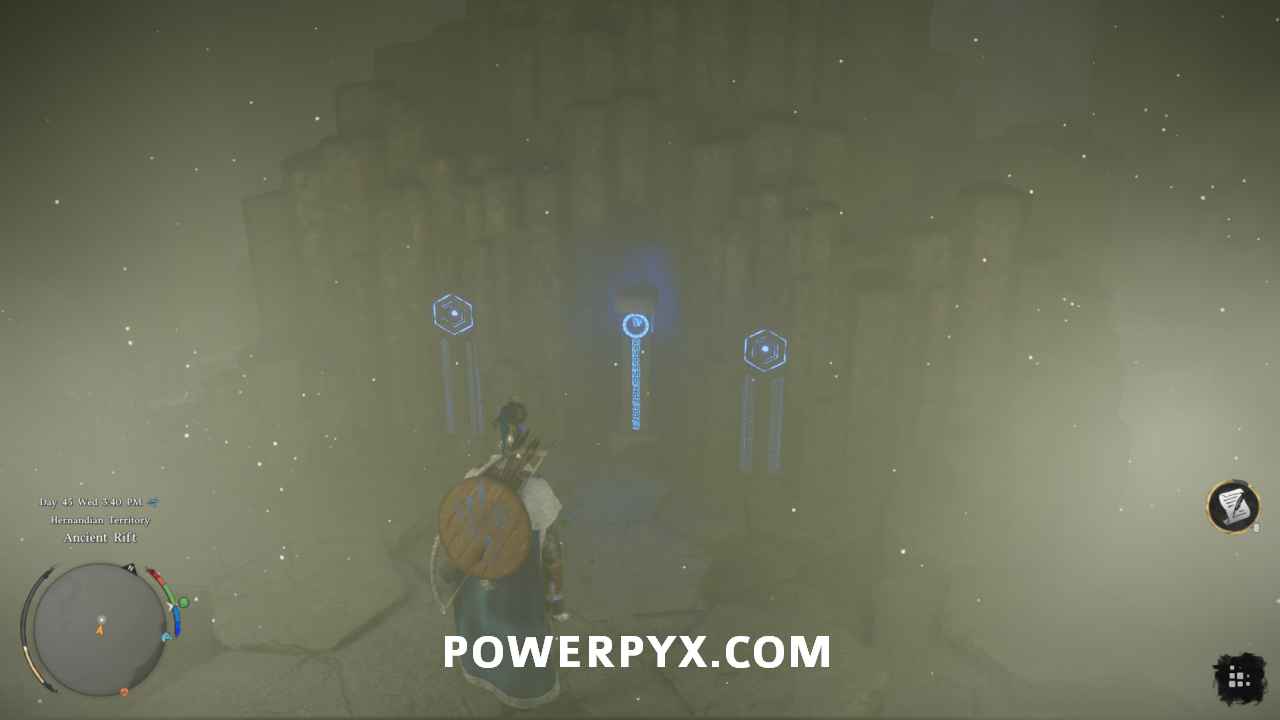
This maze is solved by using Focus Light on the sets of pillars around the area to open rooms, where you can obtain Engraved Stones ( :l1: + :r1: > hold :l1: / :lb: + :rb: > hold :lb: / CTRL + Left Click > CTRL). Approaching the area from the south, the first wall is down and to the right. Use Focus Light on only the third pillar to open the door. If you accidentally hit an incorrect one and don’t want to try and figure out a further solution yourself, you can fast travel to a different region and come back and the puzzles will reset. Once you open the door push the large button on the pillar to obtain the Engraved Stone.

Turn around and leave the room, and look down to the left and right and note the other two doors. Jump down to the one on the left with three pillars, and use Focus Light on the first pillar to open it.

After obtaining the next, climb back up one left and then look to the left to spot the other door again. On this door use Focus Light twice each on the far left and far right pillars.

After obtaining all Engraved Stones drop down to the lowest level and move toward the “?” area on the map. At the dead end there is a wall with three slots, use the Engraved Stones to access the Cresset which completes the maze.

Maze 4: Smoking Lands Desert Mouth Maze

This maze is located in the southwest of Crimons Desert region, directly north of Hexe Sanctuary, in the area that looks like rivers past the Deadfire Mountain.

This maze is solved by flipping the sun/moon doors until they are flipped the correct way, which is shown by them being lit up on the map that is on the ground. This also corresponds to exactly where they are within this area, so you can use that to find them, and spot them easily by climbing to the top of the walls. You need to flip every one of the doors using Force Palm ( :r3: / Mouse Wheel) or Force Current skill, except for the one on the south that is already lit up.

The only one that might cause you trouble to find is the one located in the northwest edge of the “?” area. You need to drop all the way down through a hole in the ground, then follow the path around to where you can find the door above you.

For all other collectible types refer to Crimson Desert Challenge Guide.

« PrevCrimson Desert Azure Moon Labyrinth Ruins Puzzle (Phoniel Ranch)Next »Crimson Desert All Sanctum Locations & Solutions
Share
Tweet
Shares 0

Filed Under: Crimson Desert, Game Guides

Leave a Reply Cancel reply

Your email address will not be published. Required fields are marked *

Youtube 1,220,000Subscriber
Facebook 15,000Fans
Twitter 19,200Followers

Latest Trophy Guides

Crimson Desert Trophy Guide

God of War Sons of Sparta Trophy Guide

Marathon Trophy Guide

Resident Evil Requiem Trophy Guide

Reanimal Trophy Guide

Nioh 3 Trophy Guide

Code Vein 2 Trophy Guide

Arknights: Endfield Trophy Guide

Ghost of Yotei Trophy Guide

Silent Hill f Trophy Guide

Borderlands 4 Trophy Guide

Kingdom Come Deliverance 2 Trophy Guide

Red Dead Redemption 2 Trophy Guide

Latest Game Wikis

Crimson Desert Wiki

Resident Evil Requiem Wiki

Ghost of Yotei Wiki

Borderlands 4 Wiki

Kingdom Come Deliverance 2 Wiki

Elden Ring Wiki

Hogwarts Legacy Wiki

God of War Ragnarok Wiki

Cyberpunk 2077 Wiki

Red Dead Redemption 2 Wiki

Recent Posts

  • Crimson Desert All Shooting Challenges
  • Crimson Desert All Mind Games Challenges
  • Crimson Desert New Horizons Walkthrough
  • Crimson Desert The Desert’s Edge Walkthrough
  • Crimson Desert Evolving City Walkthrough

Crimson Desert Wiki

  • Wiki
  • Walkthrough
    • Unfamiliar Lands
    • In Ashes
    • Realm of Uncertainty
    • New Journey
    • Where Rumors Gather
    • Mysterious Man
    • True Wisdom in Kindness
    • Actions Speak Louder than Words
    • Heart Beyond Borders
    • Mystical Key
    • Polar Opposites
    • Abyss Without Balance
    • Woman in White
    • Where the Light Leads
    • Memory Fragment
    • Reunion
    • For Honor
    • Awestruck
    • Shadow Cast Over the River
    • Where Misery Gathers
    • Trial After Trial
    • The Man Trapped in the Mire
    • Missing Companion
    • Secrets Hidden in the Dark
    • The Dark Veil
    • The Flames of Greed
    • Kidnapped Healer
    • Rebellion or Revolution
    • Cheers Echoing From the Edge
    • Old Friend
    • First Step to Rebuilding
    • A Fresh Start
    • Reward for Their Sweat
    • Return of the Comrade
    • Familiar Curses
    • Return
    • Traces in the Manor
    • Nonhuman
    • Seed of Unease
    • Dance with the Devil
    • Hope After the Draught
    • Scattered Comrades
    • Rumors from the Sawmill
    • A Gentle Touch
    • Bustling Hill
    • Greymanes Reunited
    • Kilnden Workshop
    • Kiln Repair at the Kilnden Workshop
    • The Mysterious Pot
    • The Iron Pot’s Usage
    • Disturbance at the Arena
    • Skilled in Archery
    • The Words of Alustin
    • Scholastone
    • On the Right Path
    • Gate to the Otherworld
    • Spire of the Stars
    • Obsession and Madness
    • Casted Shadow
    • Double-sided Invitation
    • Unwelcomed Guests
    • Demenissian Delegation
    • Exposed Plot
    • The Missing Seal
    • Crowcaller
    • The Crow’s Warning
    • Bloodwind
    • Secret at the Church
    • Toward the Nest (Spire of Soaring)
    • News
    • To the Battlefield
    • The Counterattack
    • Cradle of Defense
    • The Touch of Deliverance
    • Fire on the Frontlines
    • Fire Support
    • In Ashes
    • Hidden Fangs
    • Reclamation
    • A Thousand Troops
    • Traitor
    • All Quiet on the Front
    • News of Victory
    • Return Home
    • Ashes of Treachery
    • Trust Lost
    • Bared Fang
    • Rekindled Hope
    • Podium of Resolve
    • Shadows Over Pailune
    • Driving out the Shadows
    • Lurking Wolves
    • Reclamation
    • Lonely Jackals
    • Resolution
    • The Counterattack
    • Unleashed Fury
    • The Final Bridge
    • Broken Claws
    • Battle at Silverwolf Mountain
    • Incomplete Victory
    • Ludvig’s Whereabouts
    • Time to Face Justice
    • Healing Pailune
    • A Bond
    • Ritual Preparations
    • Where the Wind Guides You
    • Chasing a Shadow
    • Blazing Fire
    • Whispering Shadows
    • Bloodied Invitation
    • Resolve Amidst a Storm
    • Preparations for Advance
    • Rebel Suppression
    • The Cursed Knight
    • The Blood Coronation
    • Clue
    • A Fleeting Dream
    • An Unknown Voice
    • Cloister of Enlightenment
    • Mark of the Scar
    • Shackles of Fate
    • Crossing Point
    • Unwavering Steps
    • Morning Fog
    • Jijeong Temple in Chaos
    • Path to Enlightenment
    • Path of the Disciple
    • True Strength
    • Face the Inner Self
    • Fragments of Darkness
    • Pursuit Beyond the Veil
    • Black Witch
    • The Cloister of Enlightenment
    • The Sage of the Desert
    • New Perspectives
    • Lust for Power
    • Untouchable
    • The Gate of War
    • Master of the Ironworks
    • Hidden Ace
    • Clockwork Insect Clash
    • Beating Heart
    • Invaders from the East
    • Frozen Hearted Predator
    • Lingering Shadow
    • The City of Steel
    • Crossroads
    • Strange Manor
    • Fortress Keys
    • Truth and Lies
    • Master of a Forgotten Land
    • Whispers in the Wind
    • Cloud Fortress Orbian
    • Precise Execution
    • Deferred Advance
    • Departure of the Brave
    • Forbidden Gate
    • A Shadow in the Void
    • Blinding Darkness
    • A New Beginning
    • Peace in Hernand
    • The Unyielding Shields
    • The Heart of Pywel
    • The Enduring Flame
    • Evolving City
    • The Desert’s Edge
    • New Horizons
  • Challenges
    • Sword
    • Shield
    • Bow
    • Spear
    • Two-Handed Weapon
    • Cannon
    • Rapier and Shield
    • Gun
    • Special Weapons
    • Horse
    • Training
    • Battle
    • Operation
    • Hunting
    • Life
    • Trade
    • Above the Law
    • Challenges and Changes
    • Shooting
    • Test of Strength
    • Duel
    • Mind Games
  • Bosses
  • Bells
  • Sealed Abyss Artifacts
  • Fast Travel Points
  • Secret Places
  • Ancient Ruins
    • Steel Mountains Ruins
    • Trembling Woods Ruins
    • Deepfog Basin Everfrost Ruins
    • Duskwood Hill Ruins
    • Timberdale Cliff Ruins
    • Timberdale Gorge Ruins
    • Hunter’s Cabin Ruins
    • Wiggling Hill Ruins
    • Blue Thicket Ruins
    • Black Wall Ruins
    • Meandering Hills Ruins
    • Duskwood Waterside Ruins
    • Beardtree Hills Rock Ruins
    • Precipice of Echoes Ruins
    • Deepfog Basin Dragon Head Ruins
    • Five-Finger Mountain Icy Ruins
    • Five-Finger Mountain Valley Ruins
    • Red River Ruins
    • Bamboo Forest Seonangdang Ruins
    • Kingshield Mountains Ruins
    • Sunrise Plains Ruins
    • Golden Plains Ruins
    • Arboria Forest Ruins
    • Fuming Lands Ruins
    • Beardtree Hills Sunflower Ruins
    • Silver Wolf Mountain Ruins
    • Haunted Hill Ruins
    • Halssius Conflux Ruins
    • The Grey Forest Ruins
    • Drakesfall Gorge Ruins
    • Mount Benus Ruins
    • Dragon’s Stone Chamber Ruins
    • Hidden Chamber of Wisdom Ruins
    • Secret Chamber of the Golden Plains Ruins
    • The Screaming Vault Ruins
    • Memory-Laden Ruins
    • Azure Moon Labyrinth Ruins
  • Mazes
  • Sanctums
    • Sanctum of Absolution
    • Sanctum of Temperance
    • Sanctum of Penitence
    • Sanctum of Benediction
    • Sanctum of Exaltation
    • Sanctum of Solace
    • Sanctum of Deliverance
    • Sanctum of Atonement
    • Sanctum of Devotion
    • Sanctum of Veneration
    • Sanctum of Oblation
    • Sanctum of Faith
    • Sanctum of Expiation
    • Sanctum of Renunciation
    • Sanctum of Revelation
    • Sanctum of Mortification
  • Spires
  • Witches
  • Crafting Items
    • Timber & Fine Timber
    • Iron Ore
    • Copper Ore
    • Bloodstone
    • Scolecite Ore
    • Gold Ore
    • Silver Ore
    • Bismuth Ore
    • Azurite
    • Garnet
    • Epidote
    • Diamond
    • Small Bone
    • Large Bone
    • Thin Hide
    • Thick Hide
    • Short Hair Hide
    • Long Hair Hide
    • Sturdy Hide
    • Fang
    • Cloth Pieces
    • Fleece
    • Feather
    • Ivory
  • Tips & Tricks
    • How To Get Money Fast
    • How to Use Storage Chest
    • How to Unlock Dragon
    • How to Unlock Robot Mount
    • How to Upgrade Weapons / Armor
    • How to Increase Inventory Size
    • How to Get Healing Items
    • How To Sheathe Weapon
    • How to Skip Time
    • How to Get Pets
    • How to Fish
    • How To Tame Horses
  • World Map
  • Trophy Guide
  • Terms of Service
  • Privacy Policy
  • Cookie Policy
  • YouTube
  • Facebook
  • Twitter

© 2008-2026 PowerPyx.com, all rights reserved.