
Gate to the Otherworld is the 56th main mission in Crimson Desert. This walkthrough will guide you through all objectives of the Gate to the Otherworld main quest.
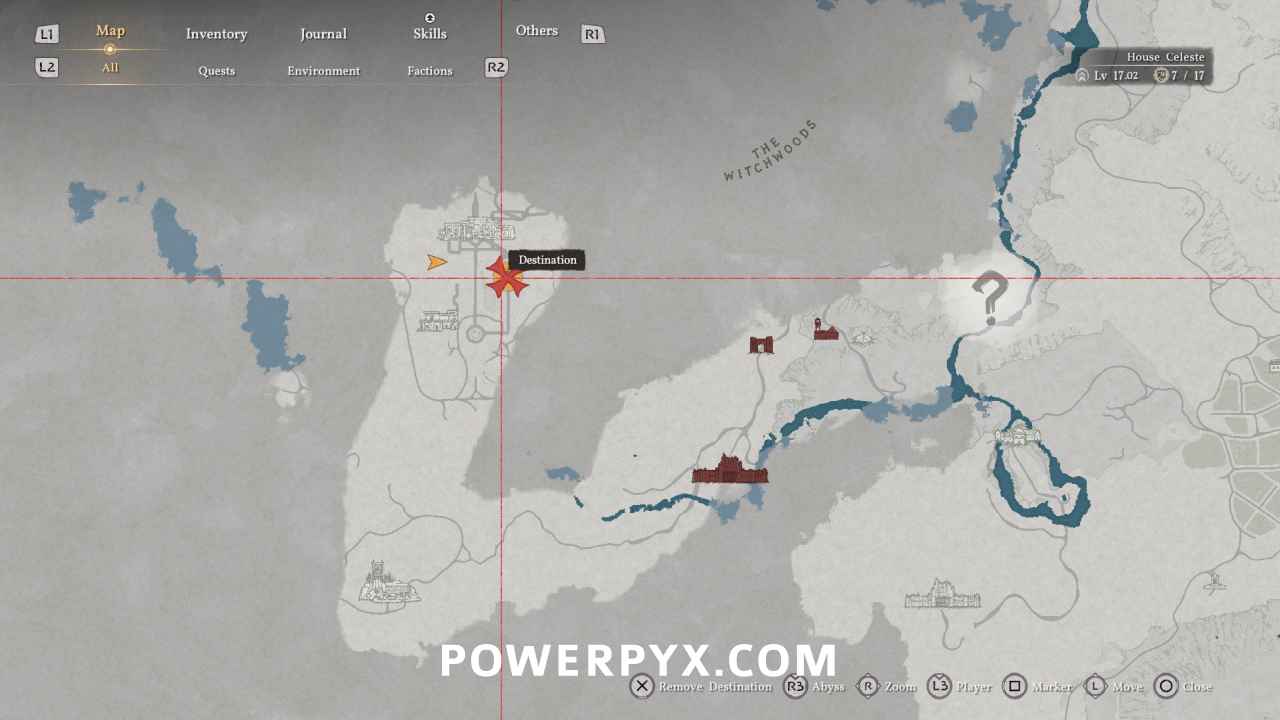
- Starting Location: Hernand region > Scholastone Institute
- Chapter: 4 – The Price of Knowledge
- Sub-Chapter: Forbidden Knowledge
- Requirement: Finished previous main quest On the Right Path
- Reward: 1x Abyss Artifact
- Quest Description: Fixing the Kiln may grant a closer look at their craftsmanship. Help with the repairs and examine the pots in the workshop.
Objectives:
- Activate the lock device switch underground
- Insert the batteries to activate the device
- Use Axiom Force to remove the unstable core
- Approach Tenebrum
- Use Force Palm to subdue Tenebrum

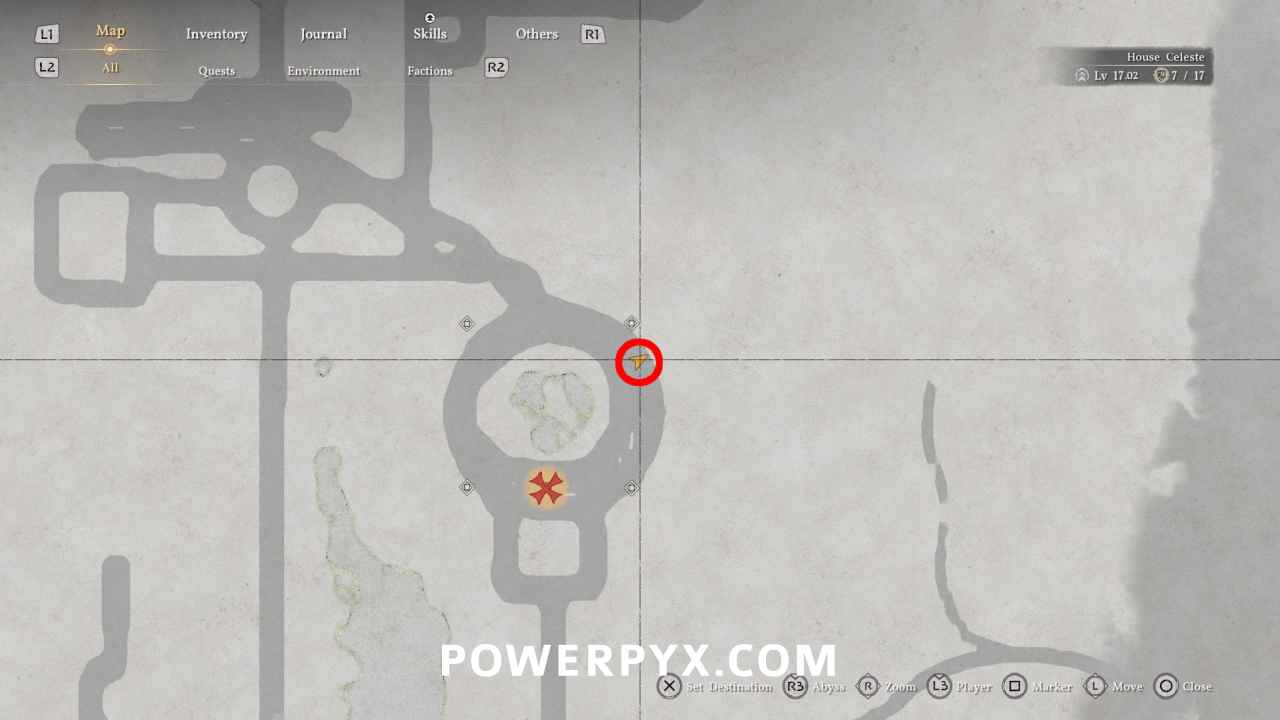
Starting Location: Gate to the Otherworld
Right where the previous quest ended, stand and listen to Octavius, the orc scholar wearing a blue robe. He will talk for half a minute.

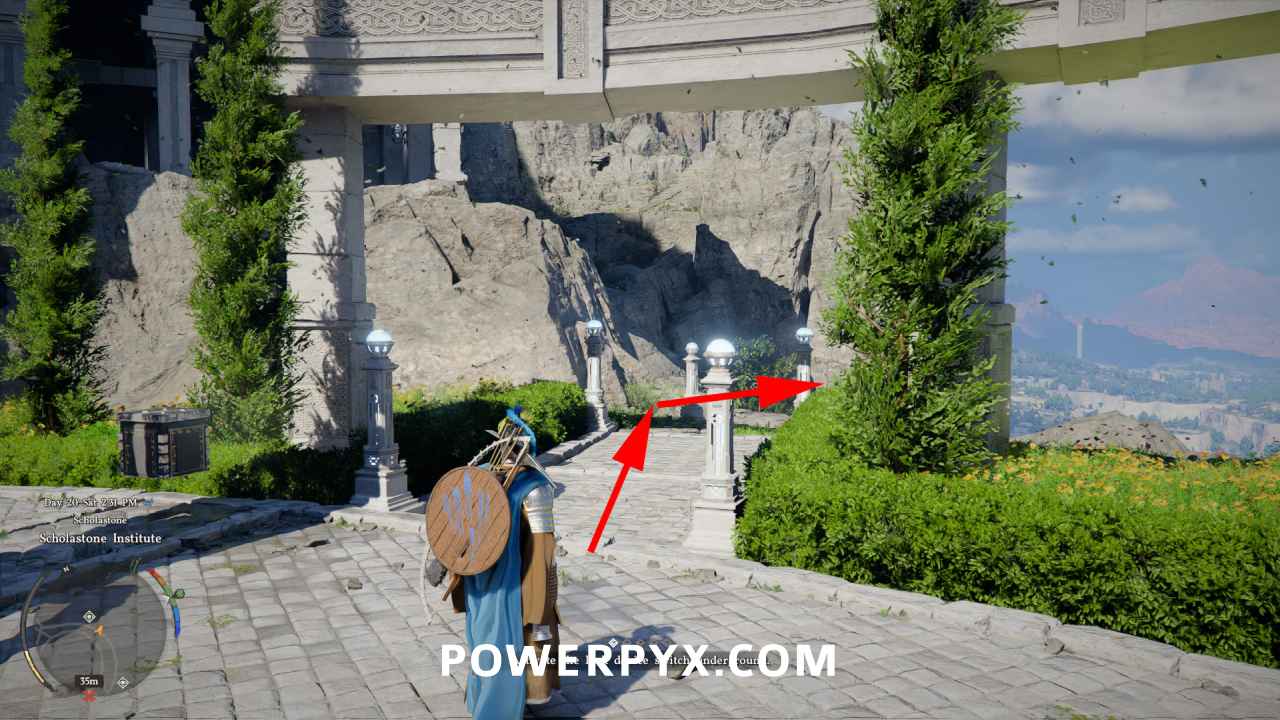
Activate the lock device switch underground
To reach the underground lock device switch, you must go to the north-east corner of the plaza where the quest started. Follow the path with the lanterns, it leads underground.
After reaching the bottom you must interact with the “hatch”, it looks like a wall panel.
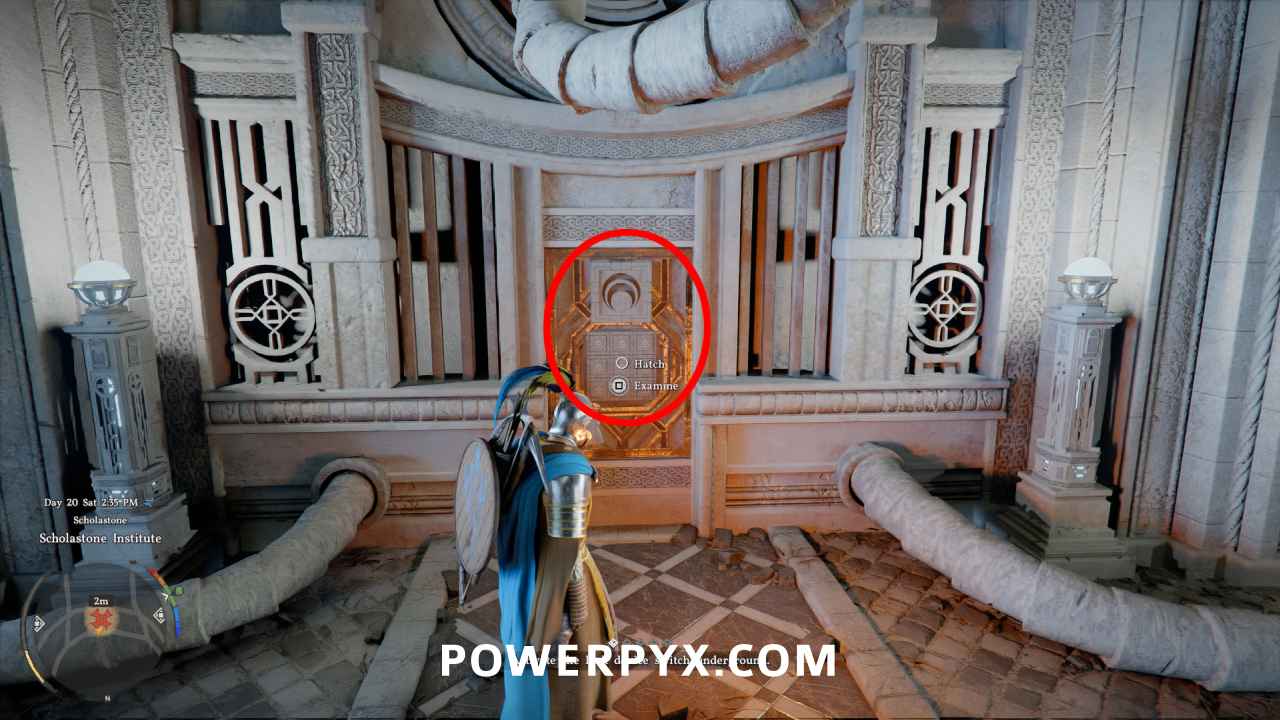
Here you must solve a puzzle by pushing the hatch buttons. You can press Dpad Left/Right to change which button to press. There are many solutions but an easy method is to press the 4 corner buttons, then press the middle button.
Hatch Puzzle Solution:
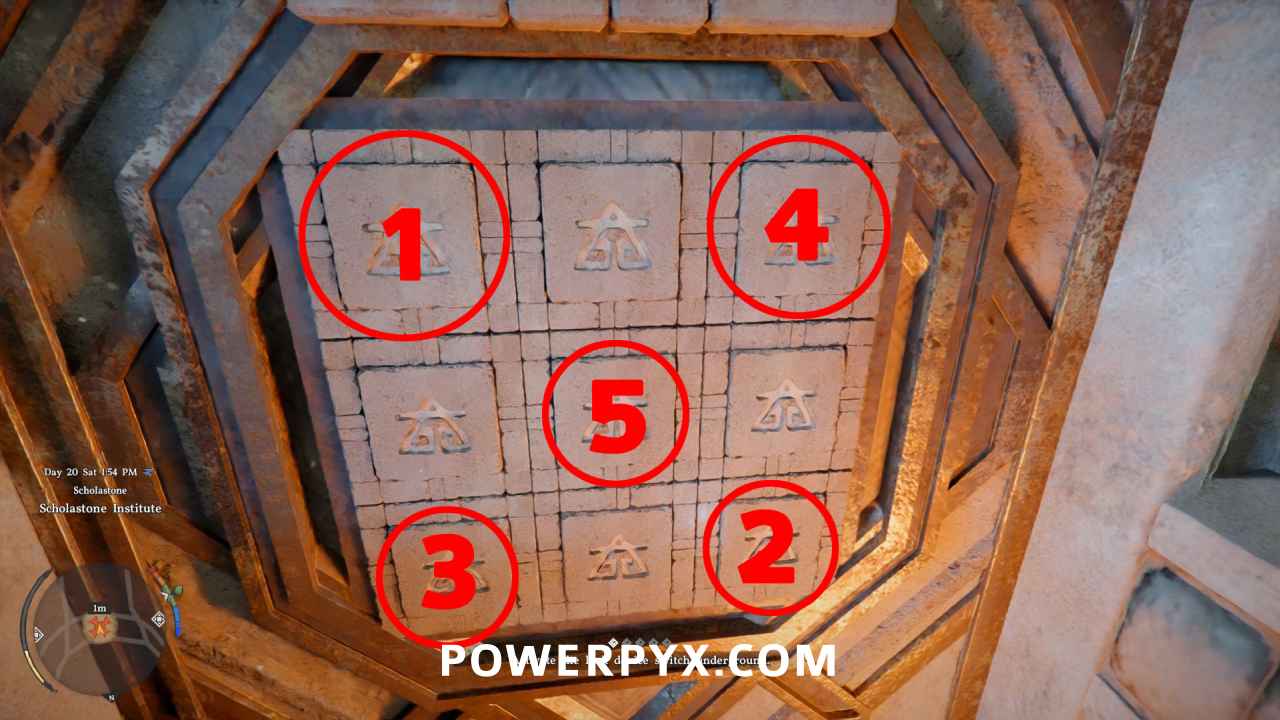
- Press top left corner button
- Press bottom right corner button
- Press bottom left corner button
- Press top right corner button
- Press middle button
If you’ve already interacted, you can back out to reset the puzzle and interact with it again.
When all buttons glow up, you’ve solved it correctly:
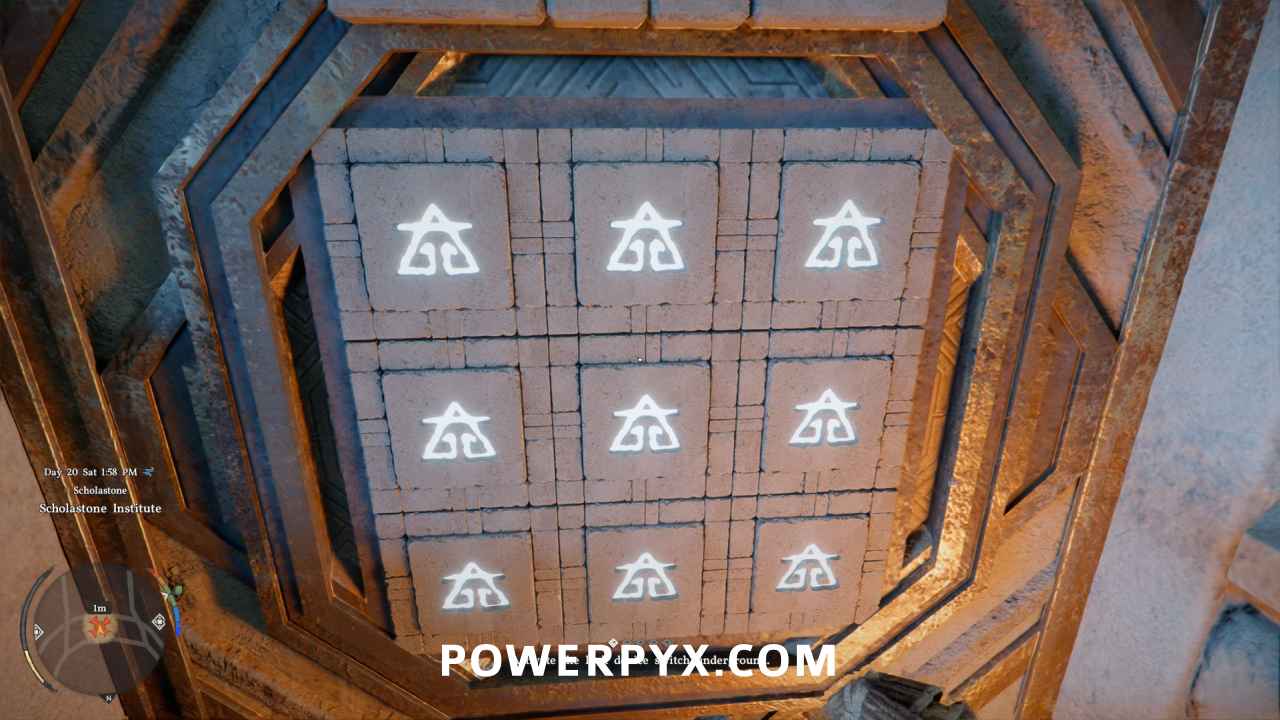
After solving the puzzle, interact with the same wall again to use the handle. You’ll get a cutscene where the machine boots up.
Insert the batteries to activate the device
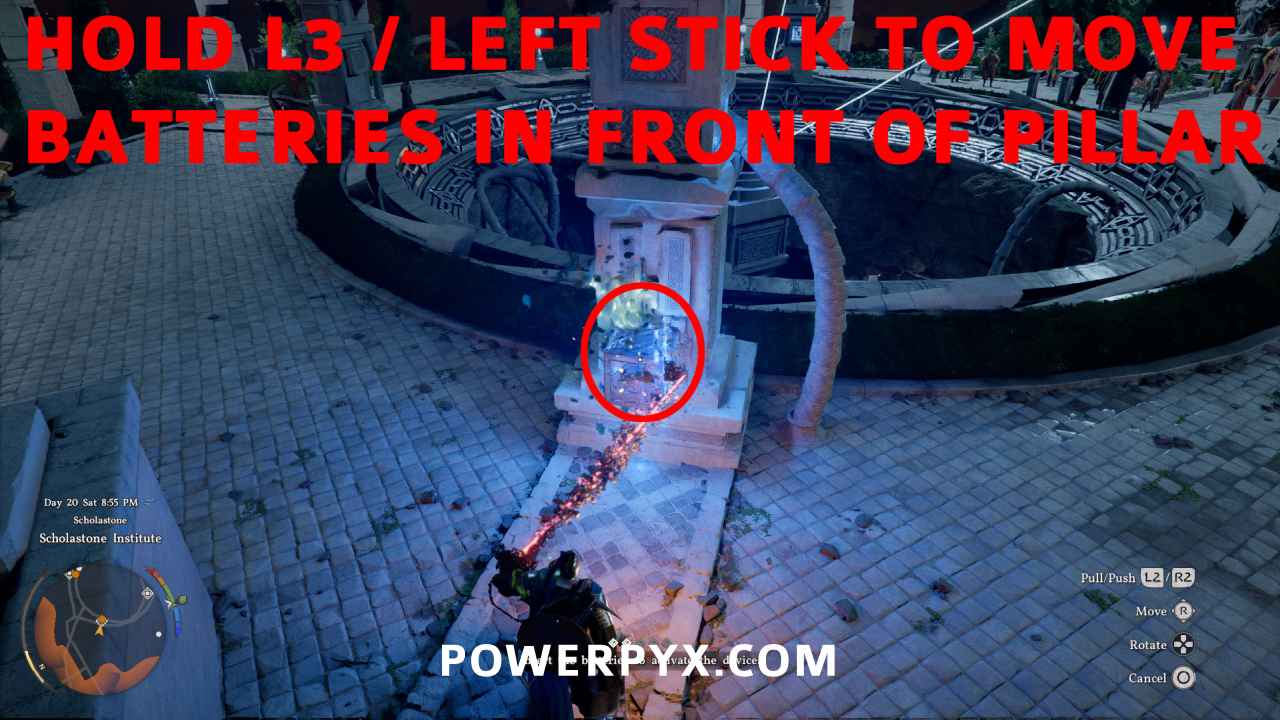
Go back upstairs to where the quest started, in the round plaza. There you will find 4 pillars with cubes in front of them – these are the batteries.
You must grab the batteries with Axiom Force (hold  /
/  ), then push them in front of the opening in the pillars with
  /
/  . The pillars are marked as orange objectives on the minimap.
While the cube floats in front of the pillar, press / again to let go, then press  /
/  to use Force Palm.
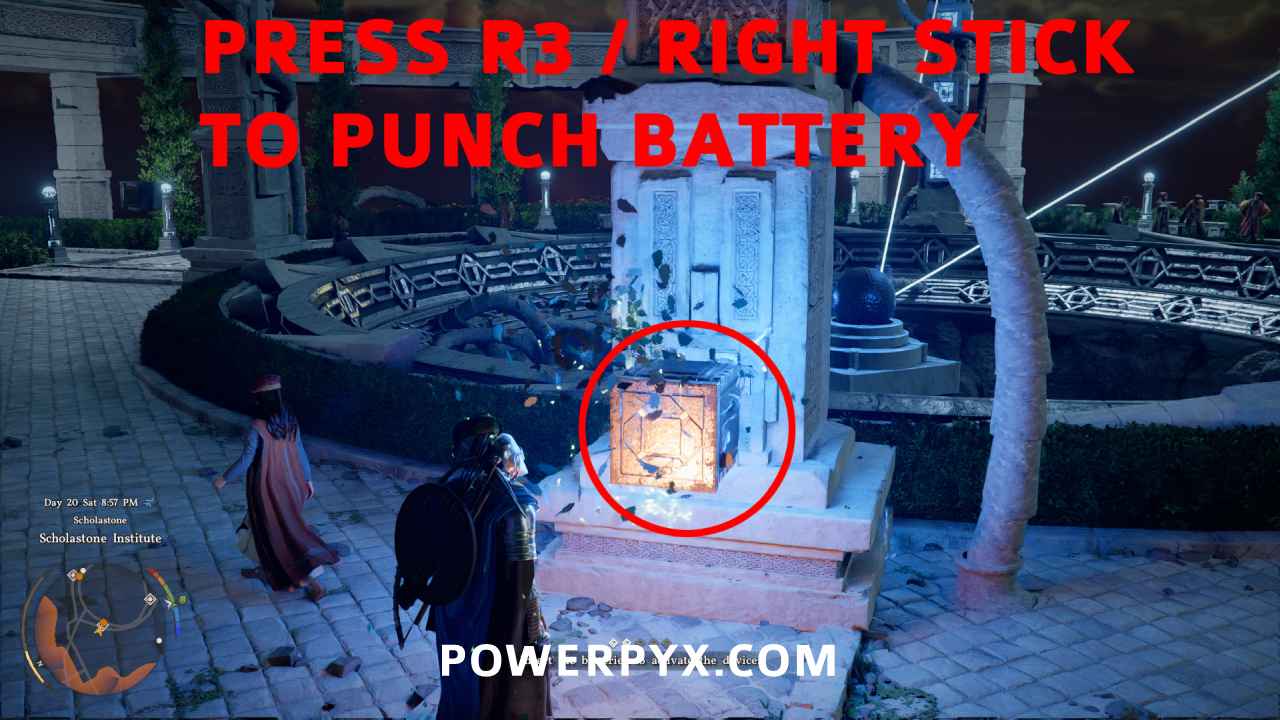
This will punch the battery into the pillar. Repeat this for all 4 batteries, each will shine a power beam at the device in the middle.
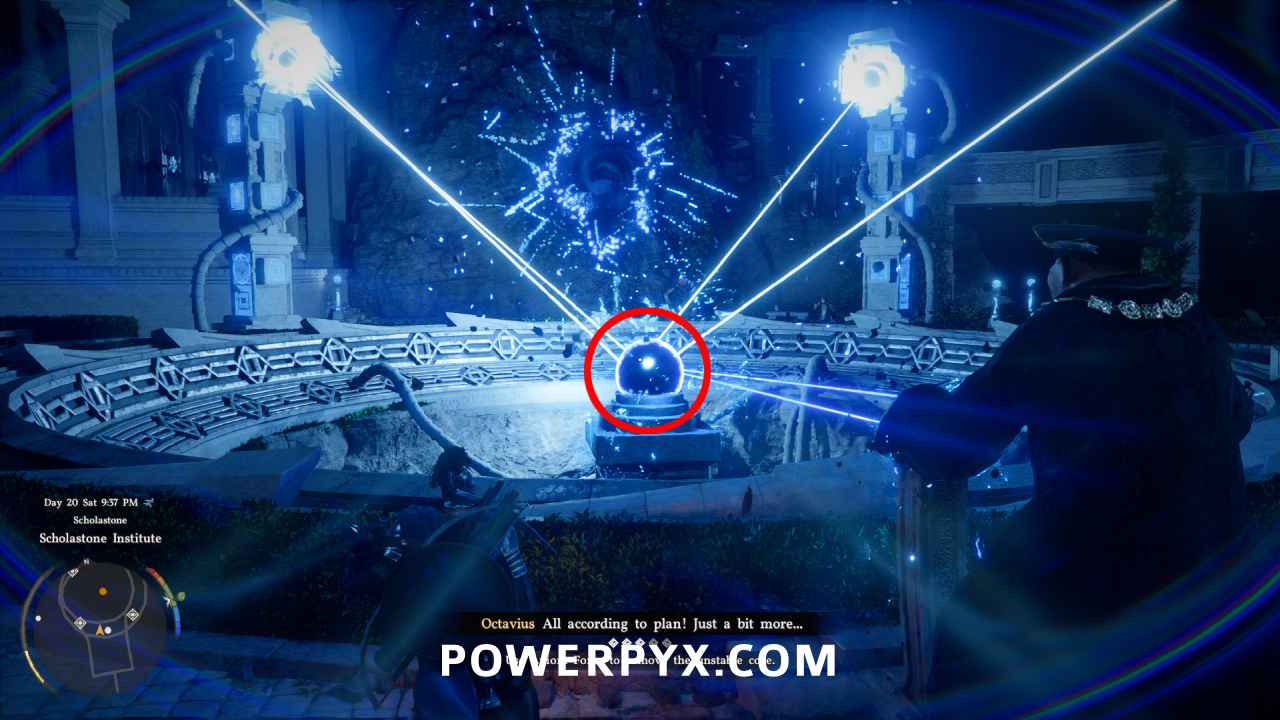
Use Axiom Force to remove the unstable core
Afterward you get a cutscene and must use Axiom Force to remove the unstable core. Aim at the blue orb in the middle by holding / , then hold  /
/  and push the Right Stick up for a few seconds to pull out the core.
Approach Tenebrum / Use Force Palm to subdue Tenebrum
Tenebrum is a special type of boss fight.
First, reveal Tenebrum’s weakspot using Blinding Flash: hold  +
+  > press /
  +
+  > press . Aim at the flying specter and it will show a square shape on it. You only need to do this once and the game gives a tutorial screen about this feature.
To defeat Tenebrum you must hit him multiple times with Force Palm while flying in the air: Double press  (
(  on XB) to jump and use your wings. Do this over the middle of the plaza where the floor is missing, where Tenebrum flies around. The wind will catapult you up to Tenebrum. In midair press / to perform Force Palm. Hitting Tenebrum can be tricky because he flies around constantly.
It’s best to attack when he stays in the middle to charge up an attack. If you get hit by his projectiles you will fall down and take fall damage, but can heal back with  to use food items.
If you run out of Spirit, hold + to restore Spirit. After a few Force Palm attacks you will run out of Spirit and must redo this. Hide behind a pillar while recharging Spirit.
Overall it’s an easy “boss” fight, just a confusing one.
After the fight you get a cutscene and get an Abyss Artifact as your reward.
This finishes Gate to the Otherworld in Crimson Desert.
For all other Quests refer to Crimson Desert Walkthrough.
Leave a Reply