
Unwavering Steps is the 124th main mission in Crimson Desert. This walkthrough will guide you through all objectives of the Unwavering Steps main quest.
- Starting Location: Crimson Desert
- Chapter: 9 – The Sage of the Desert
- Sub-Chapter: Thinning Blade
- Requirement: Finished previous main quest Crossing Point
- Reward: Witch’s Ring (Accessory), Greymane’s Earring (Accessory), Challenge: Spire of the Sun, Challenge: Nest of Valor
- Quest Description: On the edge of the dunes, the mirrors of a cryptic ruin lie shattered, casting fractured light across the shifting sands.
Objectives:
- Go through the Spire of the Sun to enter the Abyss / Go to the Nest of Valor
- Achieve enlightenment

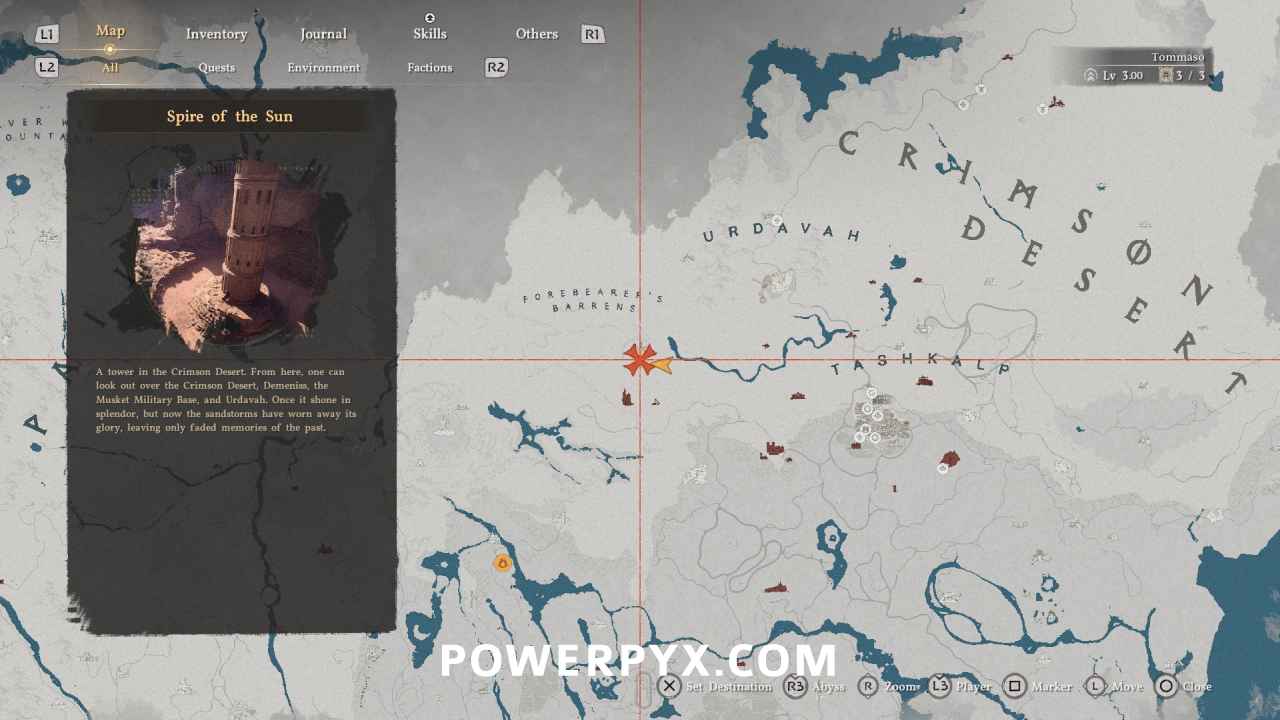
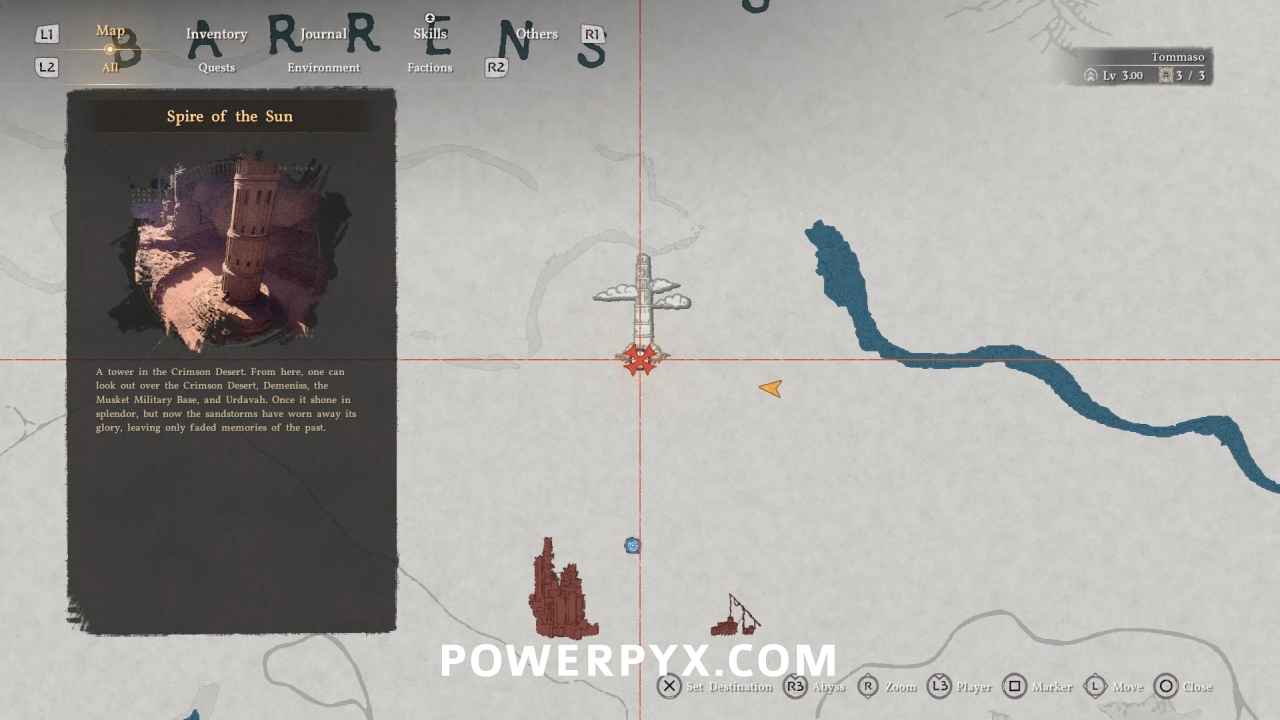
Go through the Spire of the Sun to enter the Abyss / Go to the Nest of Valor
Spire of the Sun is located in Crimson Desert region.
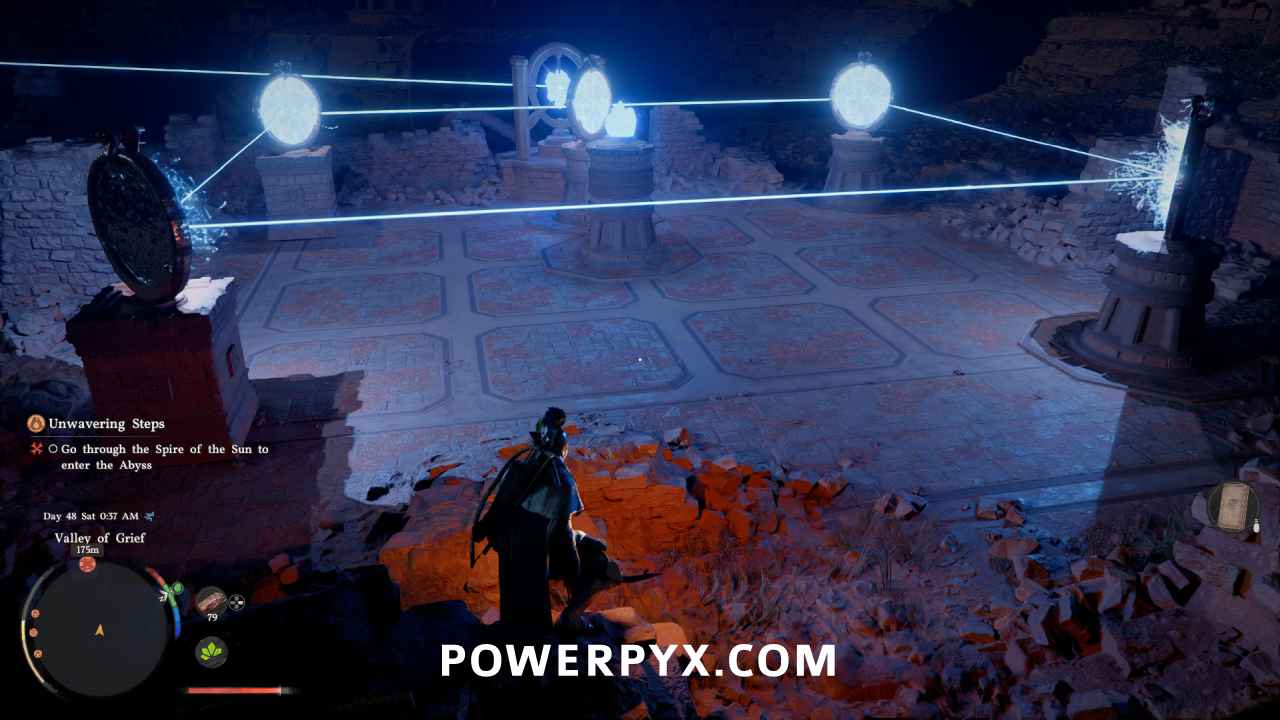
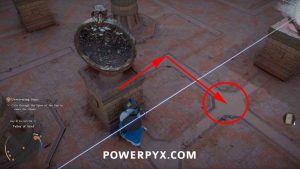
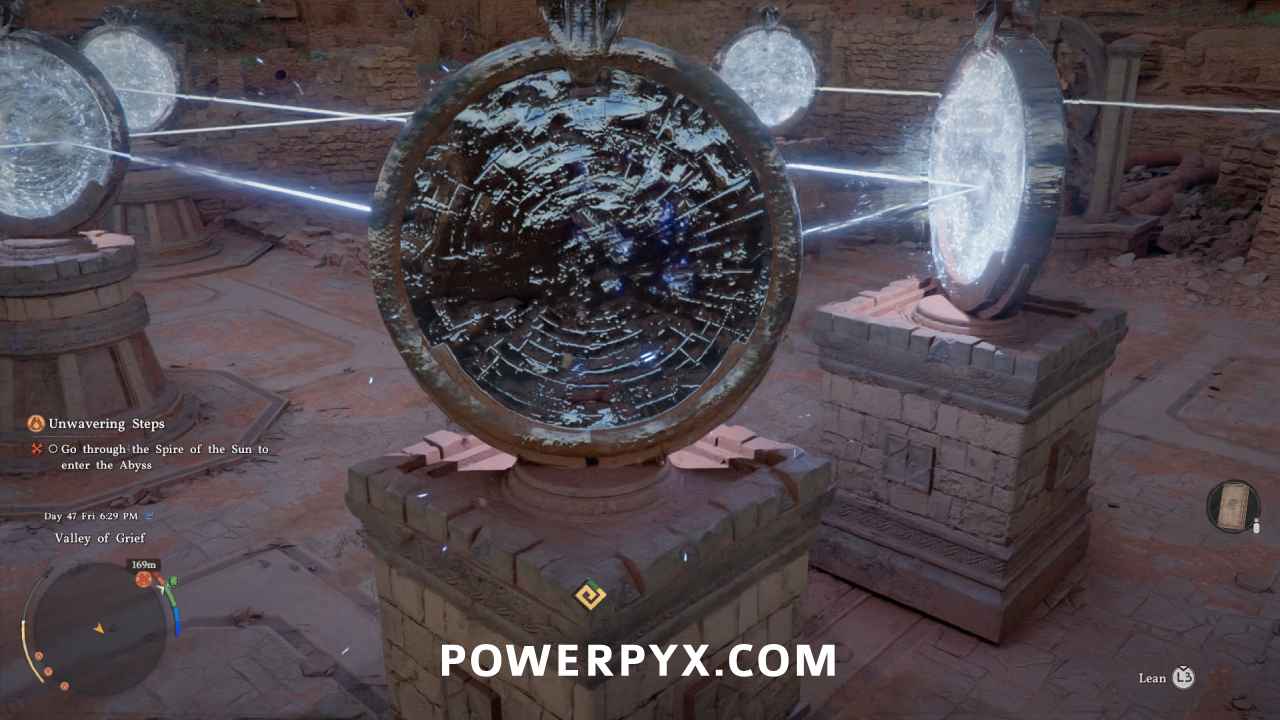
Step 1: Redirect Mirrors East of Spire
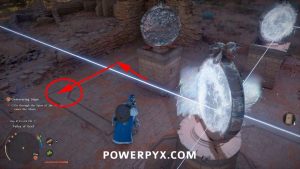
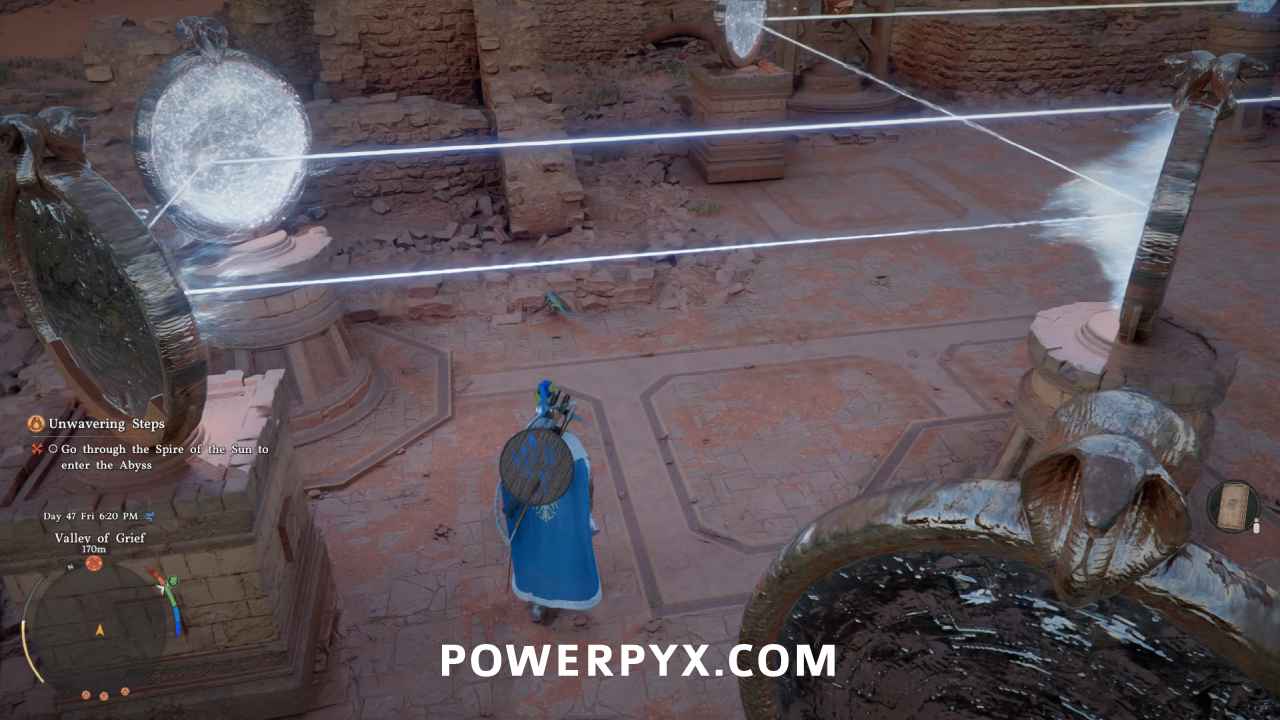
Outside the Spire, slightly to the east, you find mirrors with a blue light bouncing off them. Here you only need to move the one corner mirror that isn’t lit up.
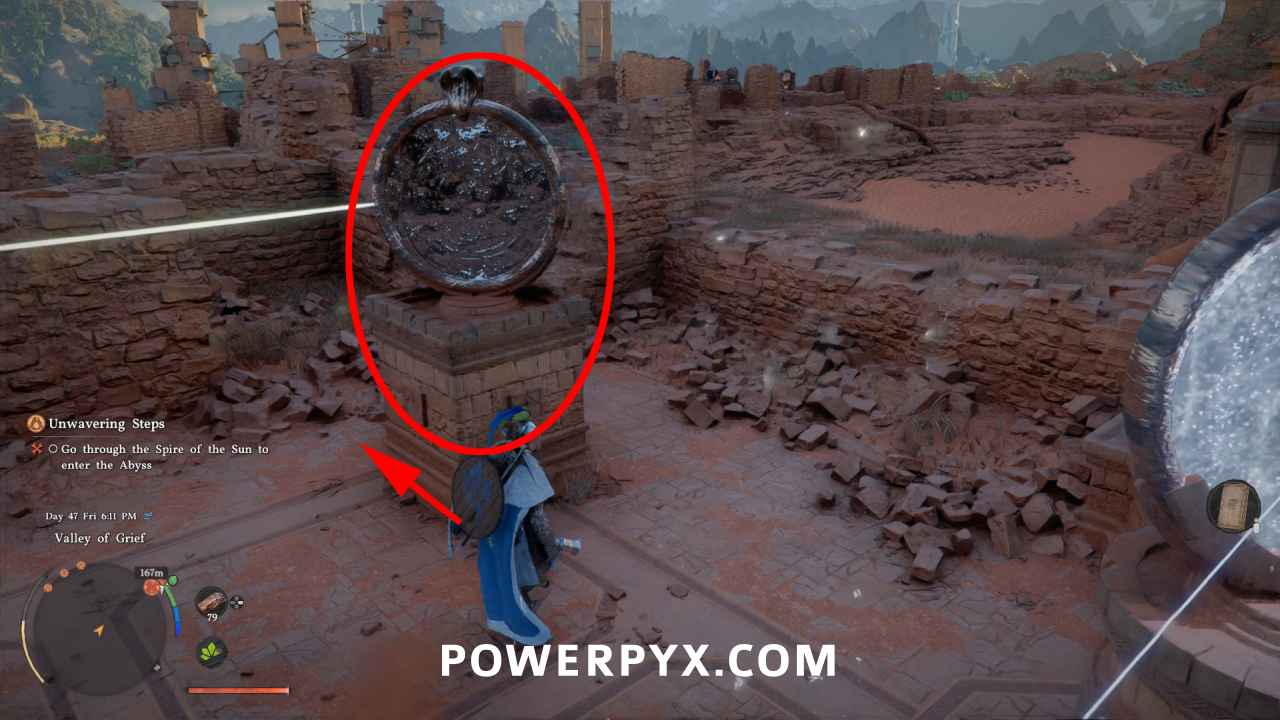
No need to interact with the other mirrors, leave them in their starting positions. Then the light shines at the crystal and is redirected to the 2nd set of mirrors south of the tower.
Finished Solution:
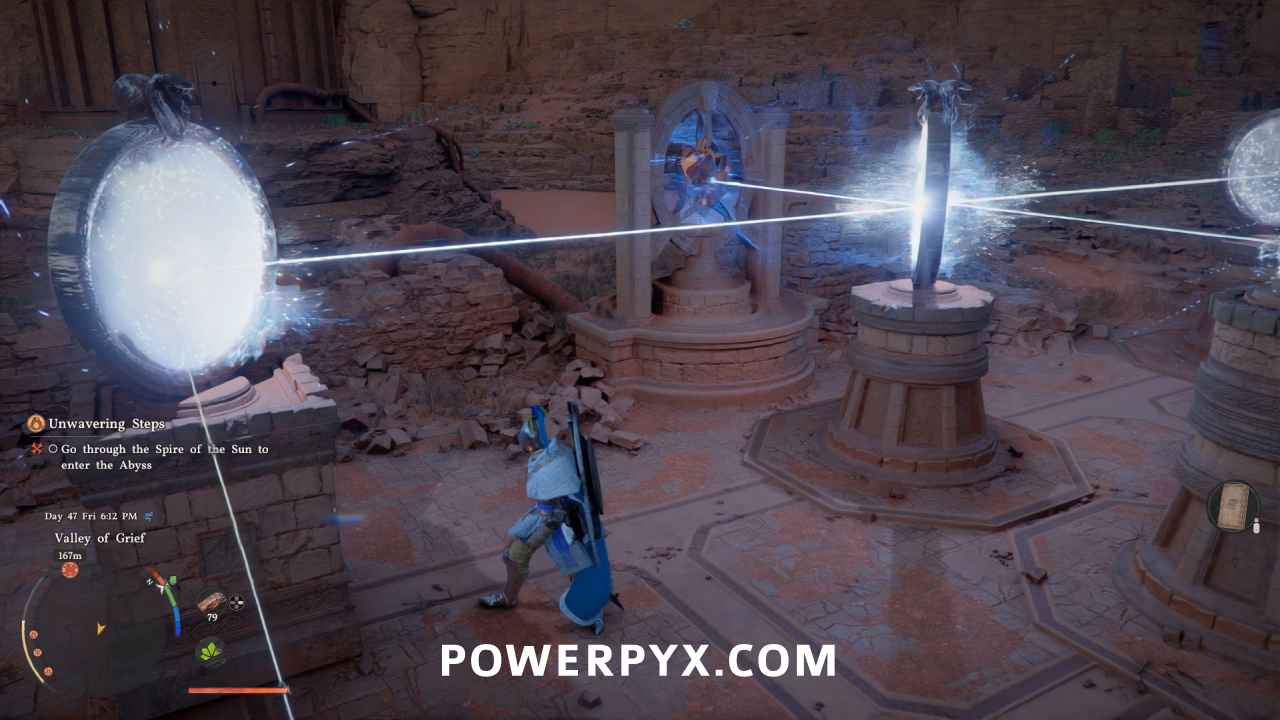
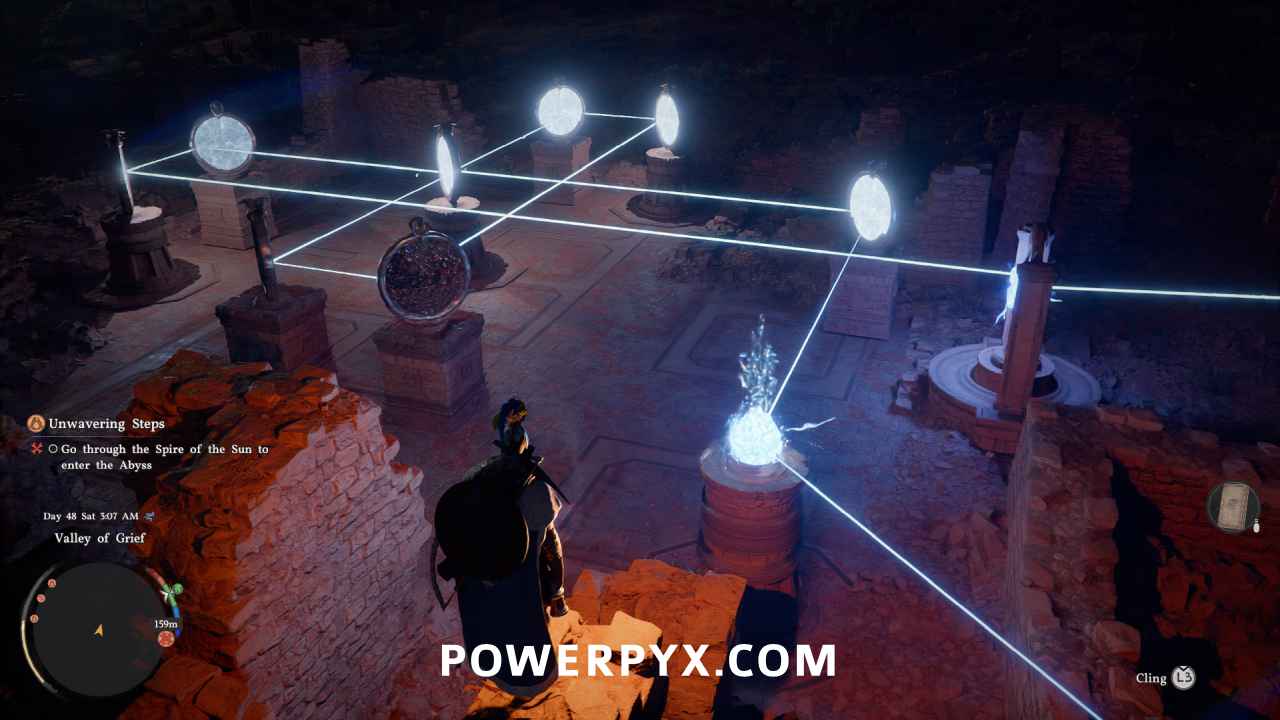
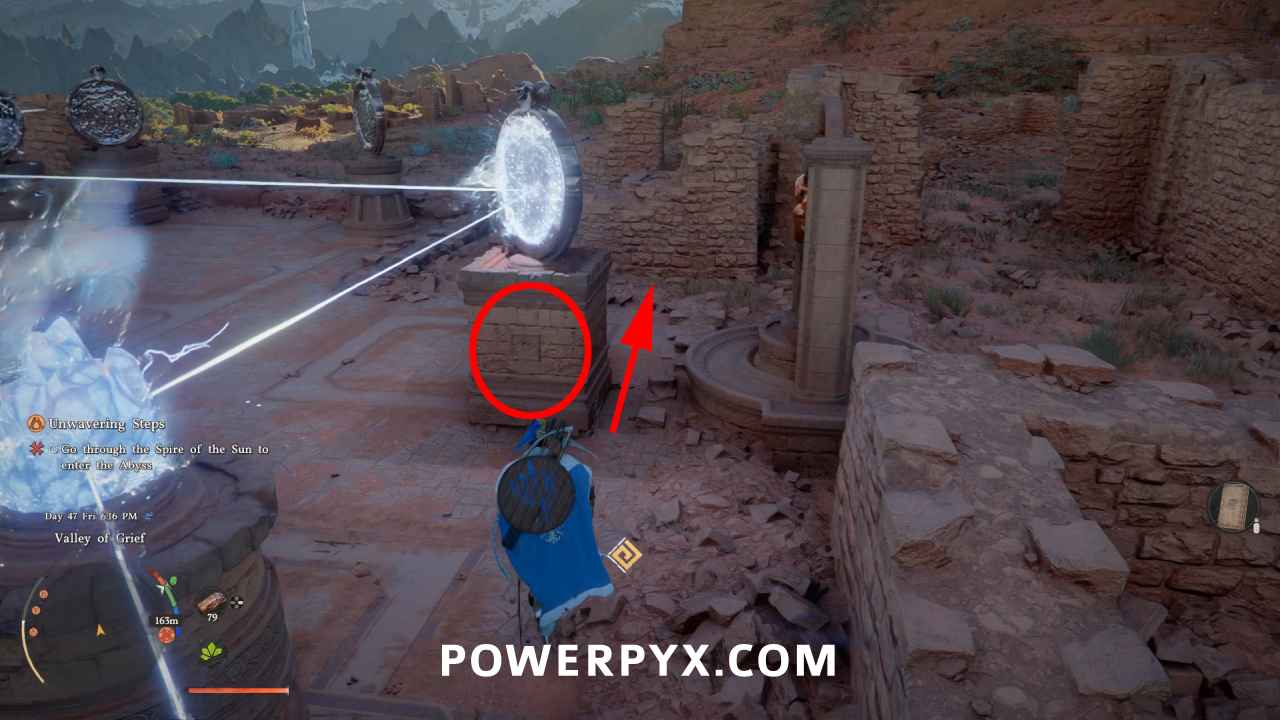
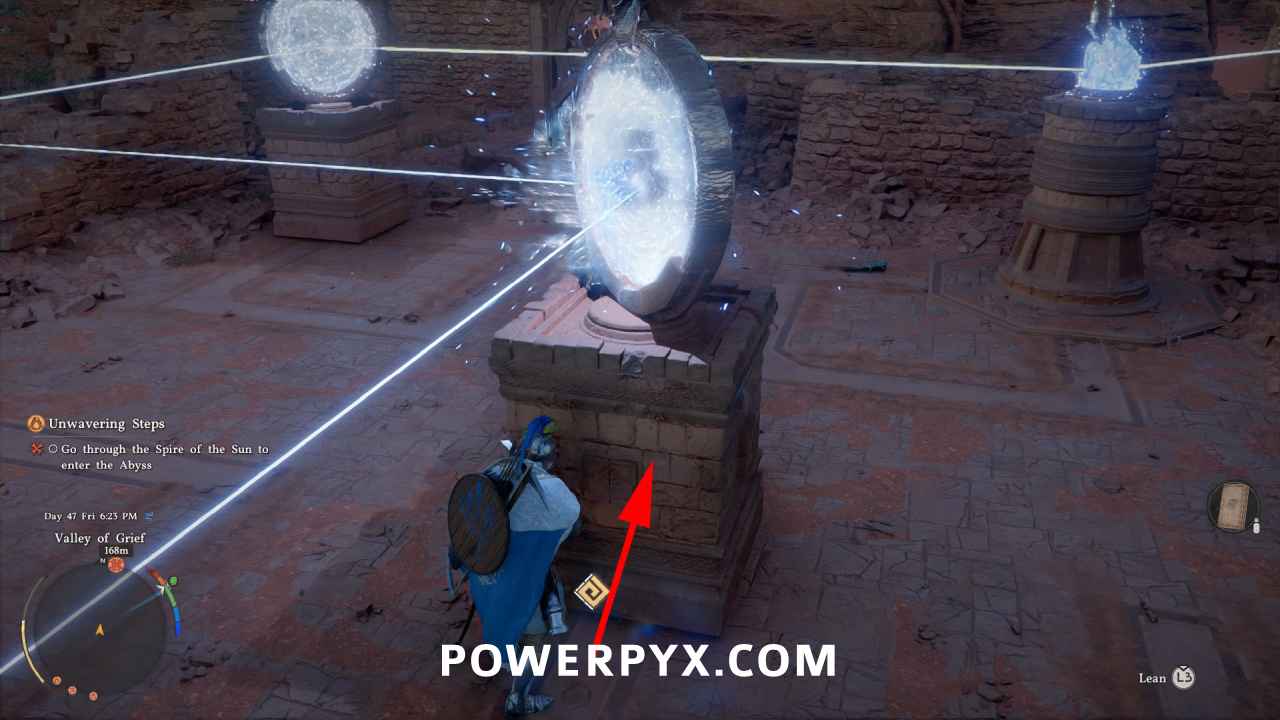
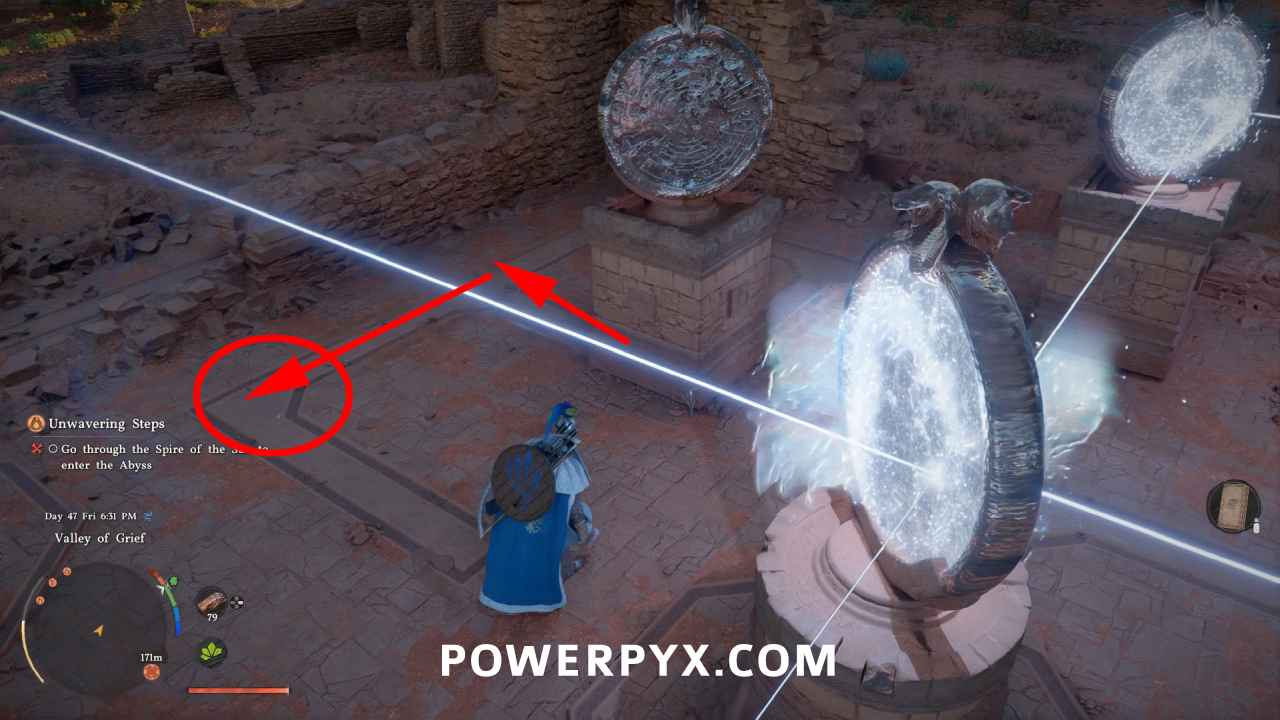
Step 2: Redirect Mirrors South of Spire
Follow the blue light to the next set of mirrors, outside the Spire, slightly to the south. This one is more complicated than the first puzzle. Also refer to the video above if this part gets confusing.
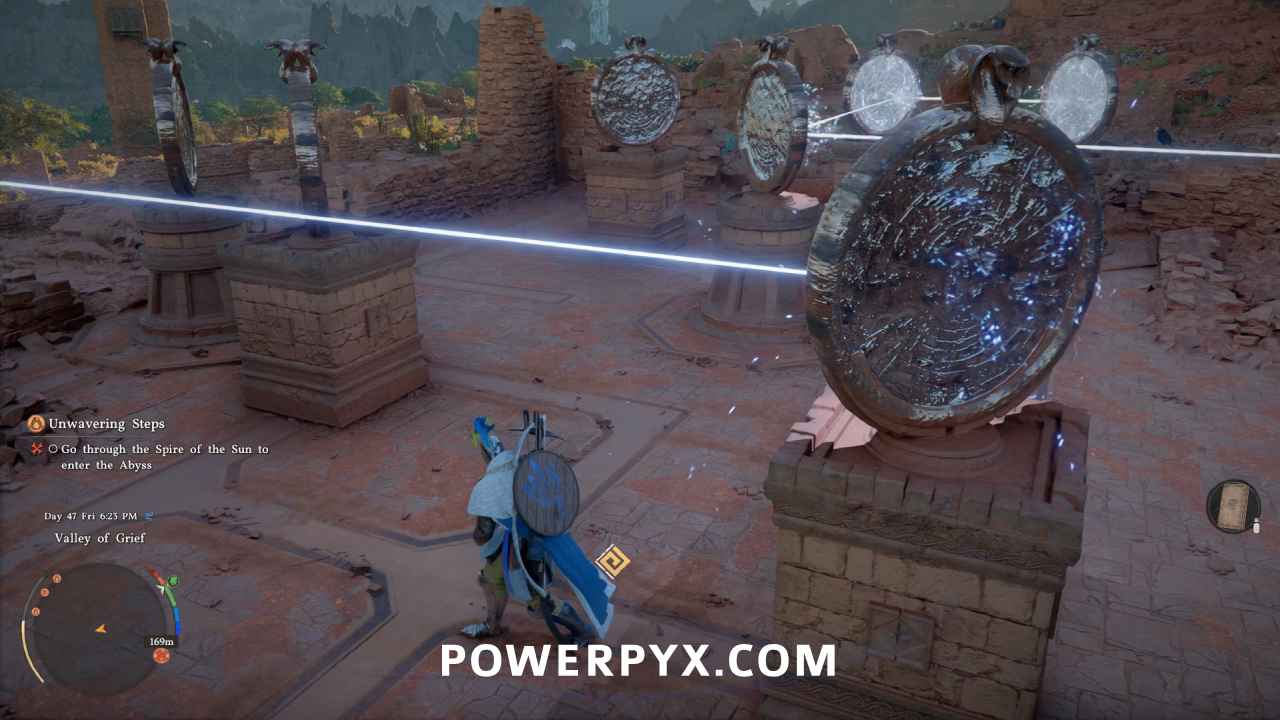
Importantly, take note of the grooves on the floor that indicate where the mirrors can be moved. At night this can be hard to see if playing with low brightness (looks like lines on the floor). You can’t move the mirrors anywhere outside the grooves.
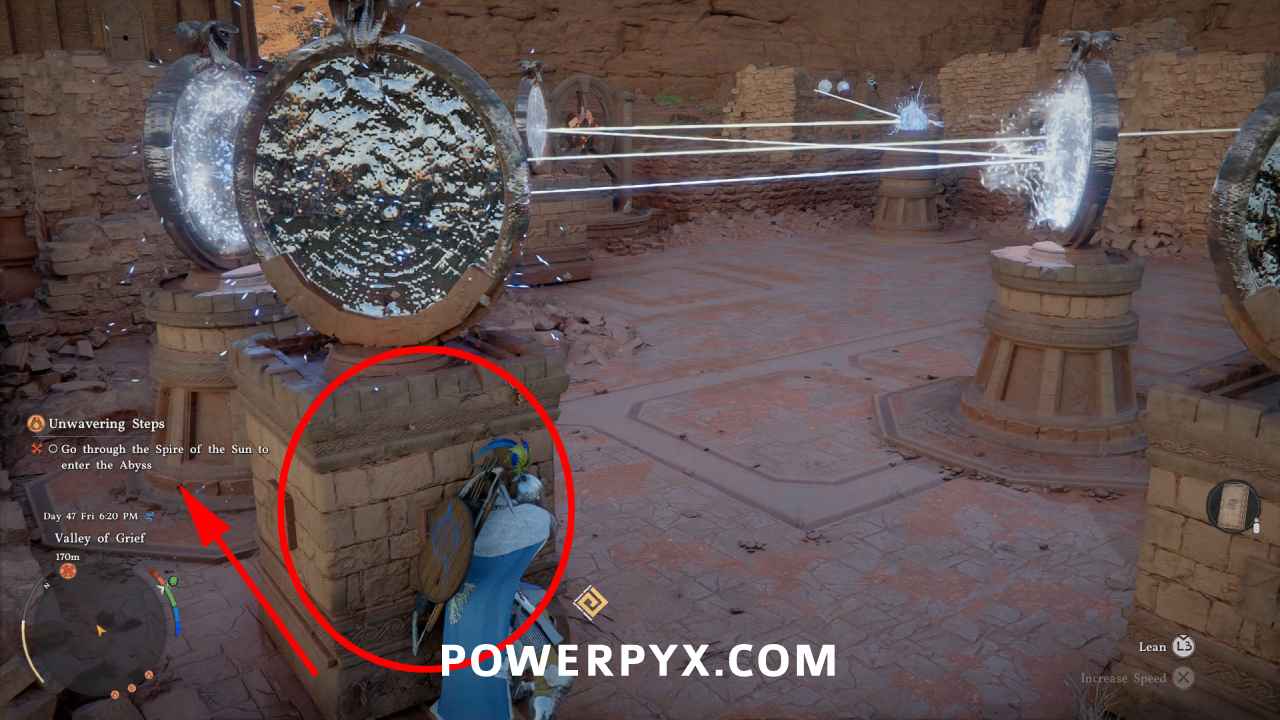
Finished Solution (redirect the lights like this):
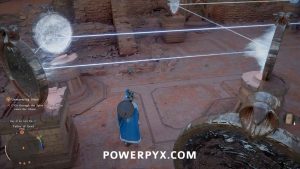
Step by Step:
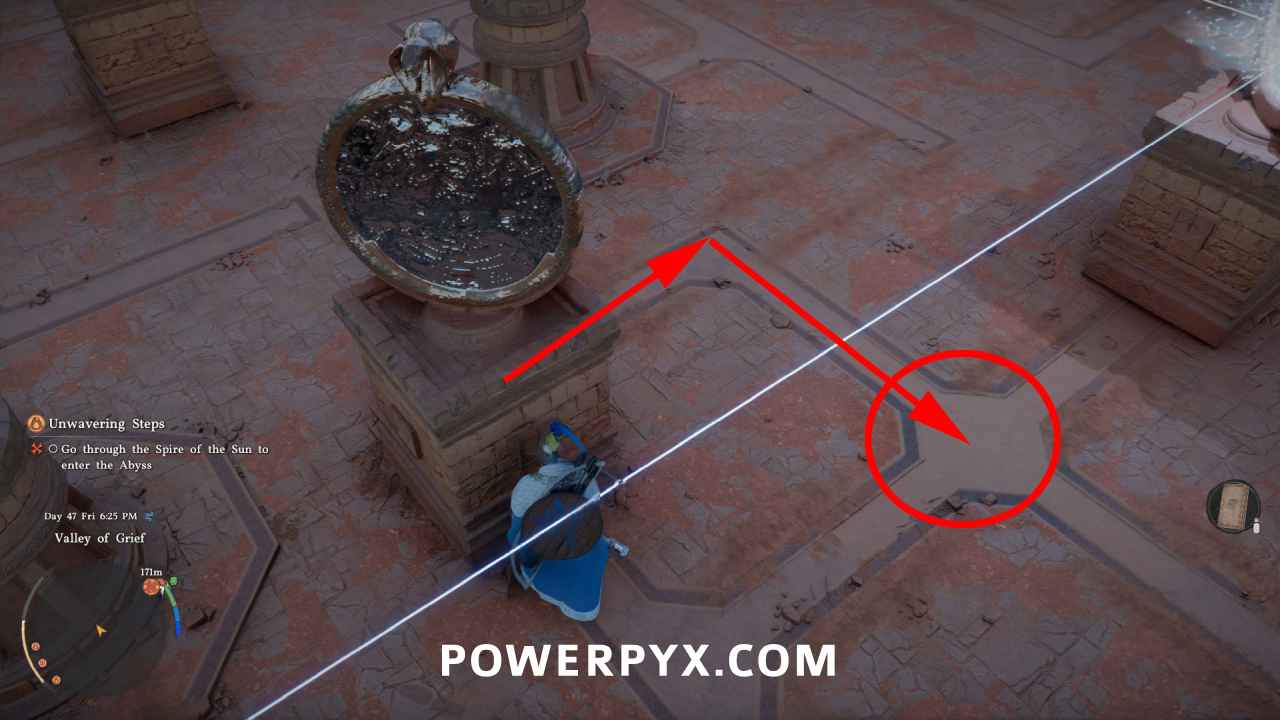
- The first mirror that’s lit by the crystal must be moved sideways so it redirects to the middle mirror.


- The middle mirror will redirect the light to the side. On the side where the light shines, move the corner mirror so the light from the middle mirror reaches it. This will redirect the light to the stationary mirror on that same side, it will redirect the light to the opposite side.

- On the side where the light shines, move the next mirror so the light hits the mirror.

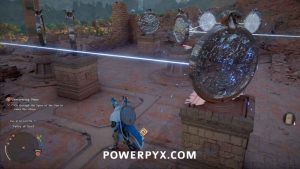
- In the direction where the light shines is another movable mirror you haven’t used yet (directly next to previous mirror, on same side). This is the most confusing one. You must move it sideways so the light hits this mirror but then also move it down the middle groove so it stands as close as possible to the previous mirror. The light will then redirect toward the middle mirror, which redirects it toward the back.

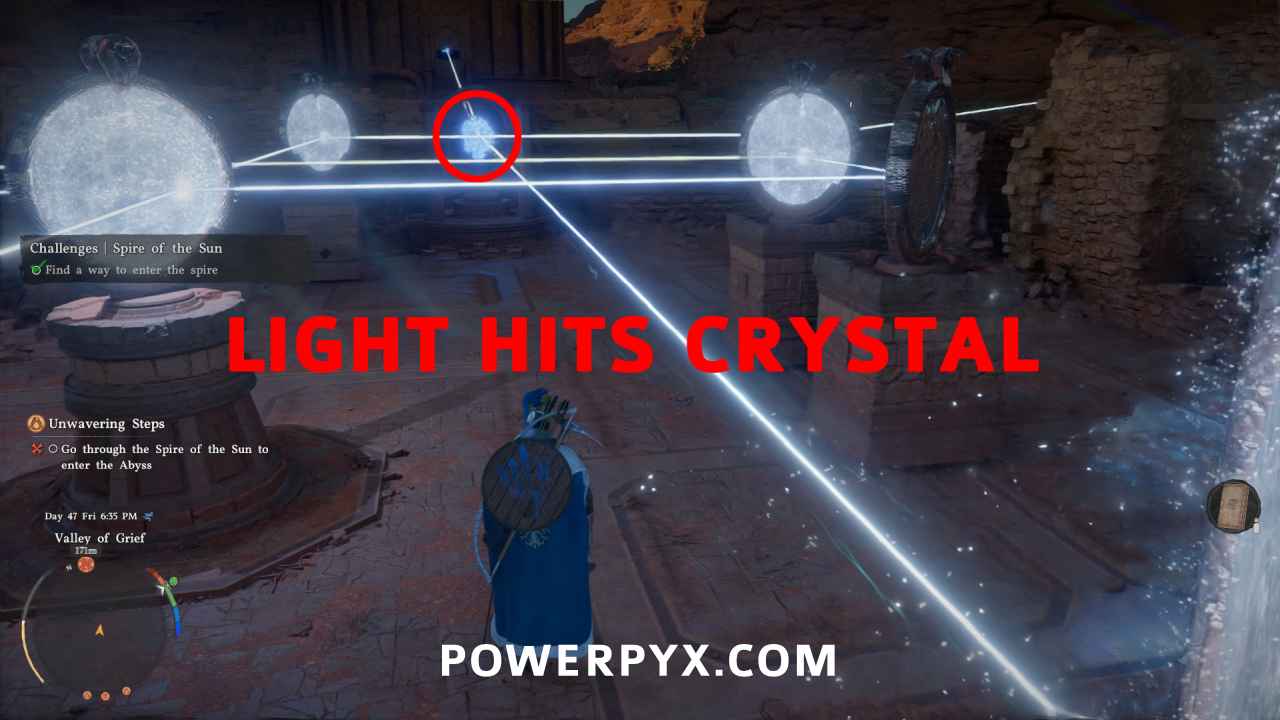
- There is one last movable mirror in the back corner we haven’t touched yet. You need to move it so the light from the middle mirror hits it. The movable mirror will then direct it to the stationary mirror in the back row, which will shine it at the crystal in the front row. If the light misses the crystal, try wiggling the movable mirror back and forth a little bit so the light hits the final stationary mirror at a different angle.


Once the front crystal lights up, it will shine at the Spire and opens the door.
Here’s the finished solution again:
Step 3: Redirect All Mirrors Inside Spire until Light reaches Crystal on Top Floor
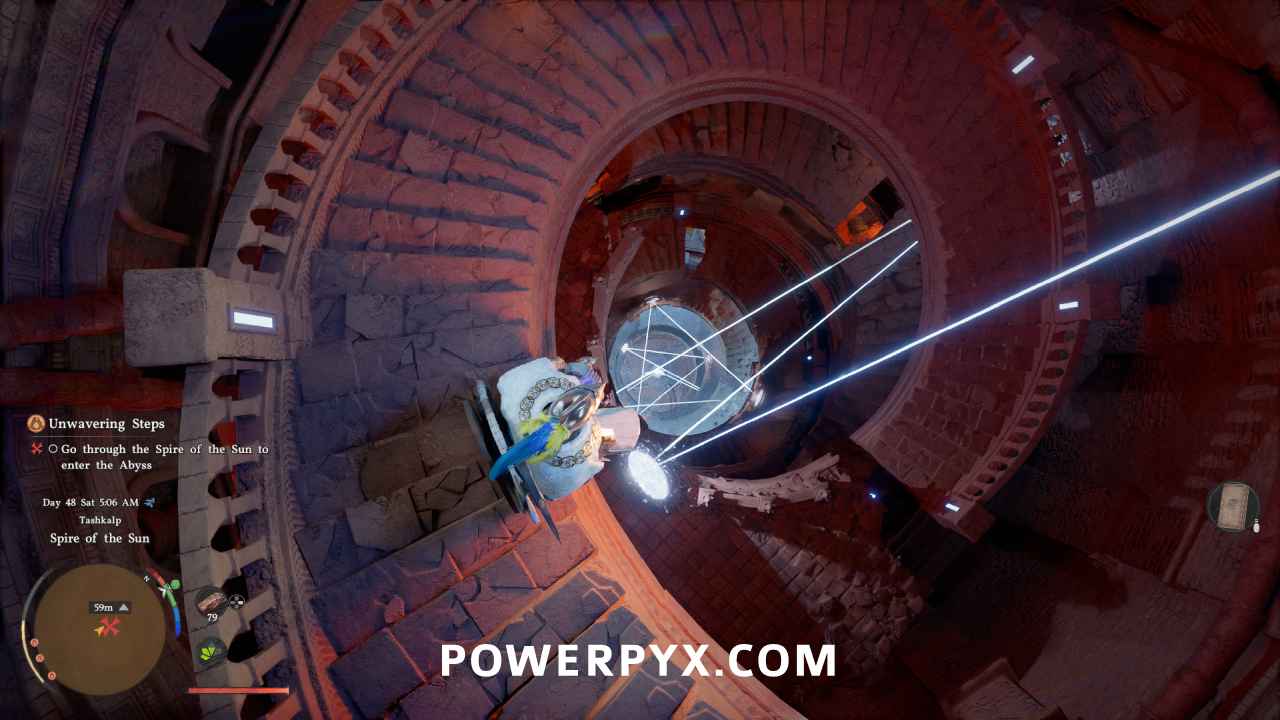
The last step is a bit time-consuming but easy. Go inside the tower, you will see the beam of light hits a mirror slightly up the staircase. Interact with the mirror to shine the light at the next mirror. Then the stairs will move. Repeat this from one mirror to the next all the way to the top of the Spire. You’ll find a mirror on each floor, always need to move it to shine the light further up.
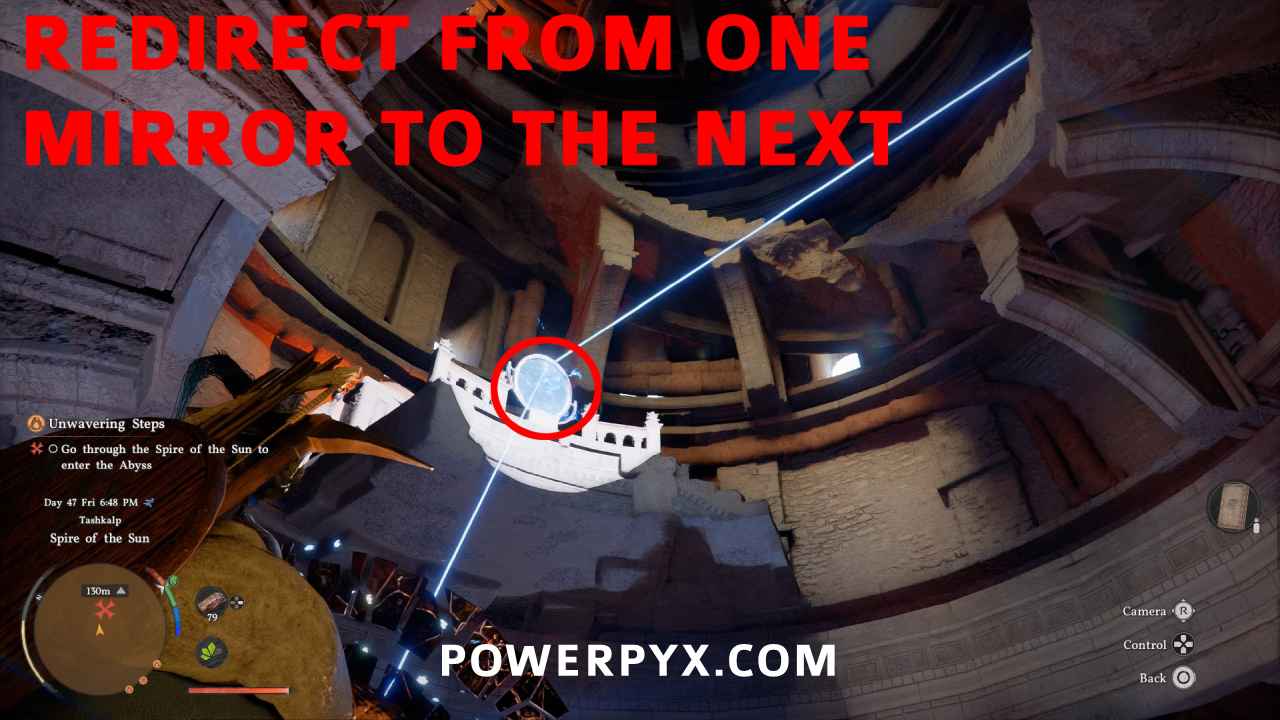
Do this until the light reaches the mirror on the top floor, from there you must shine it to the crystal on the ceiling.
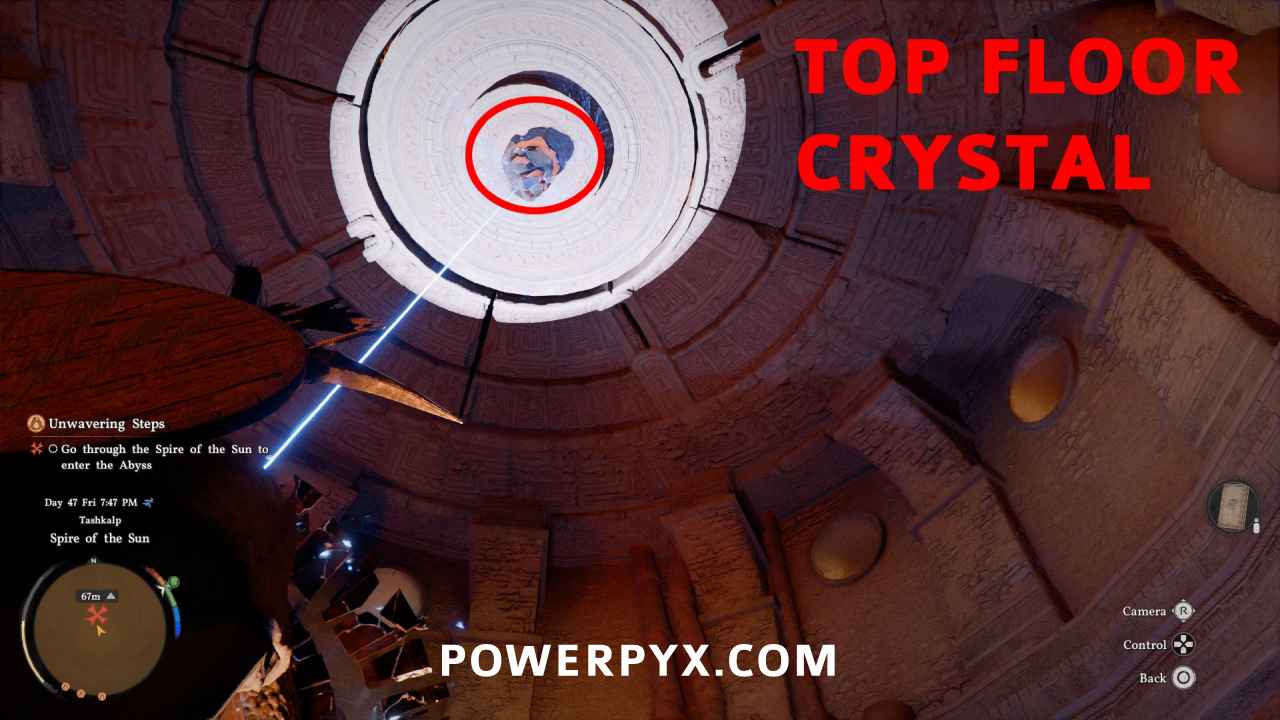
Then the final staircase comes down. Walk up, step on the elevator, it takes you to the very top where you enter the Abyss Gate.
Finished Solution (as viewed from Top Floor):
Achieve enlightenment
After going through the Abyss Gate, activate the Abyss Nexus fast travel point directly in front of you.
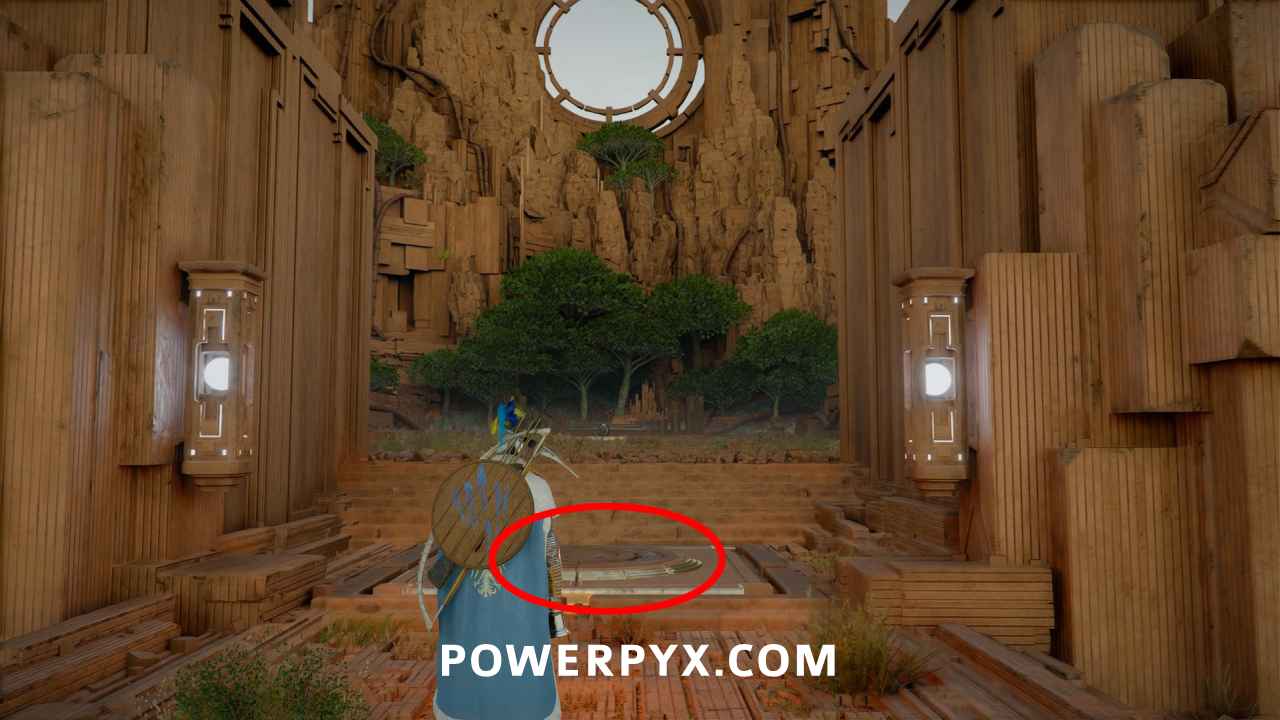
Then go straight ahead to get a cutscene with Goyen. To “reach enlightenment” you must defeat him.
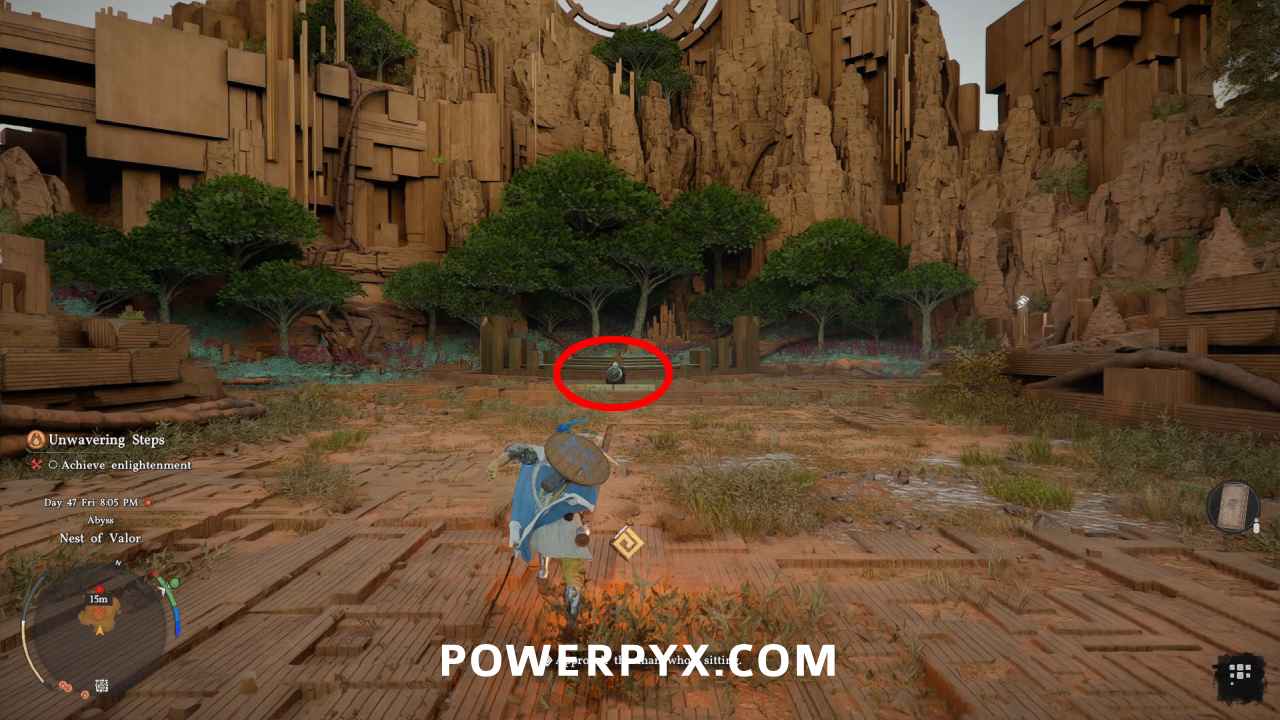
Goyen Boss Fight
Goyen is a human enemy with a shield and sword, he has only 1 healthbar. He uses a similar moveset to what Kliff can do. Before the fight, be sure to activate the fast travel point on the floor directly in front of the boss fight, in case you get stuck you can fast travel away to get stronger and travel back here.
He hits extremely hard, being able to kill in 1-2 hits with his strongest attacks. Most dangerous is when he jumps into the air and comes smashing down to create a shockwave, this can kill you in one hit depending on your armor and max health. He always follows this up with a second kick from the air. When he jumps in the air the first time, watch the floor for a display of his impact radius, repeatedly dodge to avoid this. Keep dodging sideways when he follows up with the midair kick.
His sword combos pretty much a copy of what you can do. Blocking/countering is risky because of how hard he hits, it’s generally safer to dodge to the right, let him miss a combo, then land 4 heavy attacks and follow up with a few light attacks while he’s interrupted. If you take any damage, always heal back to full health immediately. If you die too fast, your best bet is to spend some time getting more Abyss Artifacts to increase your max health, and get your weapon/armor to refinement level 7 or above.
Beating Goyen finishes Unwavering Steps in Crimson Desert.
For all other Quests refer to Crimson Desert Walkthrough.
Leave a Reply