
Anamnesis is the 2nd DLC quest in the Mysteria Ecclesiae expansion of Kingdom Come Deliverance 2. This walkthrough will guide you through all objectives of the Anamnesis DLC quest.
- Starting Location: Kuttenberg Region > Sedletz Monastery
- Quest Giver: Albich of Uniczow
- Requirement: Finished DLC Quest: The Royal Physician
- Reward: MISSABLE –
 Survivor (if you listen to all of Brother Vojta’s jokes)
 - Quest Type: Side Quest
- Quest Description: I accompanied Albich of Uniczow to Sedletz Monastery. Albich wanted to ask the Abbot to intercede with Sigismund so that he might be admitted to King Wenceslas. But the Abbot currently has other worries. A strange illness has broken out in the monastery, and the Abbot fears it might be the plague. So he asked Albich to take a look at three of the sick.
- DLC Required: Mysteria Ecclesiae
Objectives:
- Get shown around the monastery (optional)
- Go with Albich to the infirmary / Speak with Albich
- Speak with Confessor Stephen
- Search Confessor Stephen’s cell
- Speak with librarian Crispin
- Check Jaroslav’s belongings
- Speak with monk Celestine
- Search the monastery cellar
- Find the key to the door in the cellar
- Speak with Steward Zdenyek
- Speak with Valerie
- Search Blazhena’s room (Optional)
- Search the cellar
- Confront Zdenyek
- Go to Zdenyek / Defend yourself against Zdenyek / Speak with Zdenyek
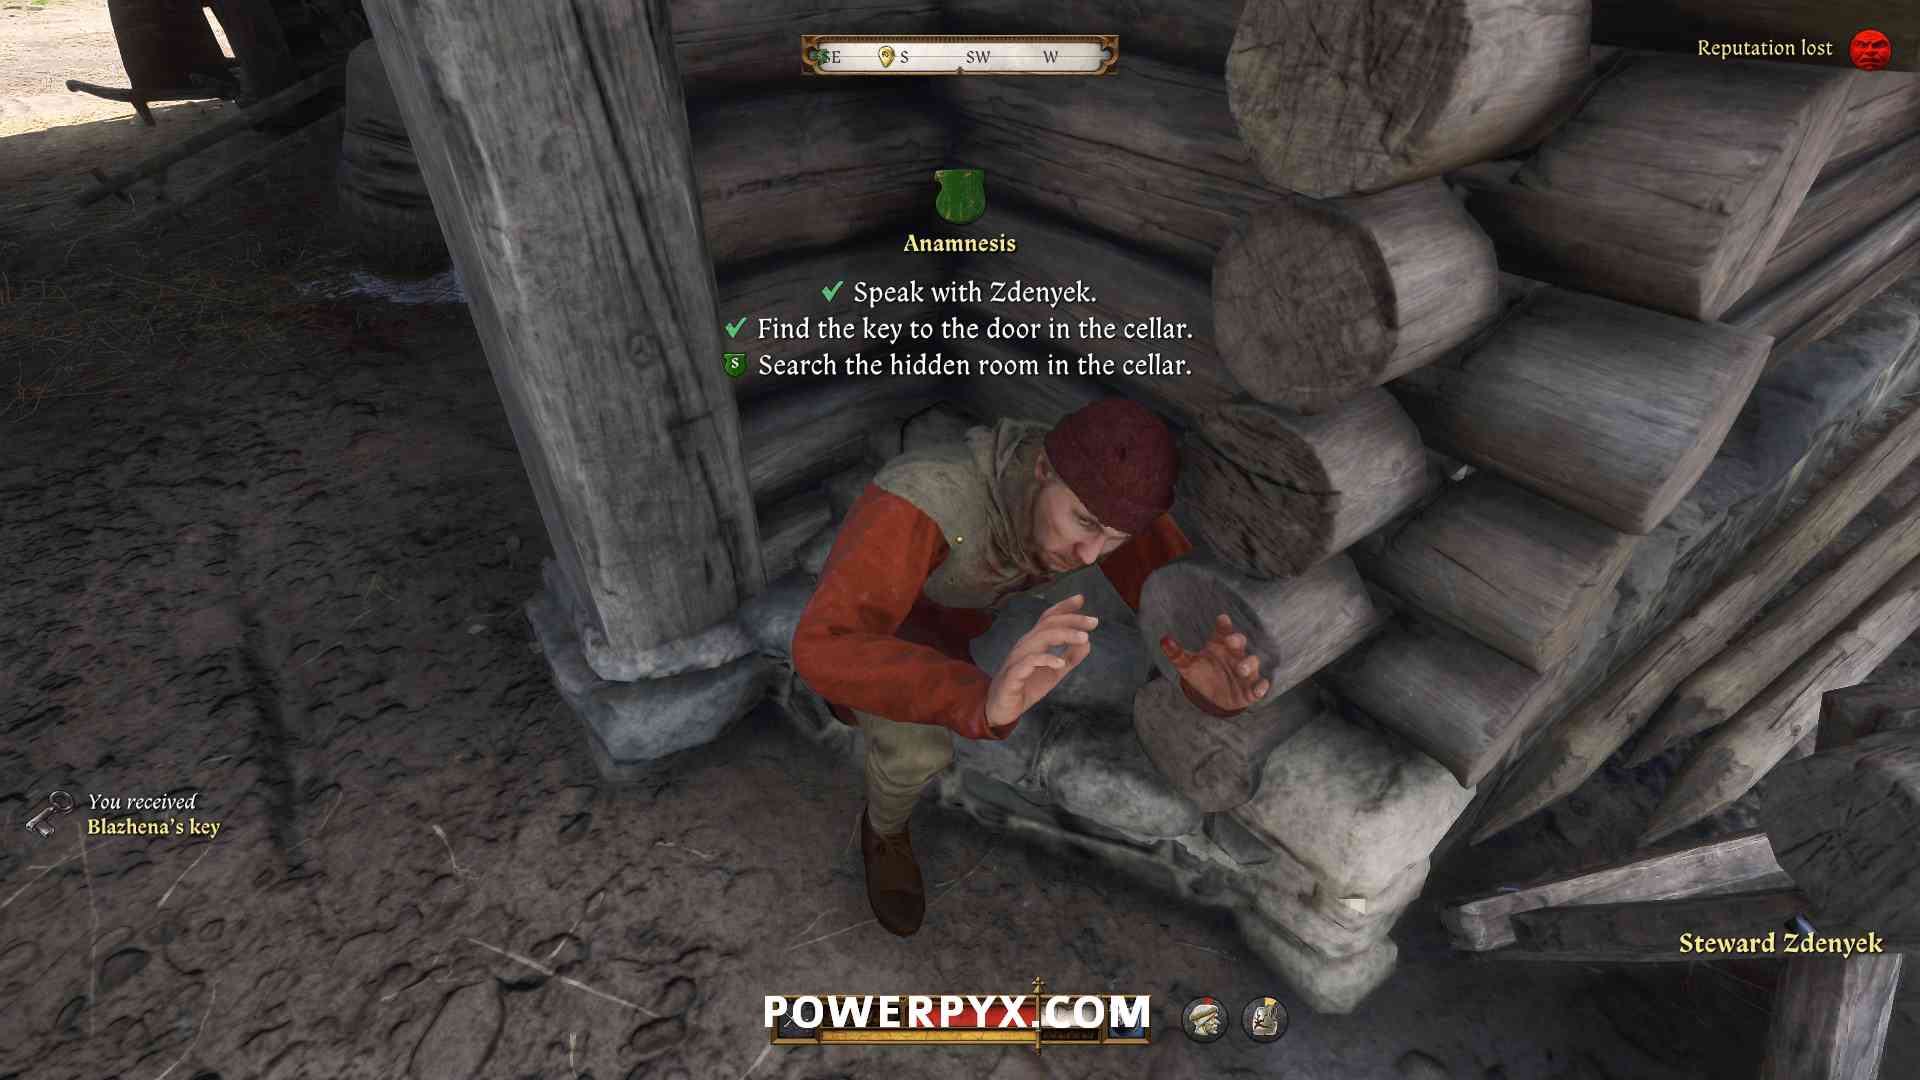
- Search the hidden room in the cellar – Survivor
- Check on Brother Ernest
- Search Ernest’s Cell
- Return to Albich
Starting Location: Anamnesis
This quest starts automatically as soon as you finish The Royal Physician. In typical Kingdom Come fashion, the Abbot will only talk to us after we do an errand for him. We must investigate what illness is spreading at the monastery.
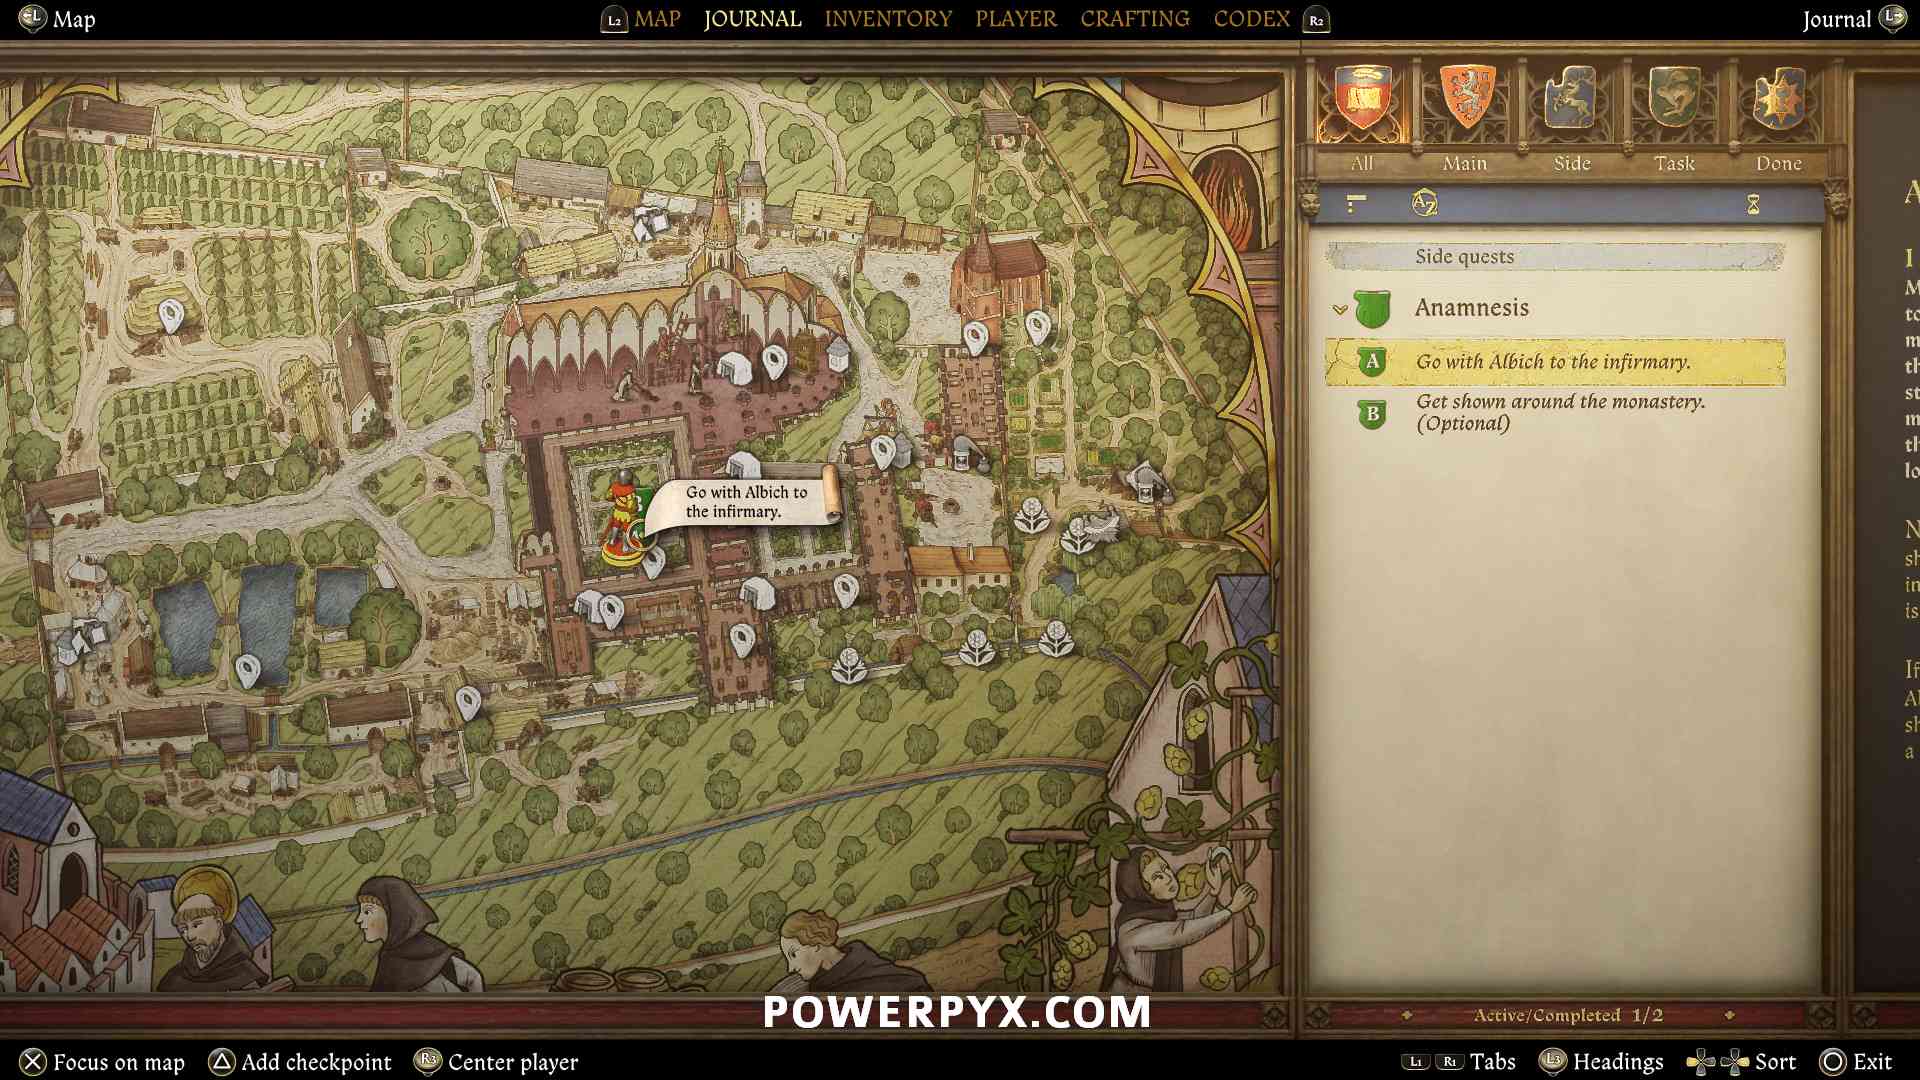
You will get 2 objectives. It’s best to do the optional objective first to get a tour of the monastery as to not miss out on it.
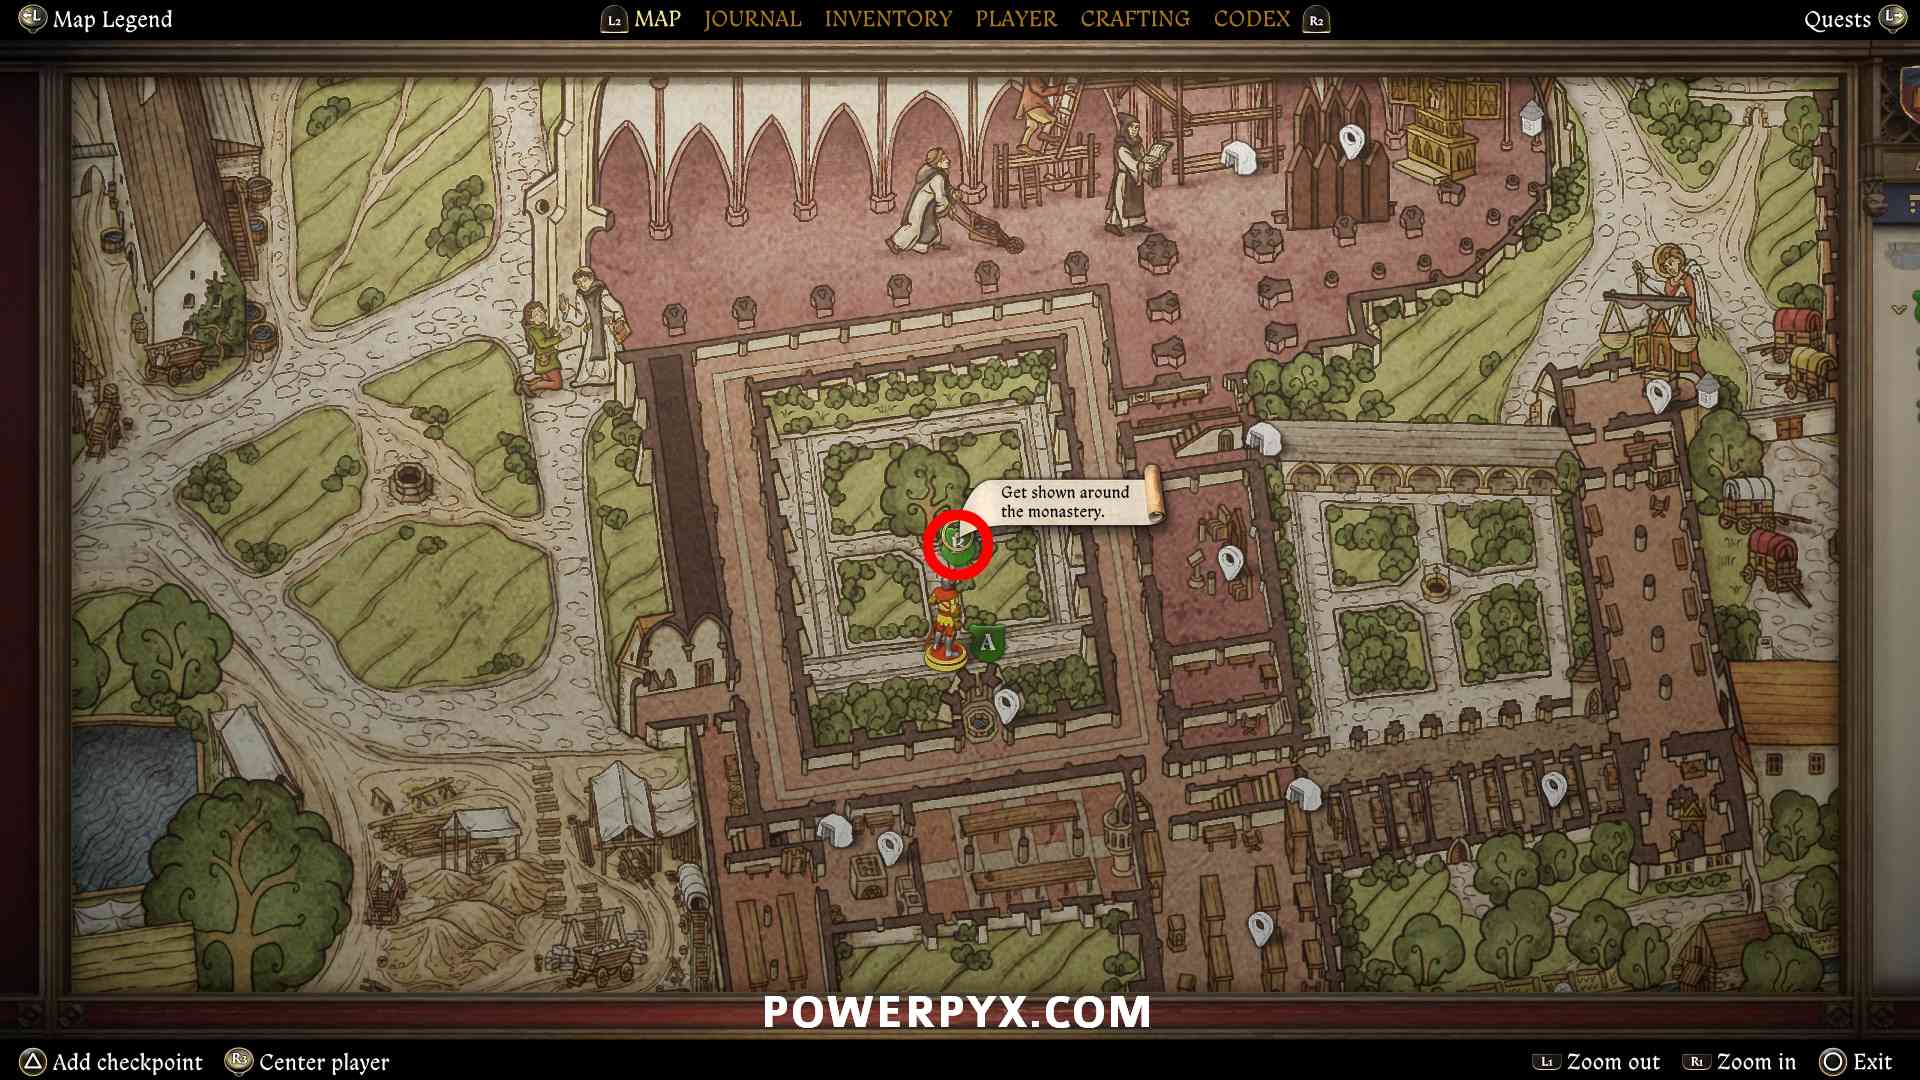
Get shown around the monastery (optional)
Talk to brother Petromil, sitting under the tree in the middle of the courtyard where you start: “Will you show me around the monastery?” > “Yes”.
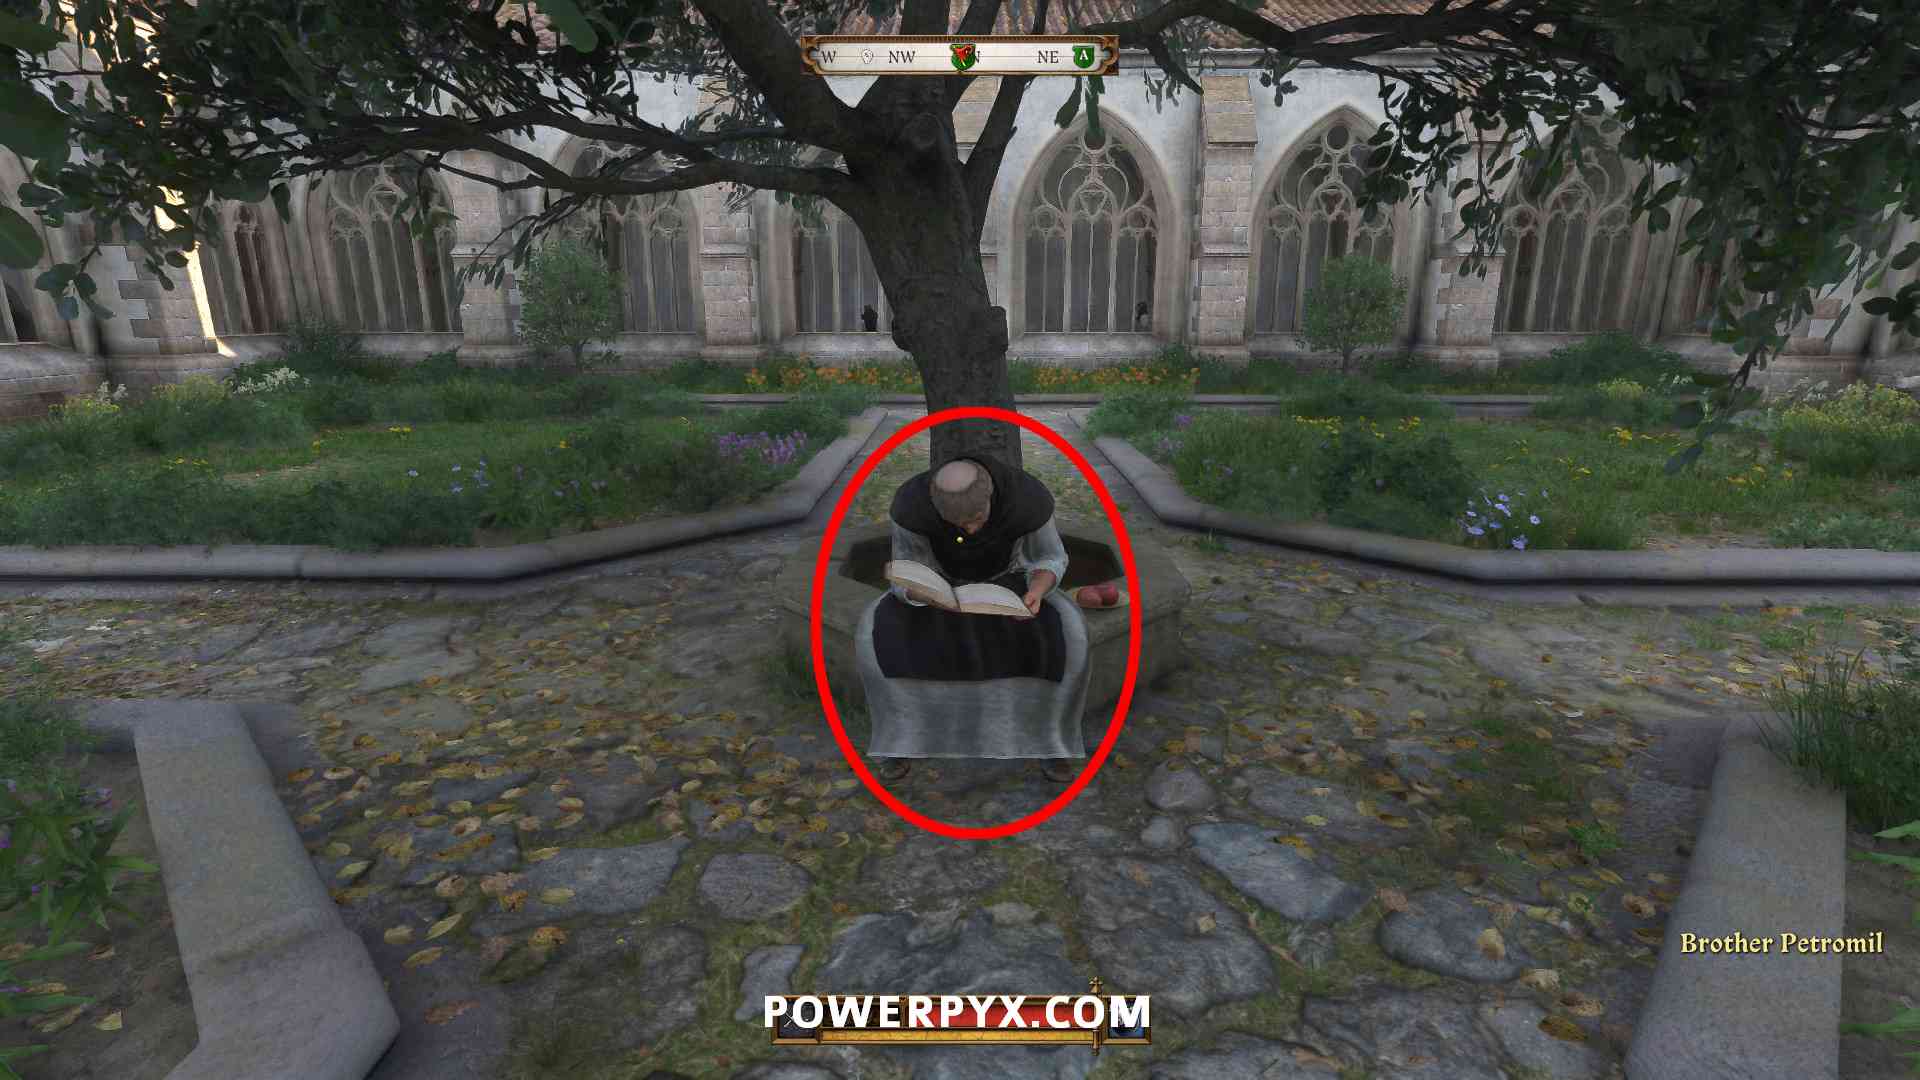
Afterward, follow Petromil and he’ll give you a tour of the monastery grounds. You can press  /
/  / ALT to auto-follow. He will first show you the outside yard, then the kitchen, library, chapter hall, church, chapel, and lastly he leads you to the infirmary where Albich awaits. During the tour you can ask questions, pick whatever dialogues you like.
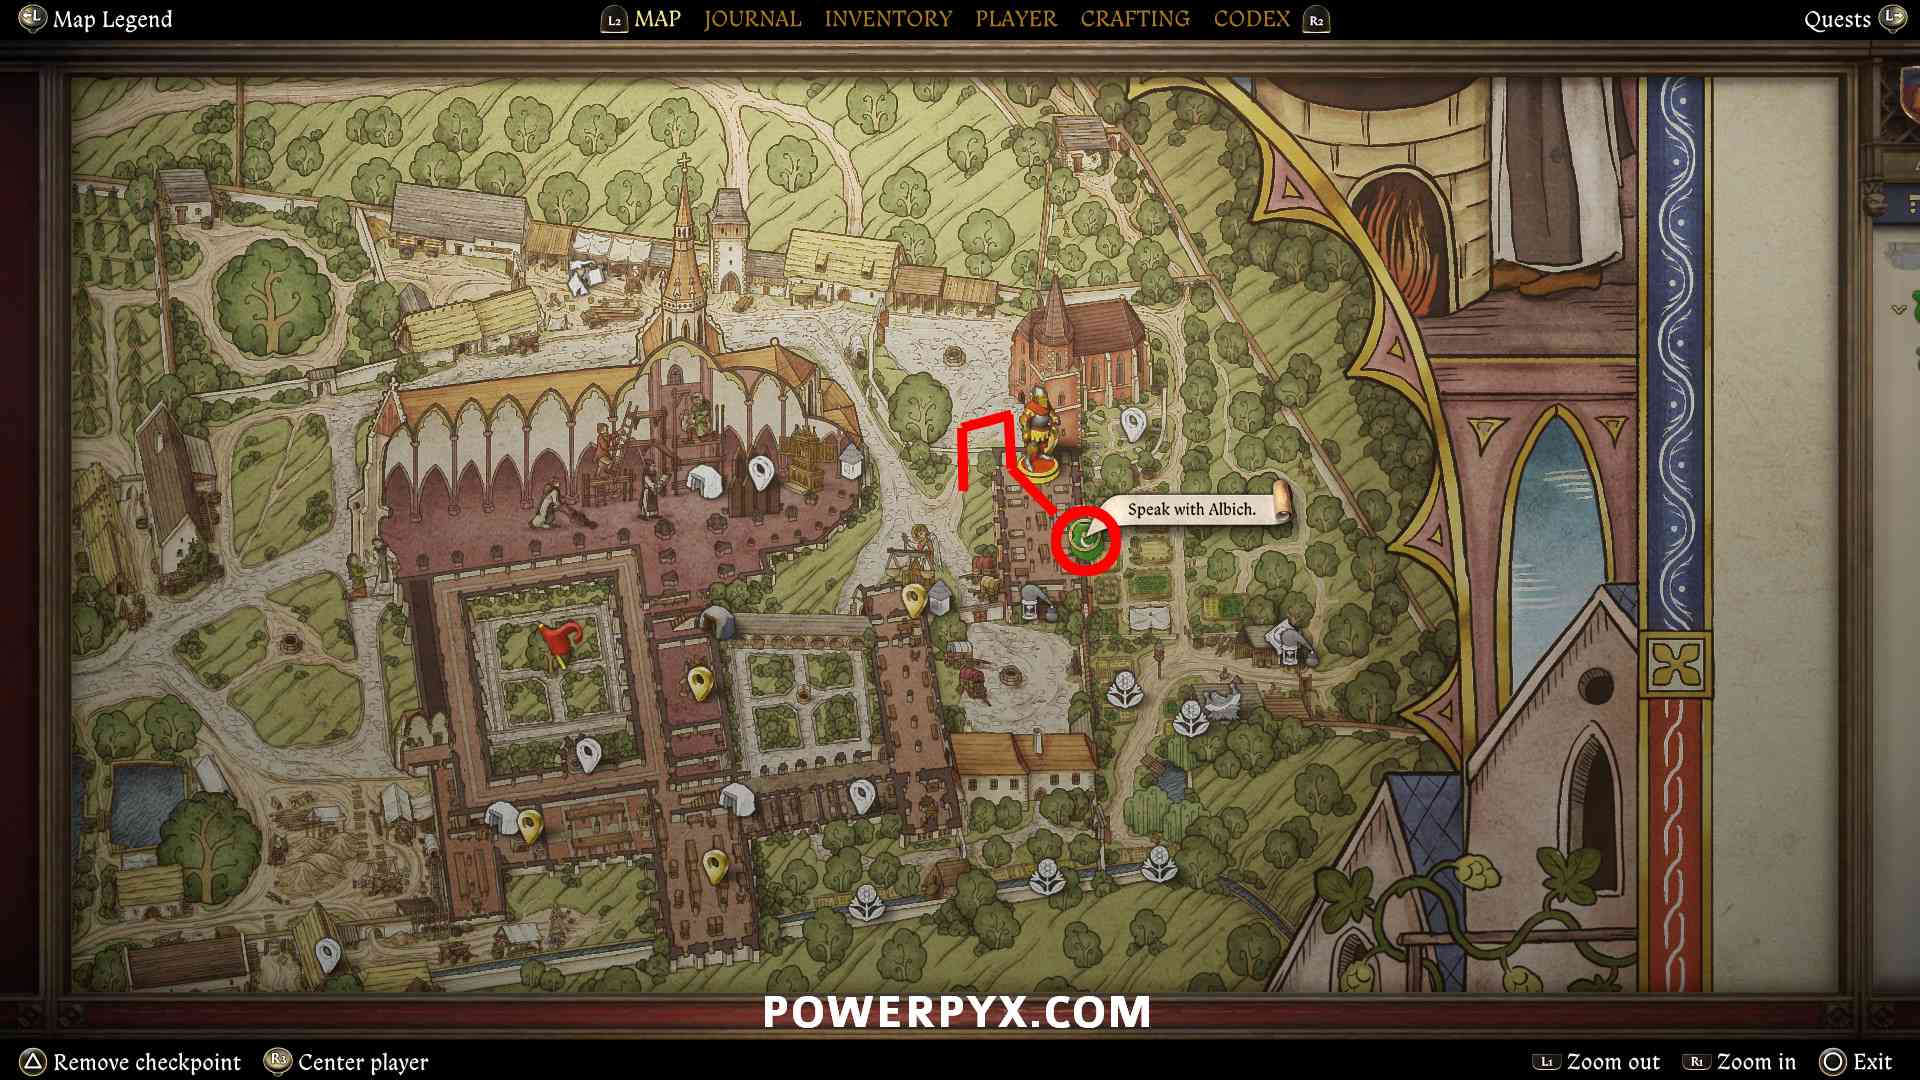
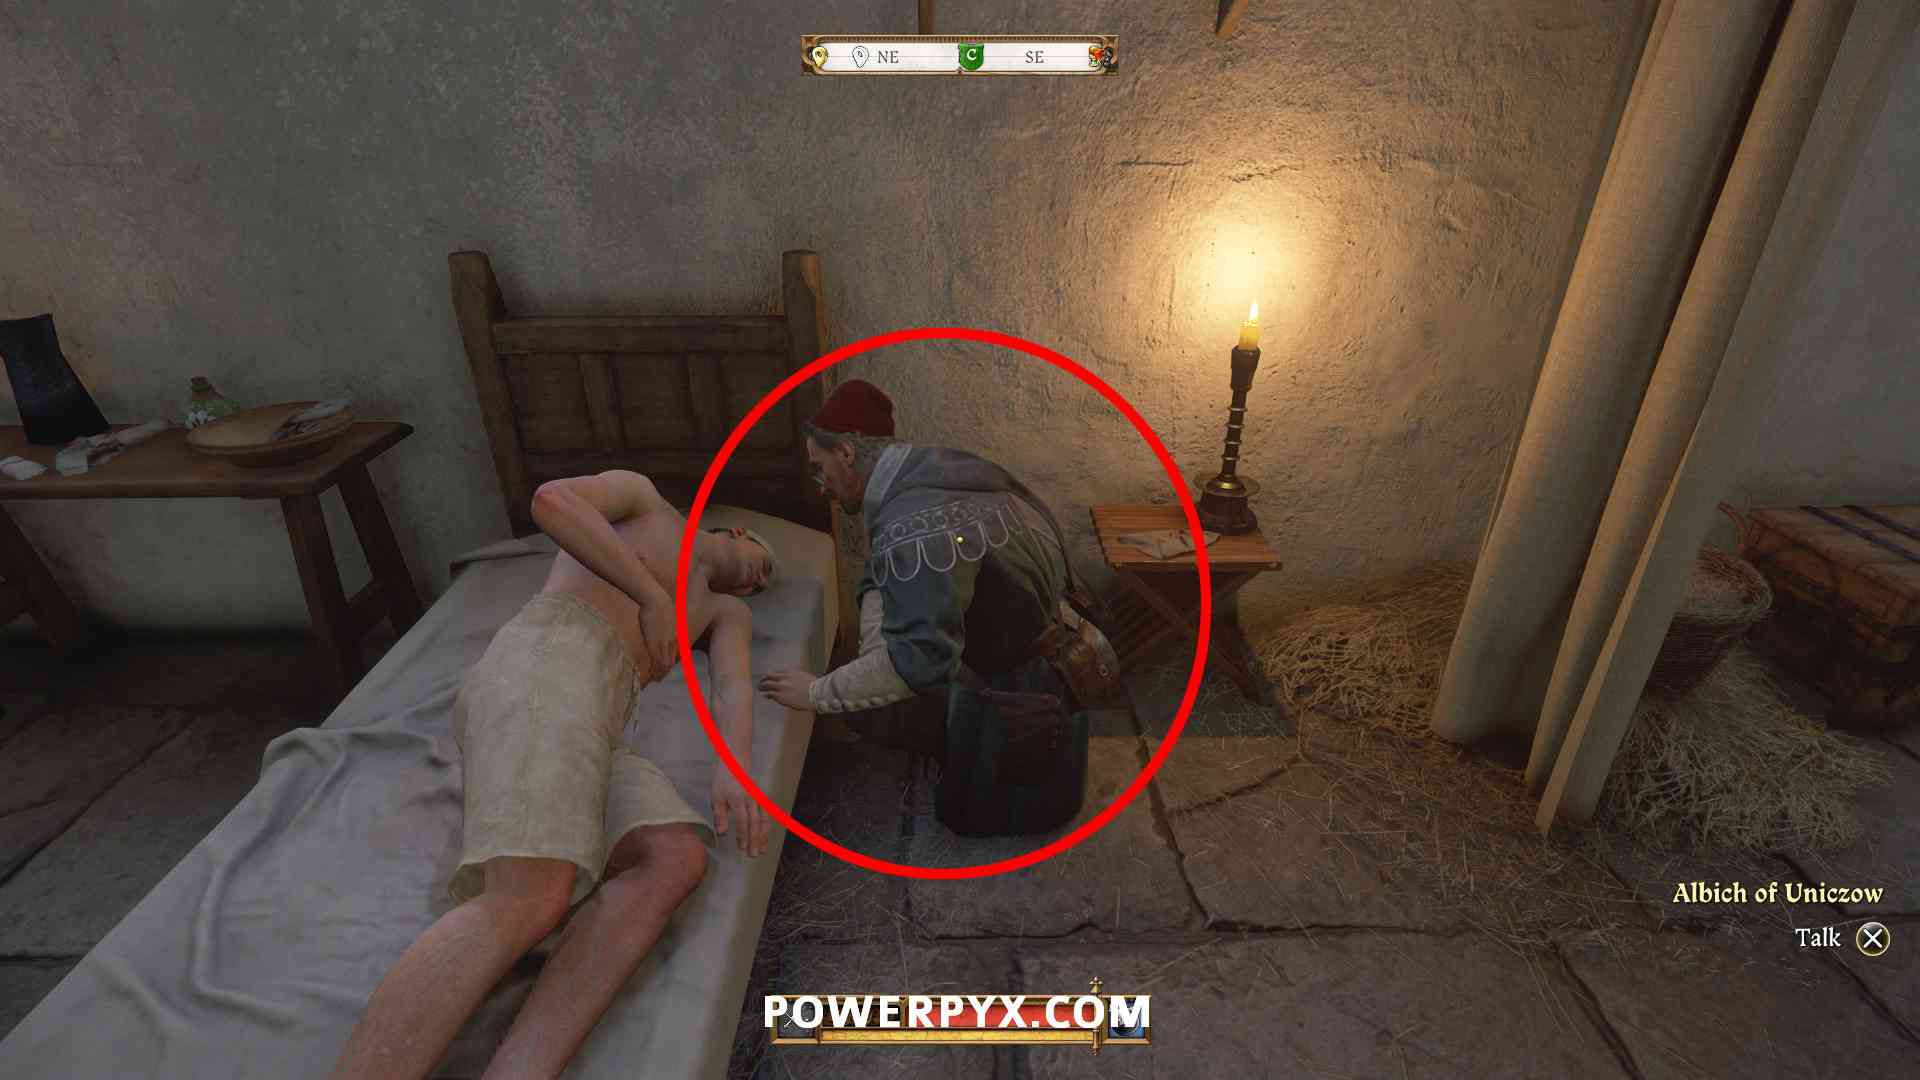
Go with Albich to the infirmary / Speak with Albich
Enter the infirmary in the north-east corner of the monastery. It’s the red church-like building. Go into the room where the beds with sick people are and talk to Albich. If you did Petromil’s tour, Albich will already wait there.
The dialogue includes two optional skill checks that require very high Scholarship. If you succeed they give reputation, if you fail you lose reputation. At 24 Scholarship both skill checks always failed for me so requires a higher stat than that.
If you don’t have very high Scholarship the best picks to not lose reputation are: “Hard to say” > “(Nod)” > “(Say Nothing)” > “Albich’s Protector” > “What did you find out?” > “(Say Nothing)” > “How can I help?” > exhaust all questions.
During the conversation you meet the royal physician of king Sigismund, called Zacharias of Prachatitz, who is a friend and former student of Albich. He too has been investigating the illness but the Abbot wasn’t convinced by his assessment. Henry is tasked with interviewing some people of interest.
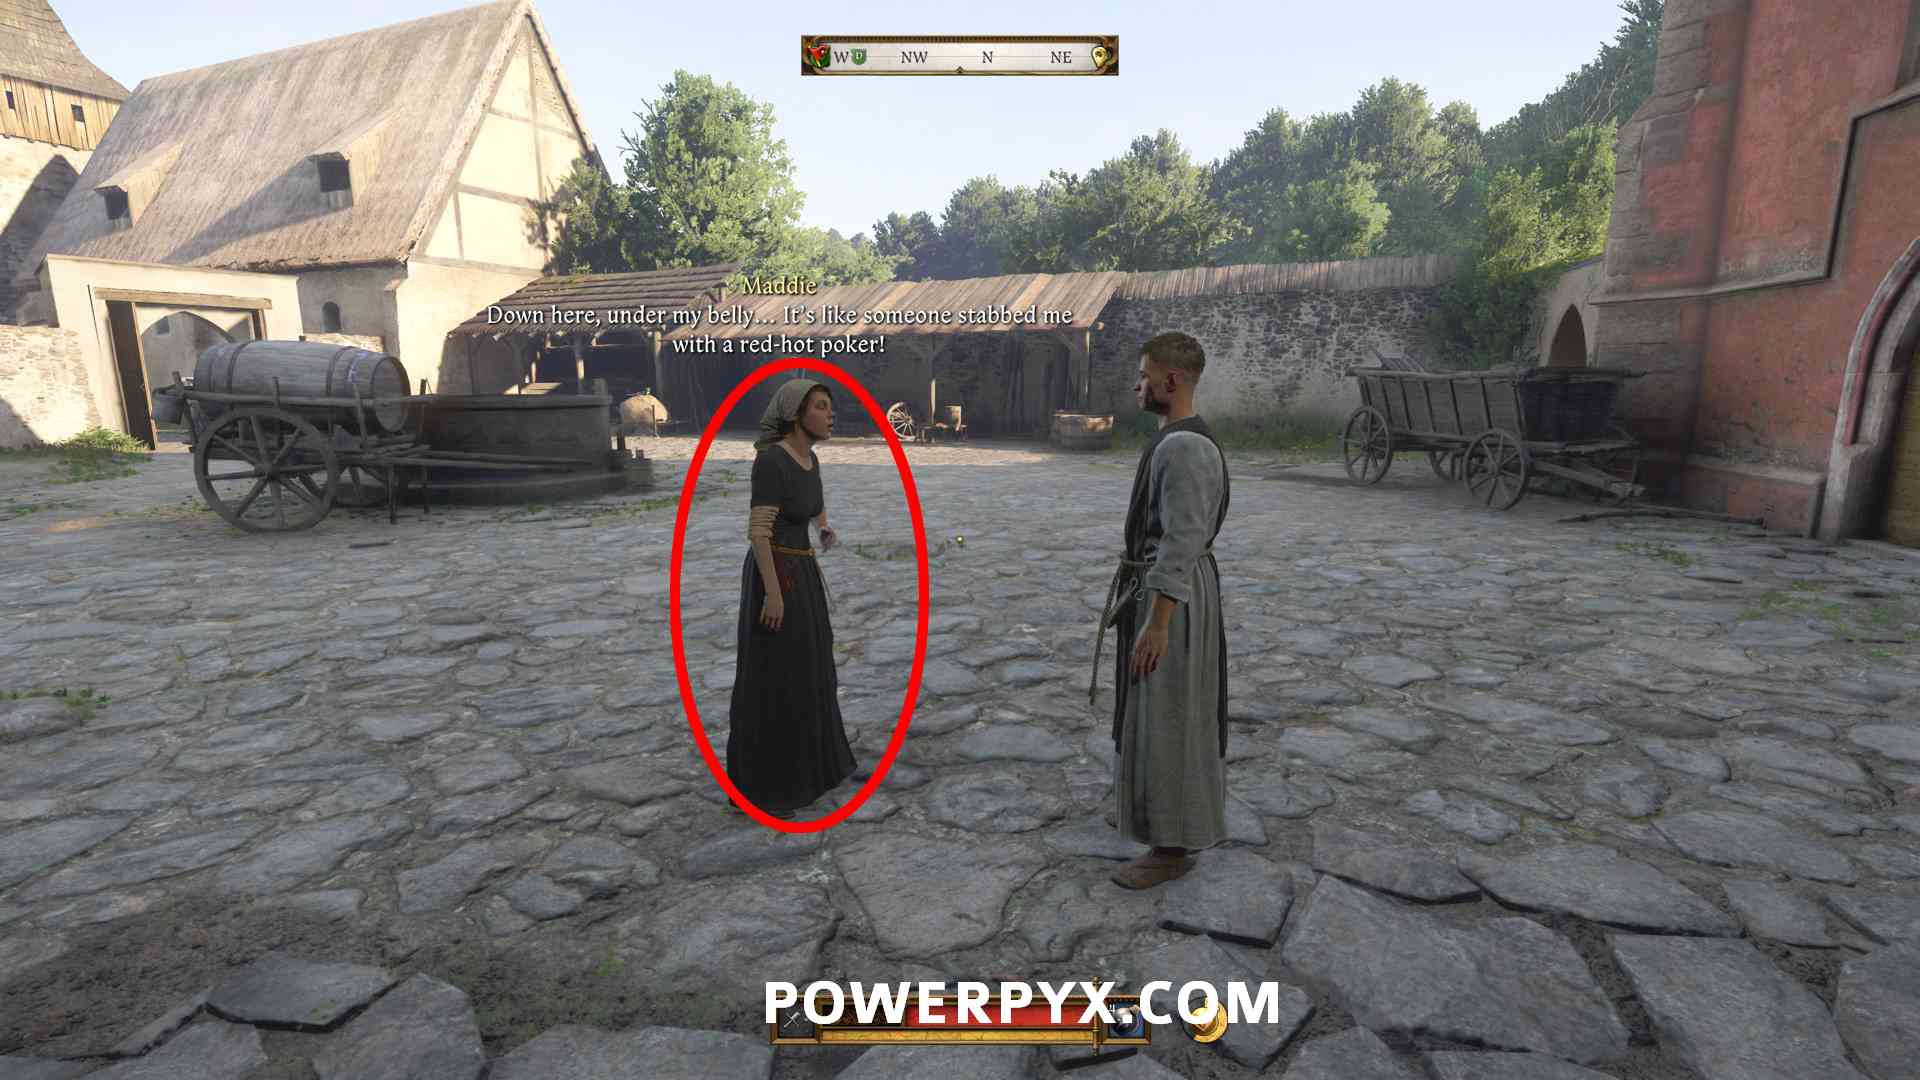
Missable Side Task: Maddening Pain (counts for  Do Good to All People):
Immediately after talking to Albich, Maddie will appear outside the infirmary and complains about stomach pain. Talk to her right away to get this task. If you ignore her, she will walk away and the task is easily missed.
Side Tasks to do now:
» Maddening Pain
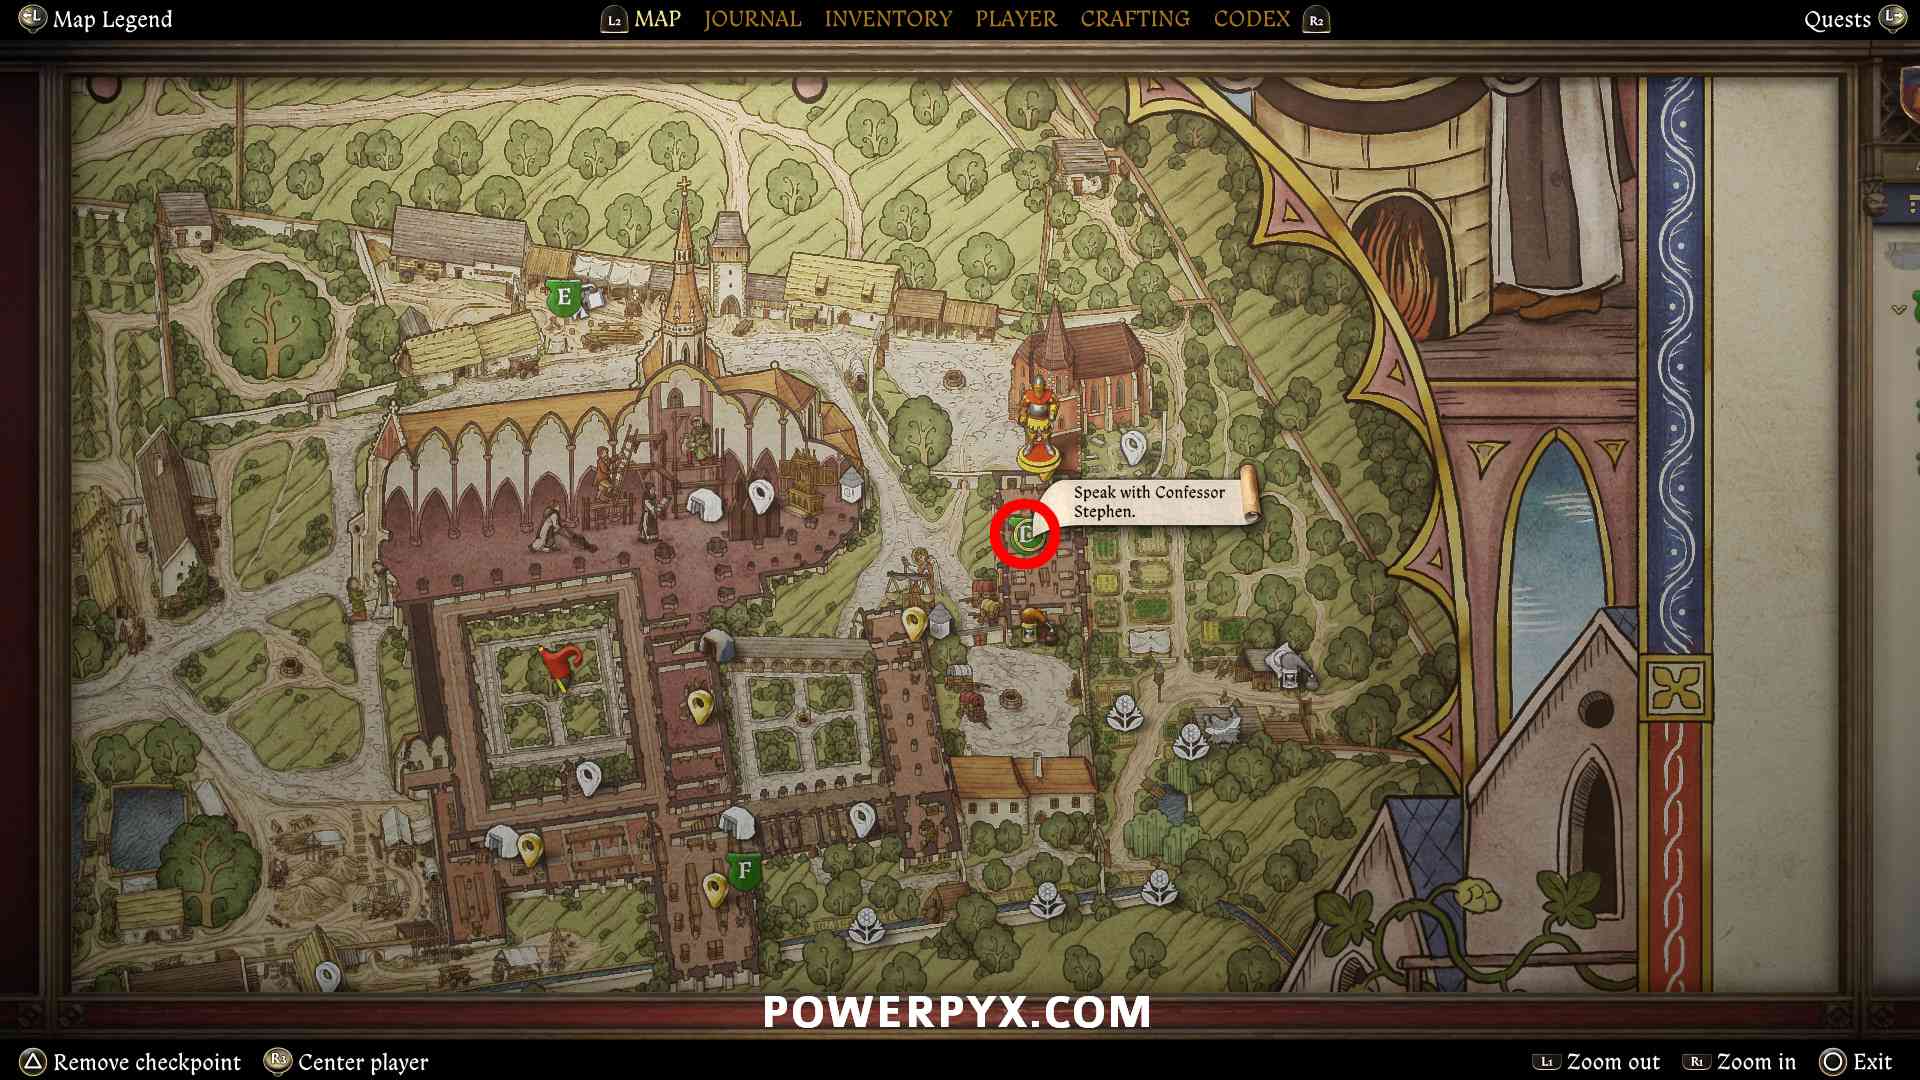
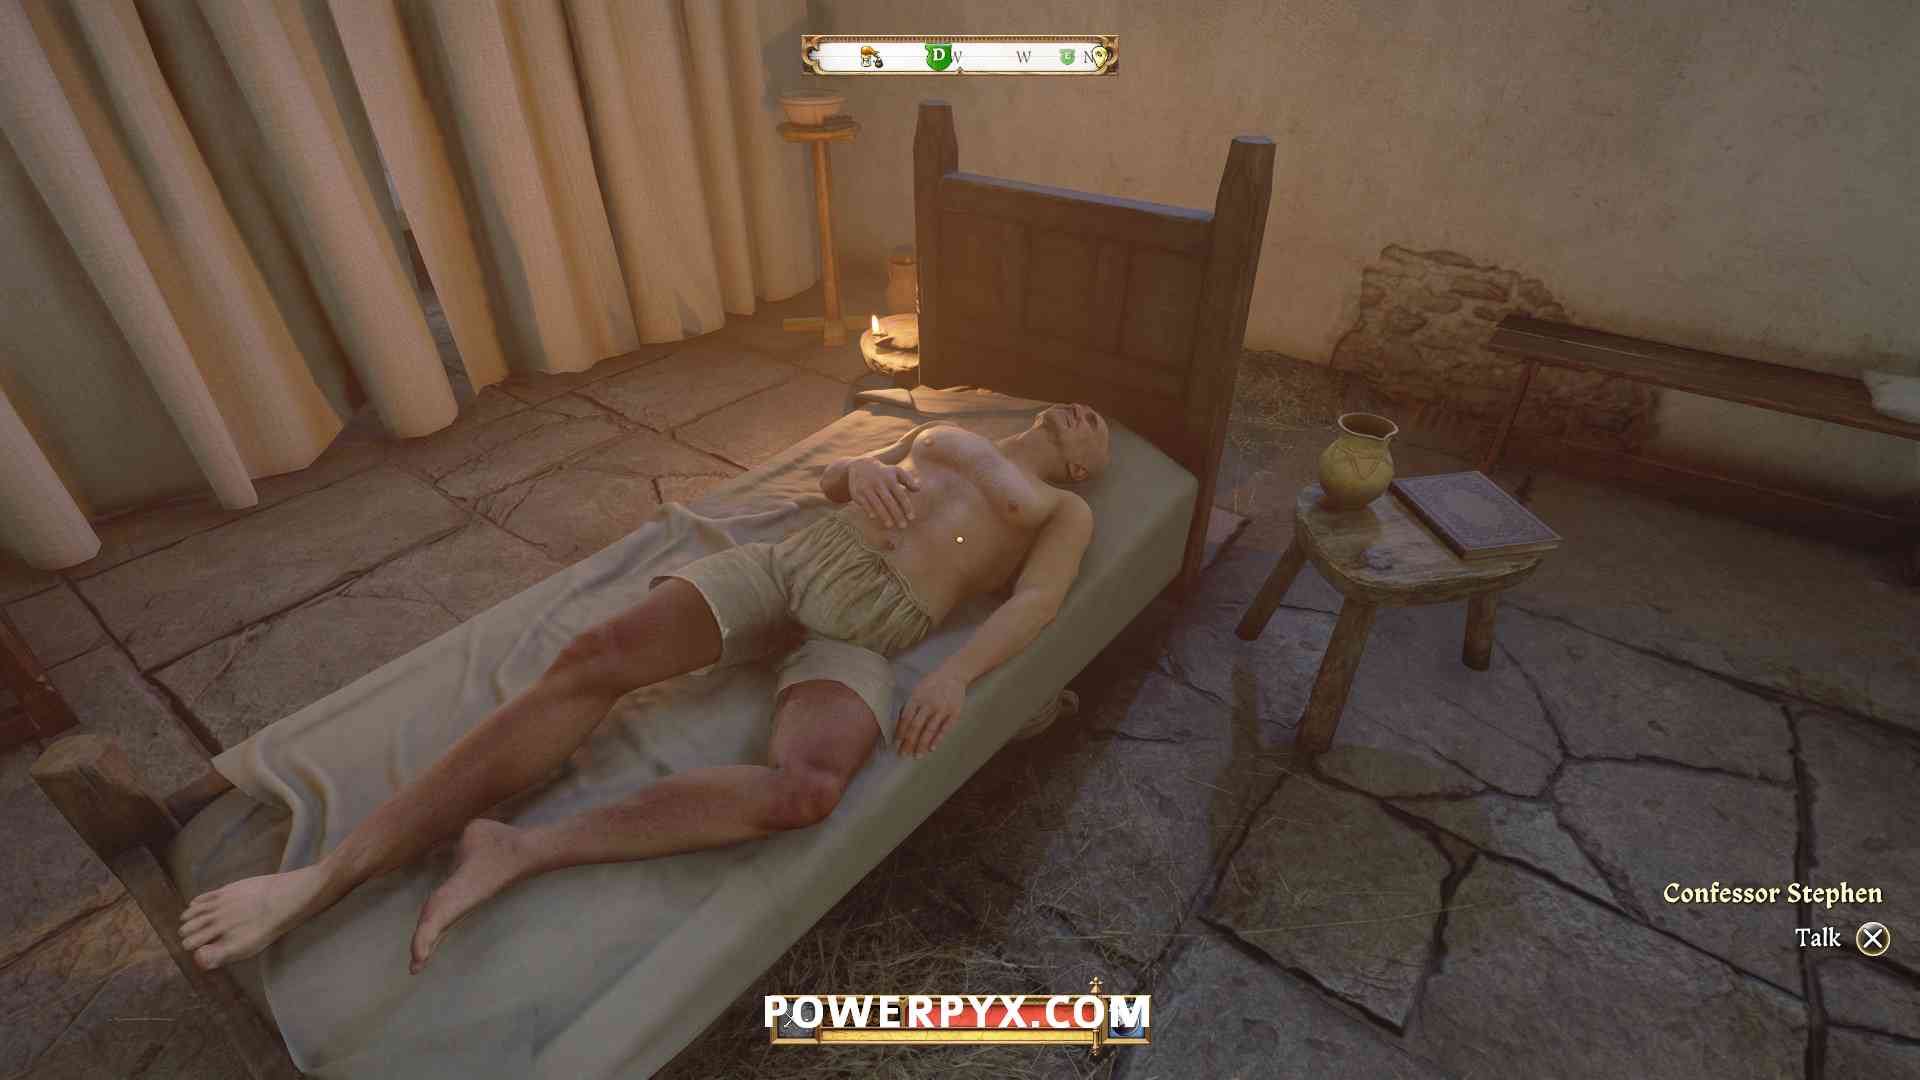
Speak with Confessor Stephen
Note: To get info from Stephen you need to pass at least 1 of 3 skill checks. Put on a high Charisma outfit before talking and make an exit-save. If you fail all skill checks you won’t get his key nor the follow-up objective to search his room. If you can’t win any skillchecks proceed to the other objectives.
Stephen is the sick man on the bed in front of you after the conversation in the infirmary.
He too has a very hard Scholarship skill check “We’re trying to find the source of the illness” (failed for me at 24 Scholarship). If you fail it, you can pick between two other options: “This isn’t just about you” (failed for me at 25 Charisma) / “You don’t have to break the seal of confession” (succeeds at 23 Coercion).
The Coercion option has the lowest skill point requirement and is easiest to succeed. Then Stephen tells you to search his cell for clues and gives you his cell key.
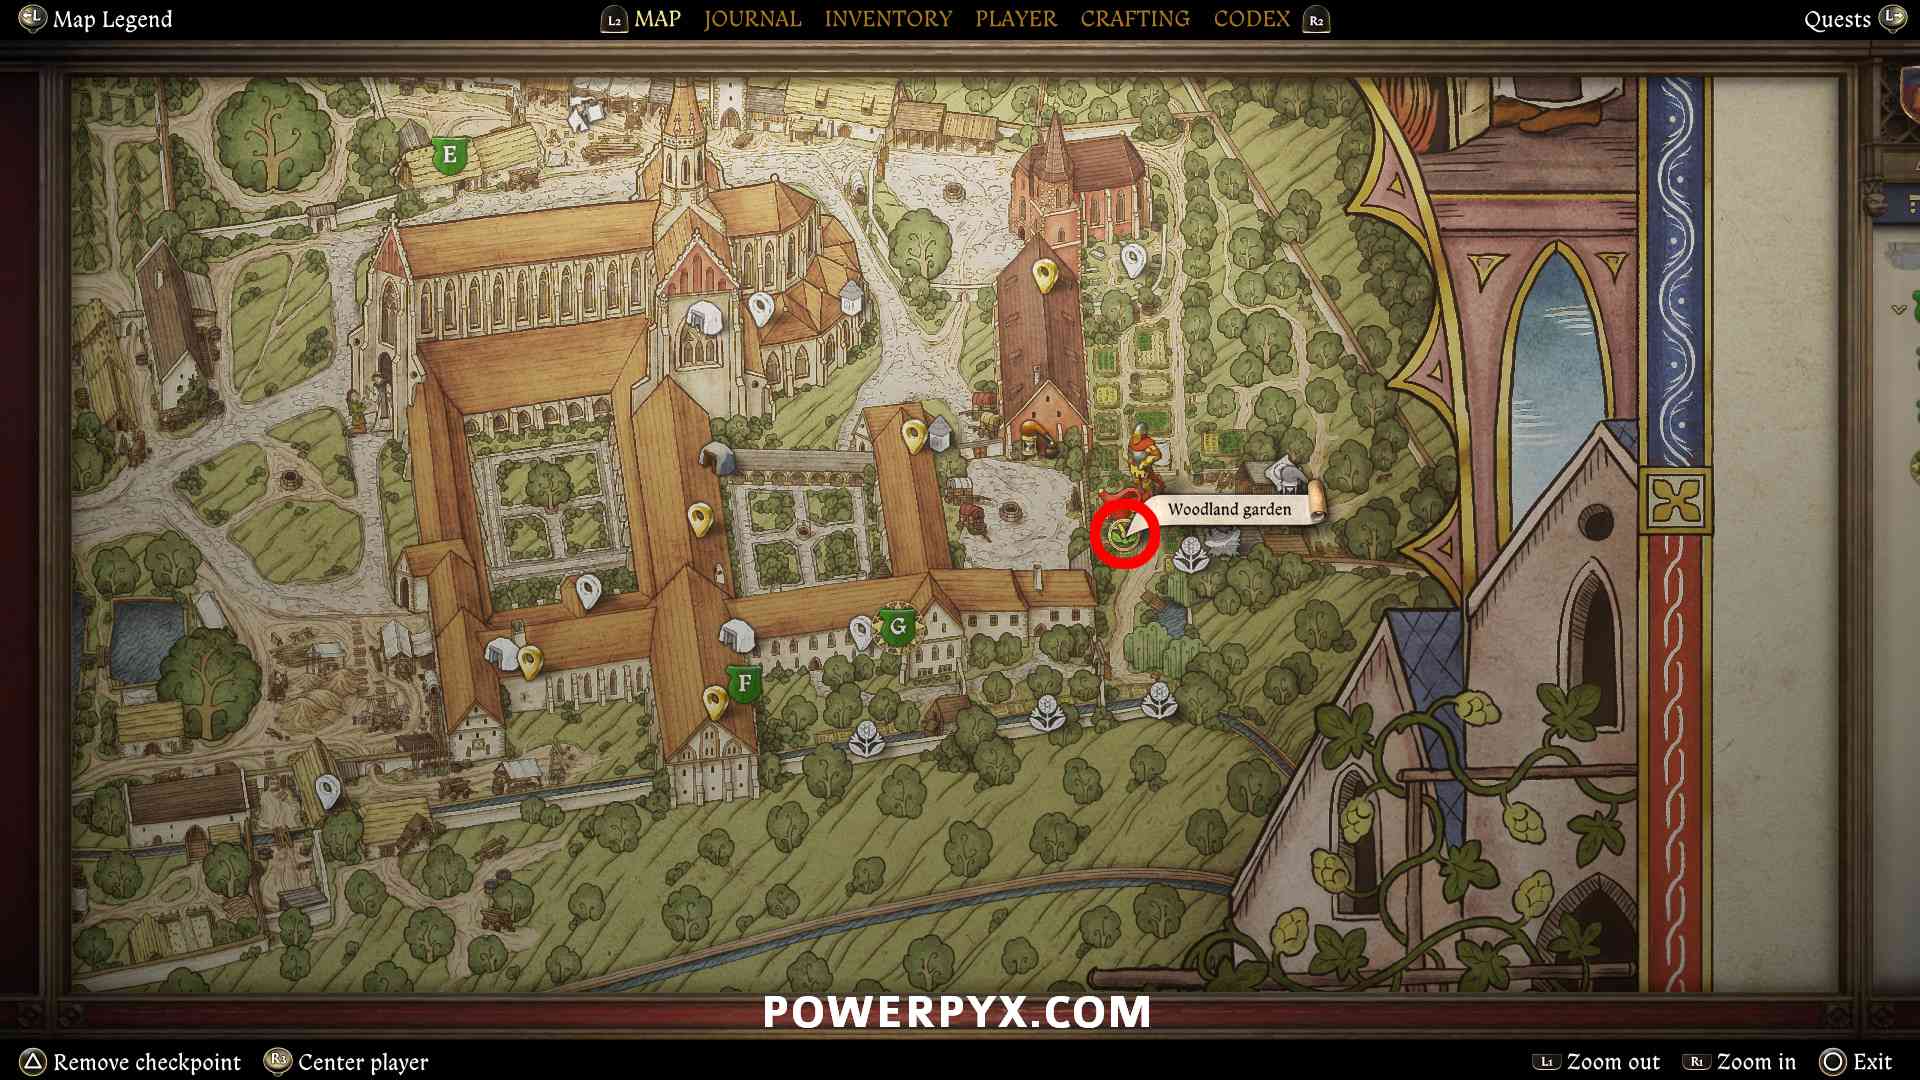
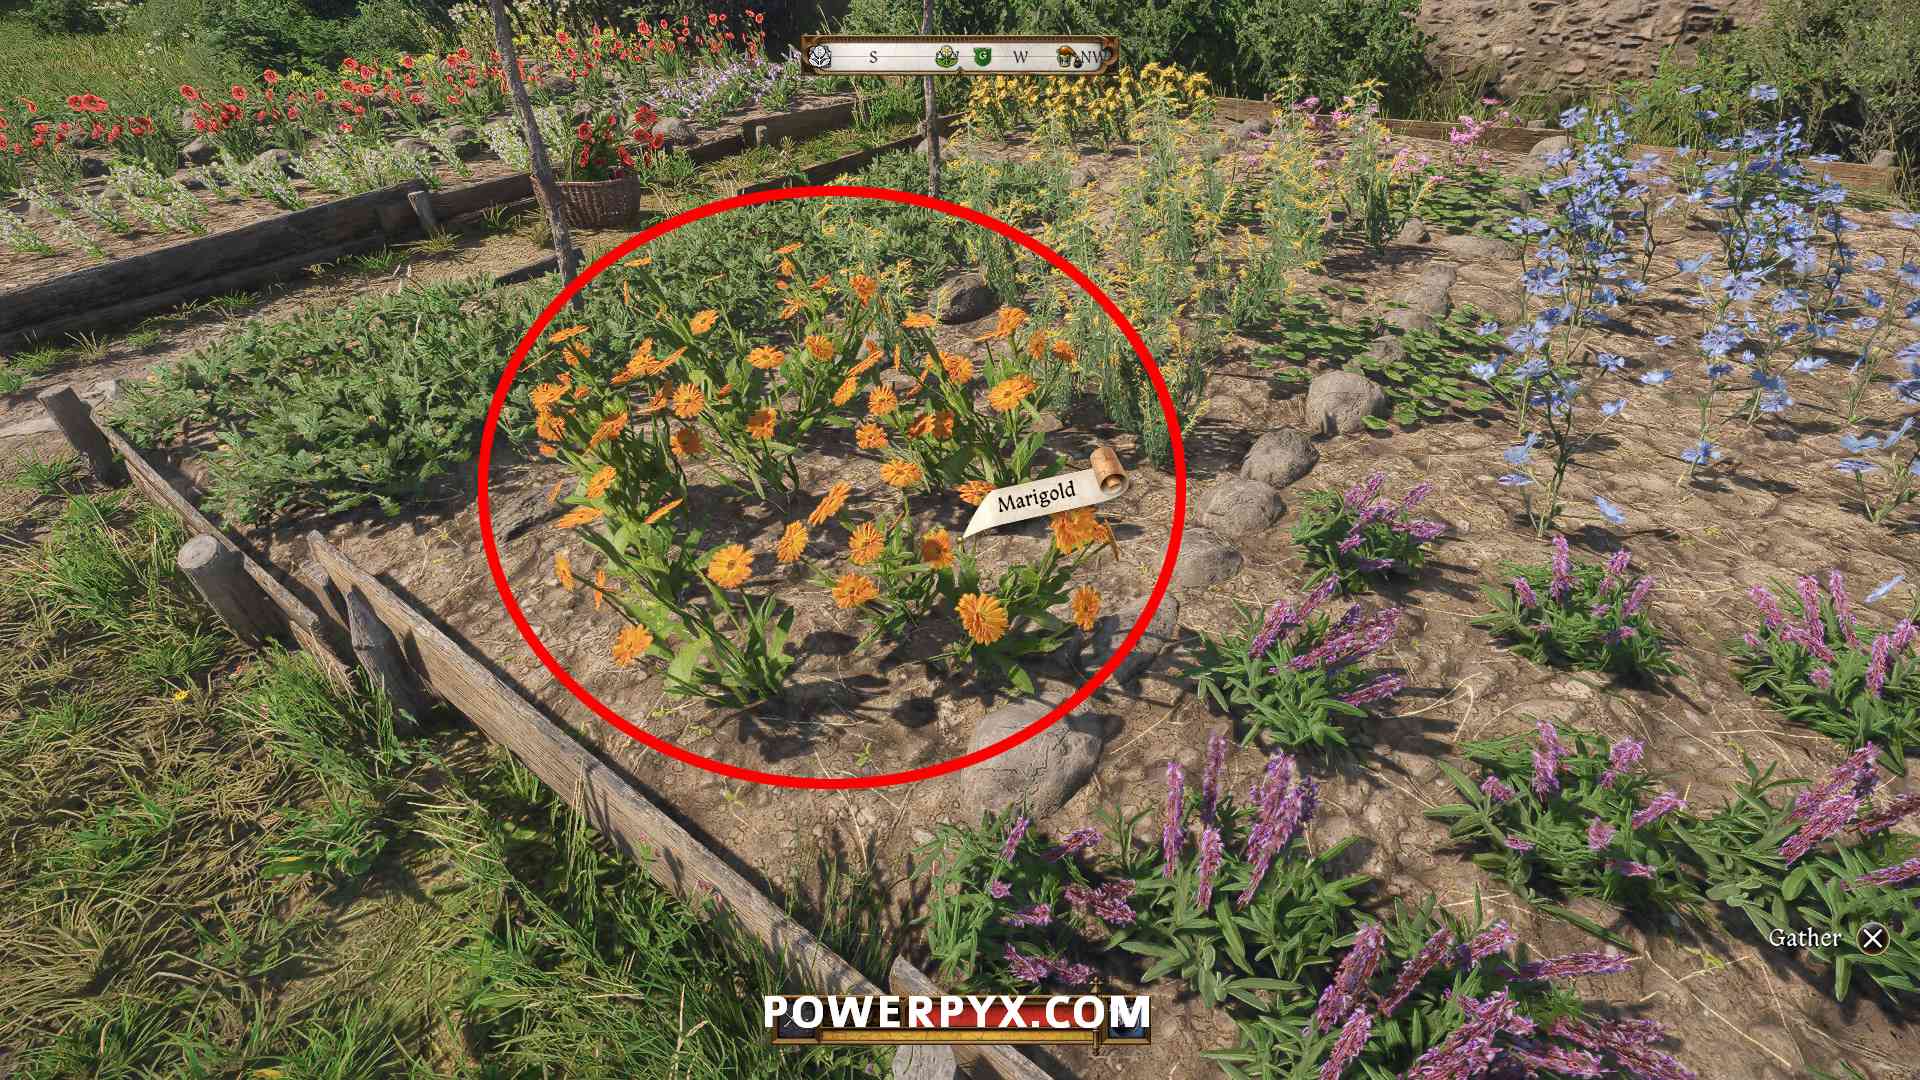
Before leaving, he requests that you bring him flowers. If you refuse you will lose some reputation. The best option is “What do you want flowers for?” > “I’ll bring you some”.
You can find flowers in the gardens south-east of the infirmary. Pick any 5 flowers and bring them back to Stephen (he’s on the 2nd last bed on the right side of the infirmary). You don’t gain any reward, however.
Search Confessor Stephen’s cell (only if you succeeded his skill check to get cell key)
If Stephen gave you his key, this objective will get marked on the map for you. His cell is accessible from the central courtyard, in the south-east corner of it.
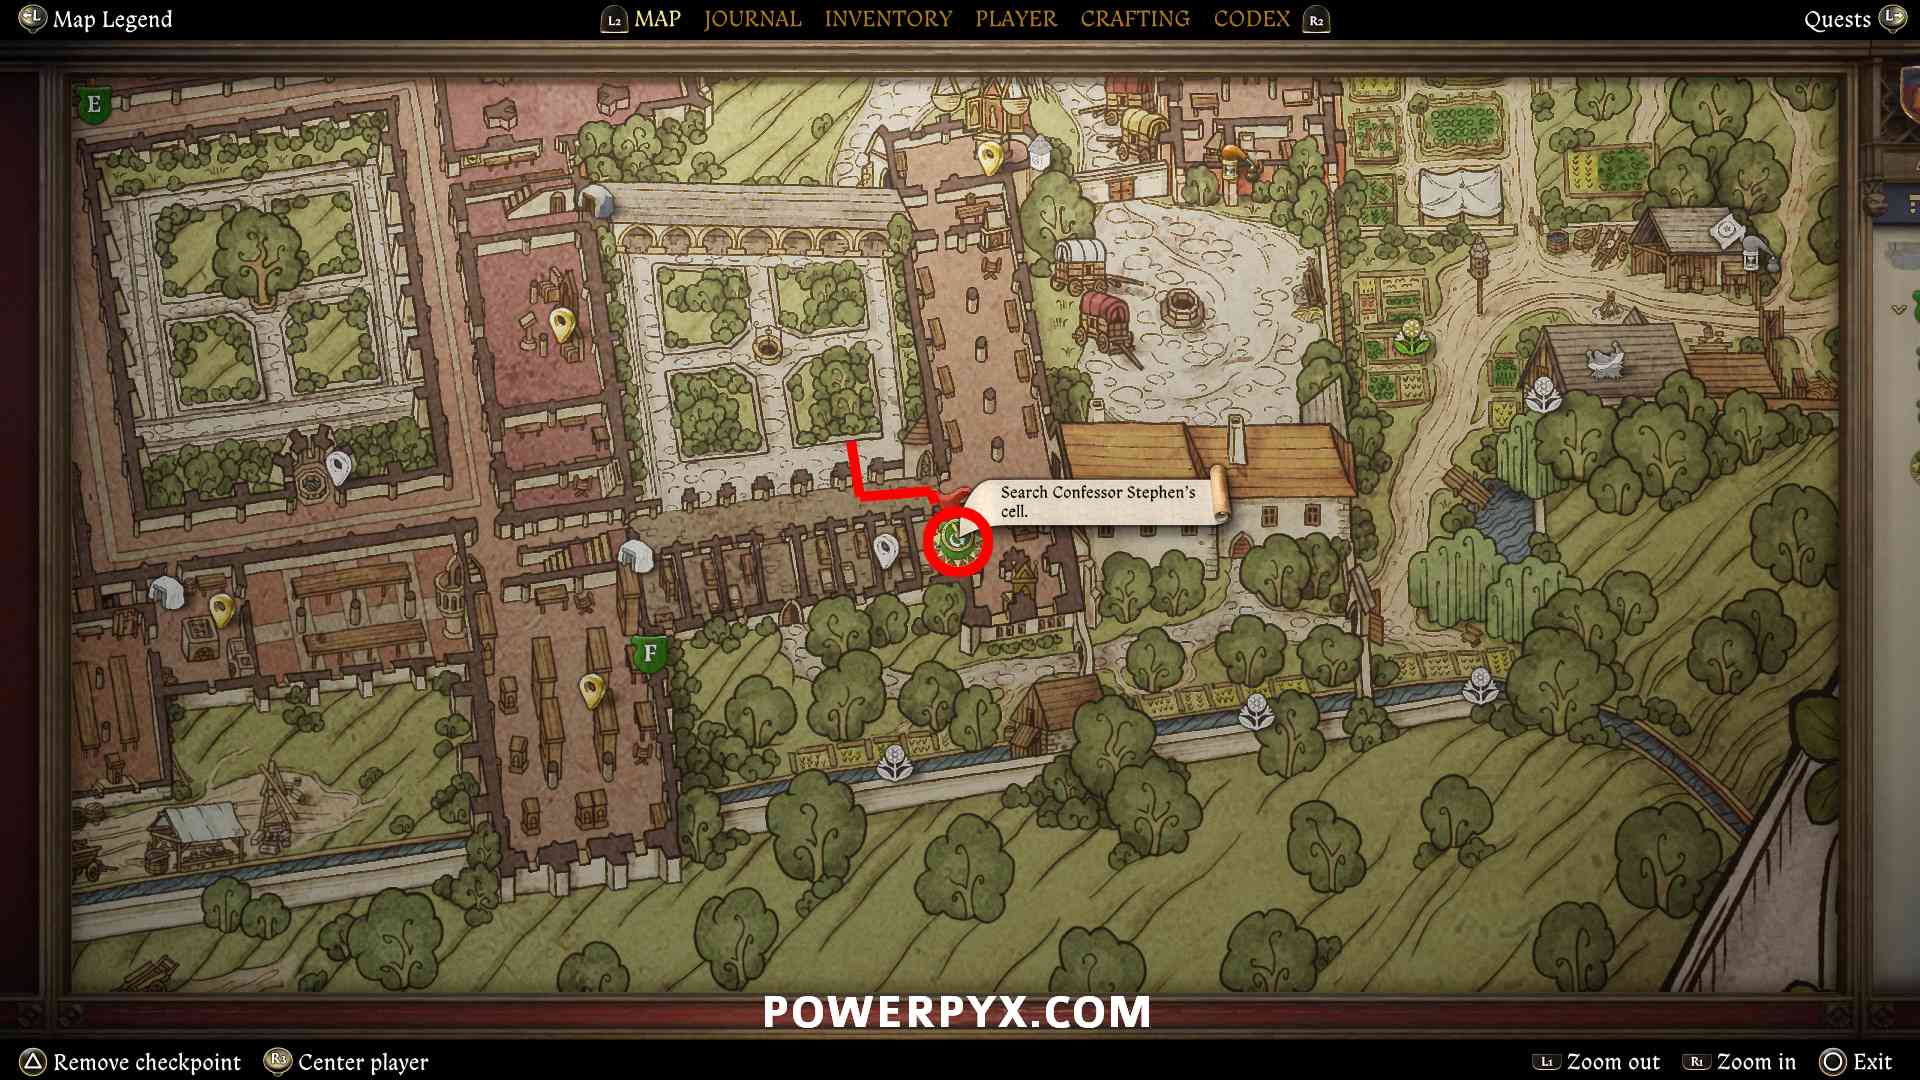
Open his bedside chest to find 3 valuables. This completes the objective.
Optionally, you can also examine the shelf on the left, the flowers on the shelf, and the flowers in the window.
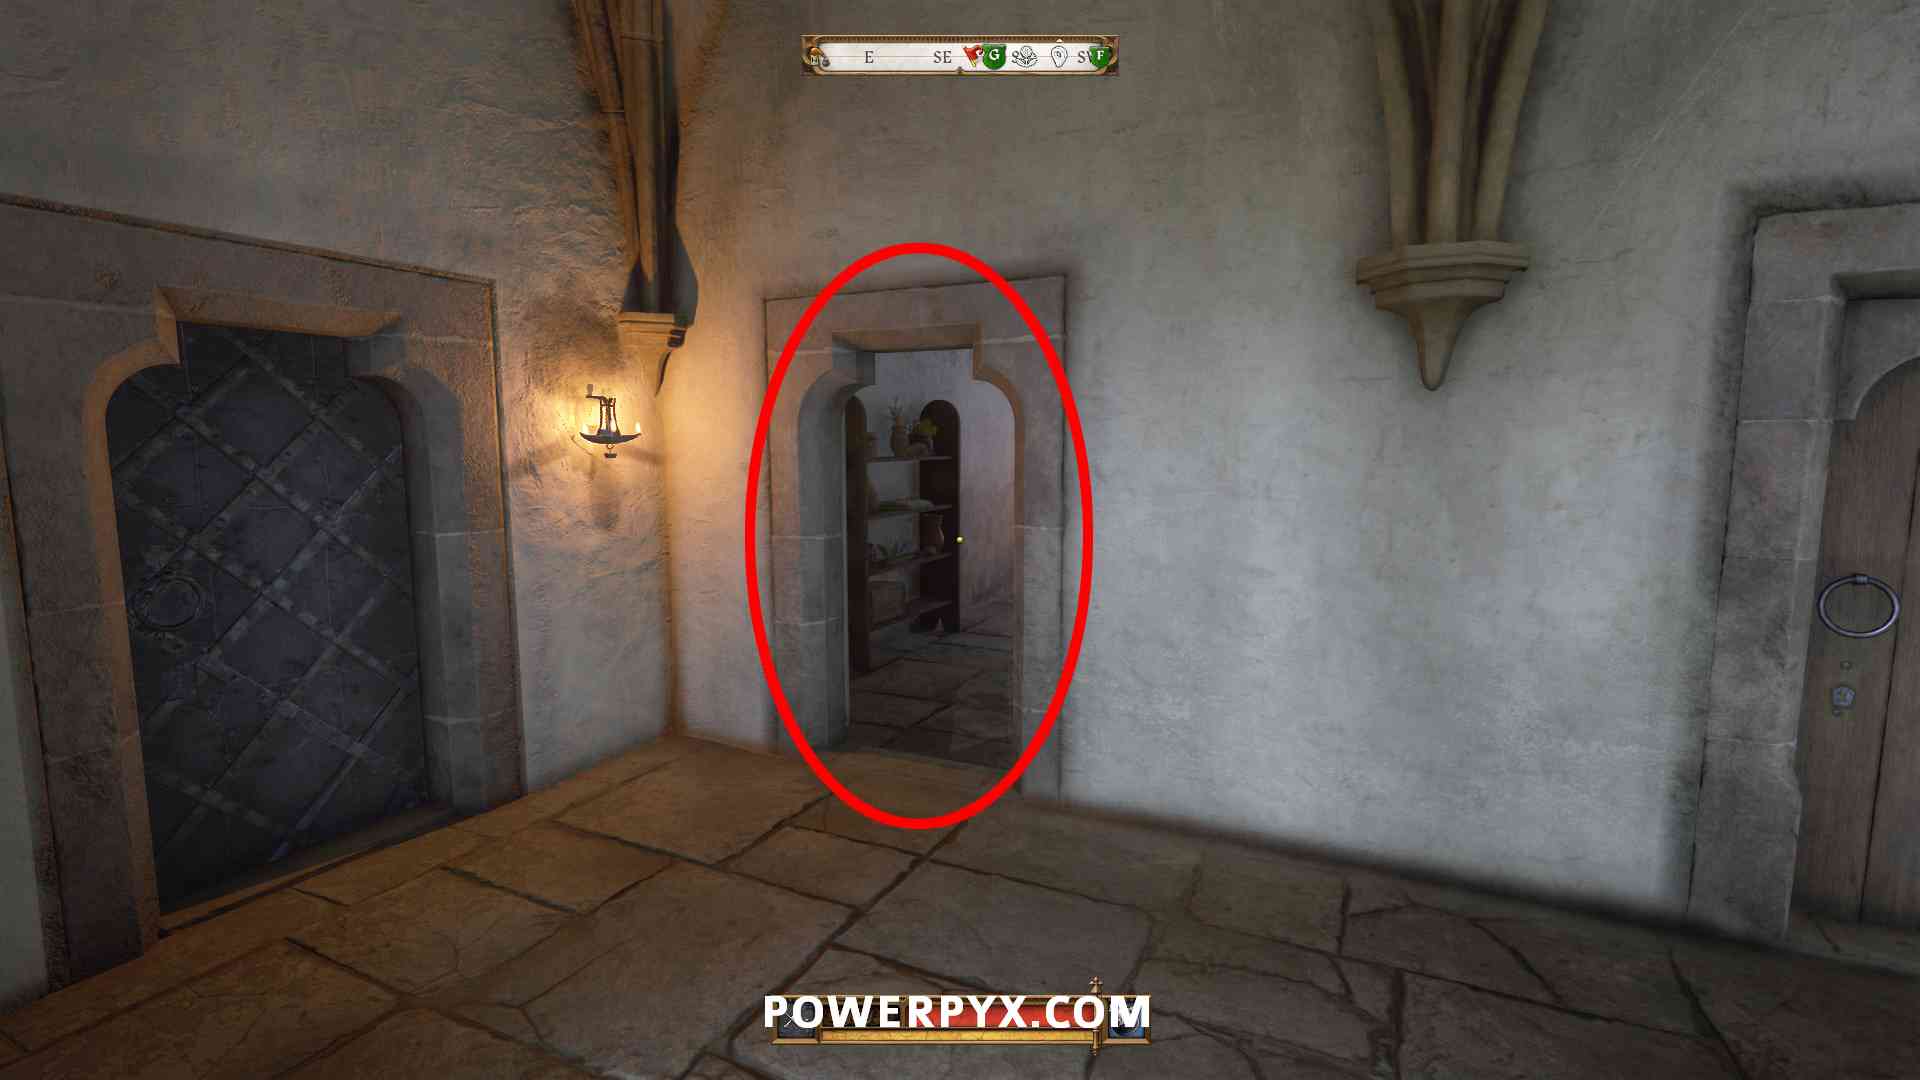
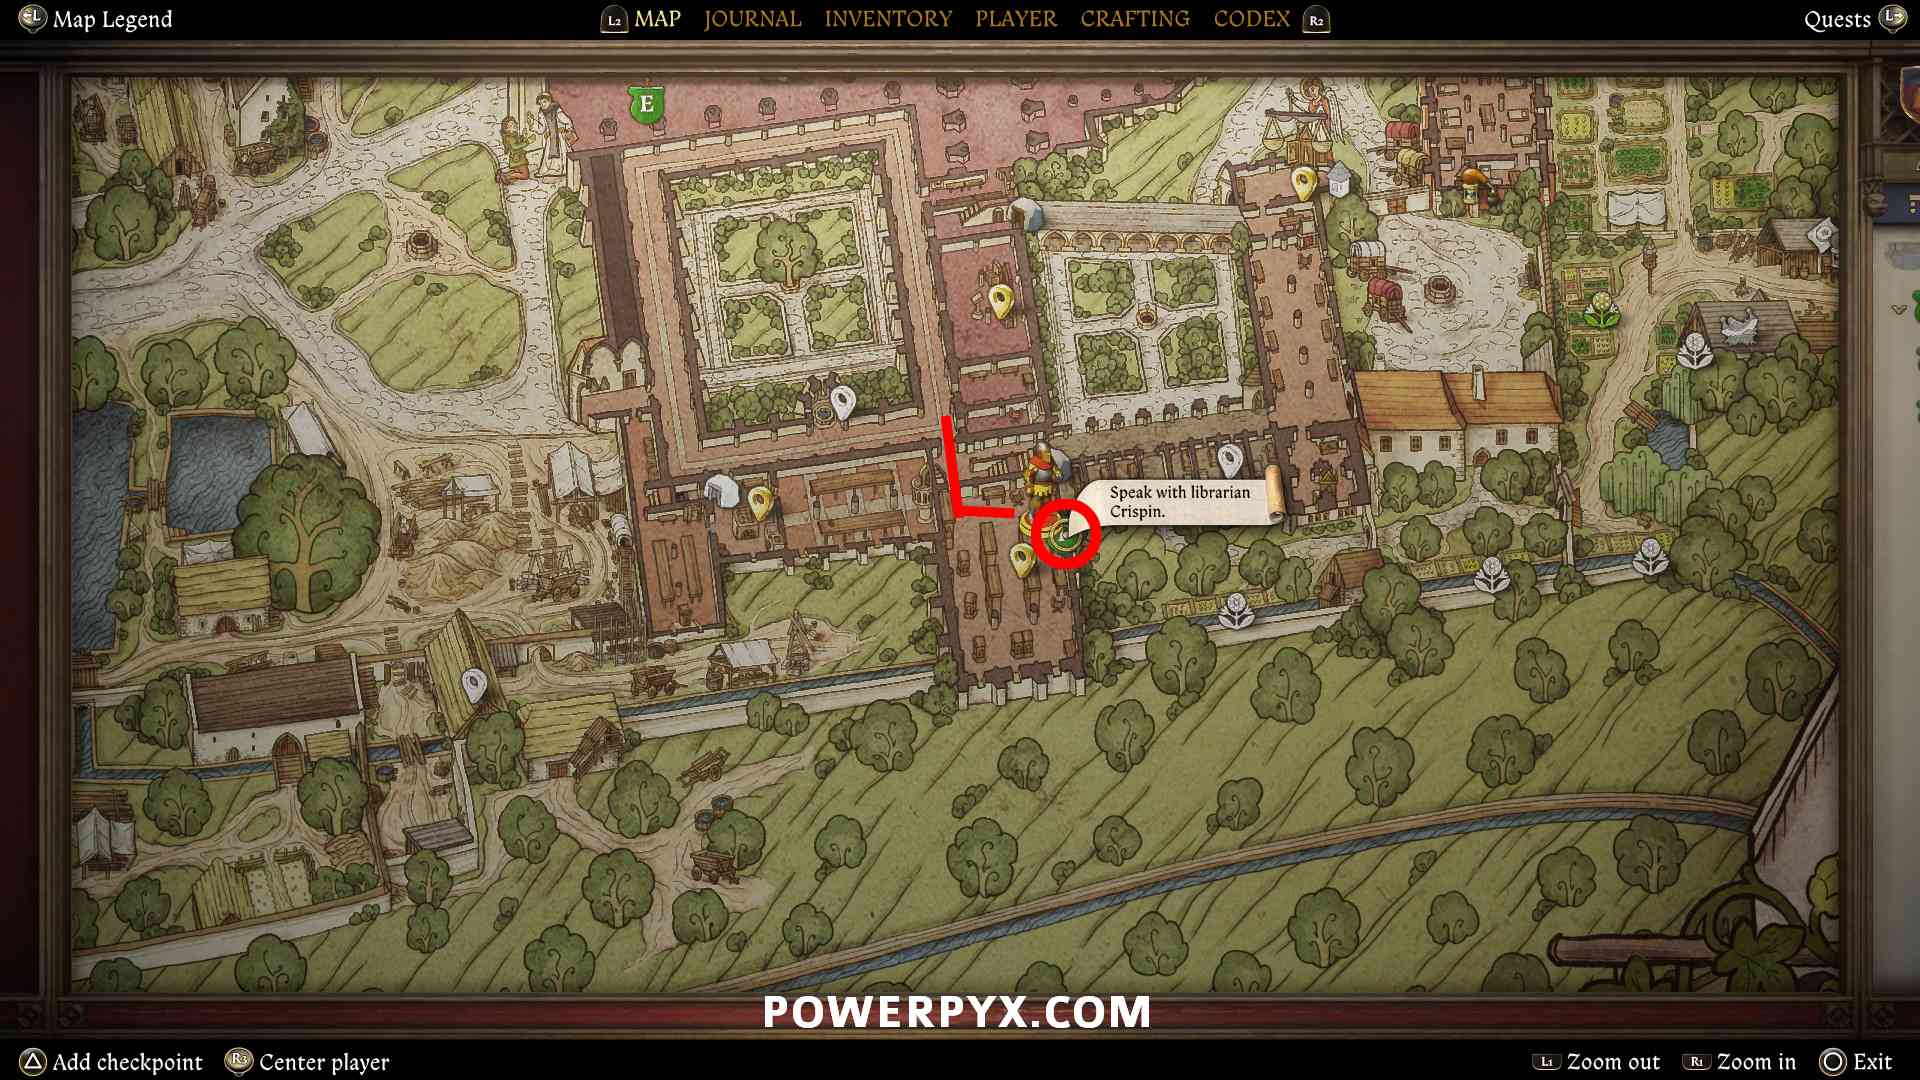
Speak with librarian Crispin
Enter the library through the big door in the hallway. Talk to Librarian Crispin inside, he’ll be marked.
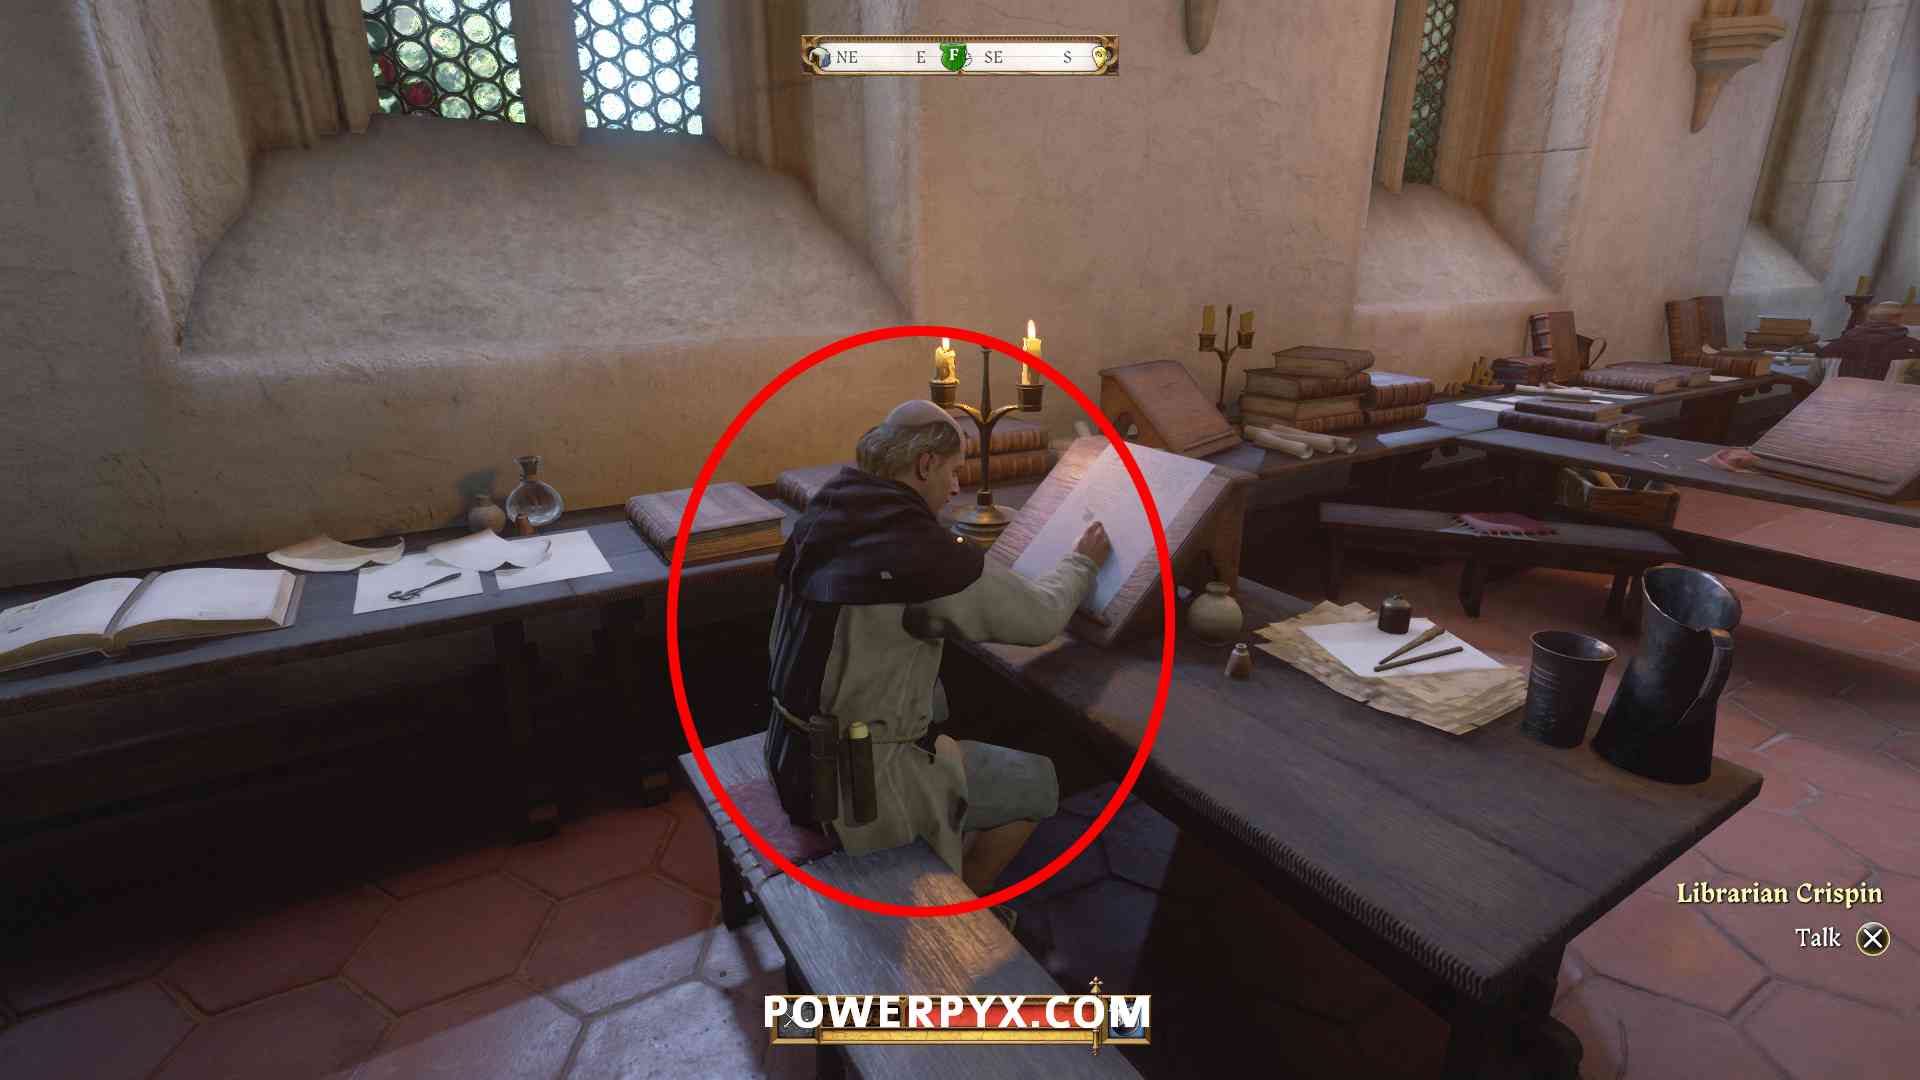
Simply exhaust all questions, there are no skill checks. This triggers two new objectives “Check Jaroslav’s belongings” & “Speak with monk Celestine”.
Cat Interaction (counts towards Feline Affection): In the back left corner of the library, walk near the last bookshelf until you see an / / ALT prompt “Kitty kitty…”. A cat should appear on top of the bookshelf. If it doesn’t appear, make an exit save and reboot the game, sometimes it glitches out. Remember to check this spot after every quest, you must interact with the cat in this place multiple times throughout the DLC until the trophy unlocks. Sometimes it spawns and sometimes not, it’s a bit random.


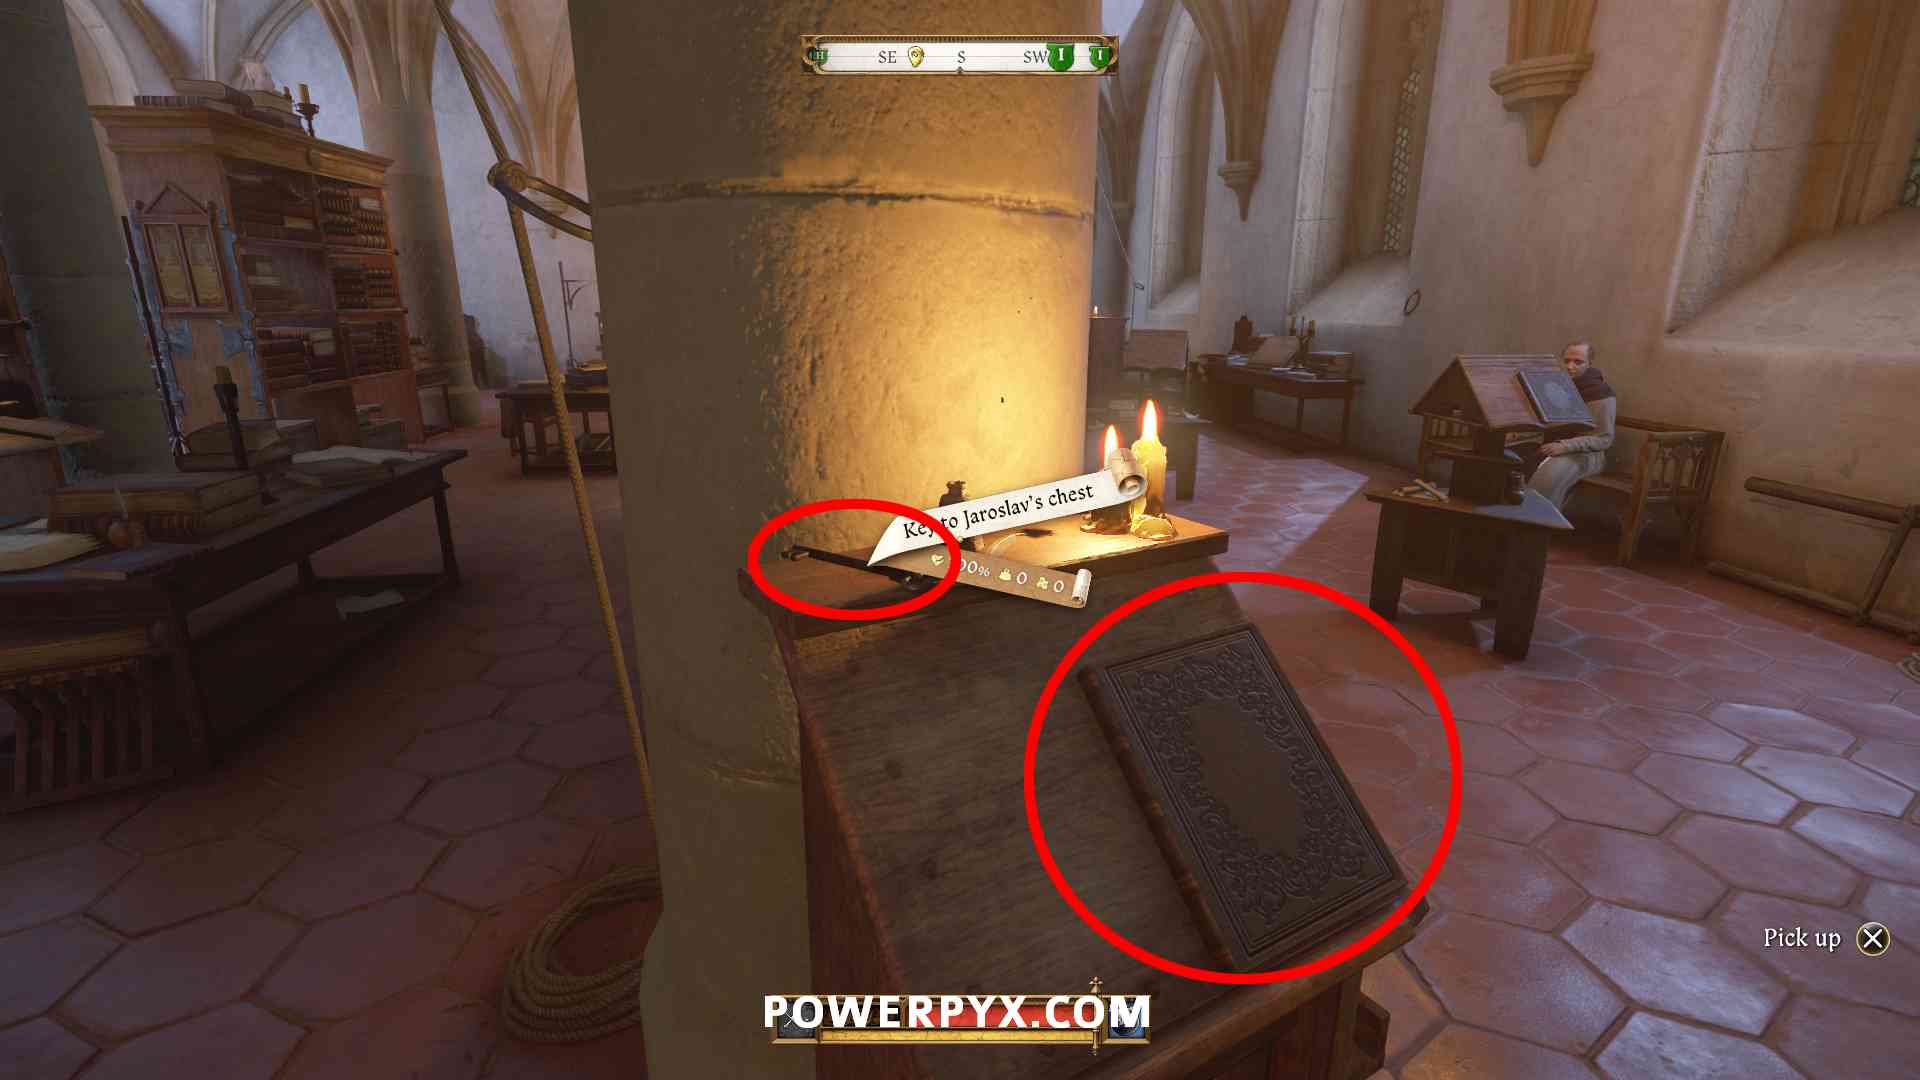
Check Jaroslav’s belongings
There are two belongings to check. First, find the bookstand at the library exit, read the book and grab the key on top of it. You learn that Jaroslav hasn’t been doing as much work as he told the other monks. Be sure to do this objective before talking to Monk Celestine to get a bonus dialogue.
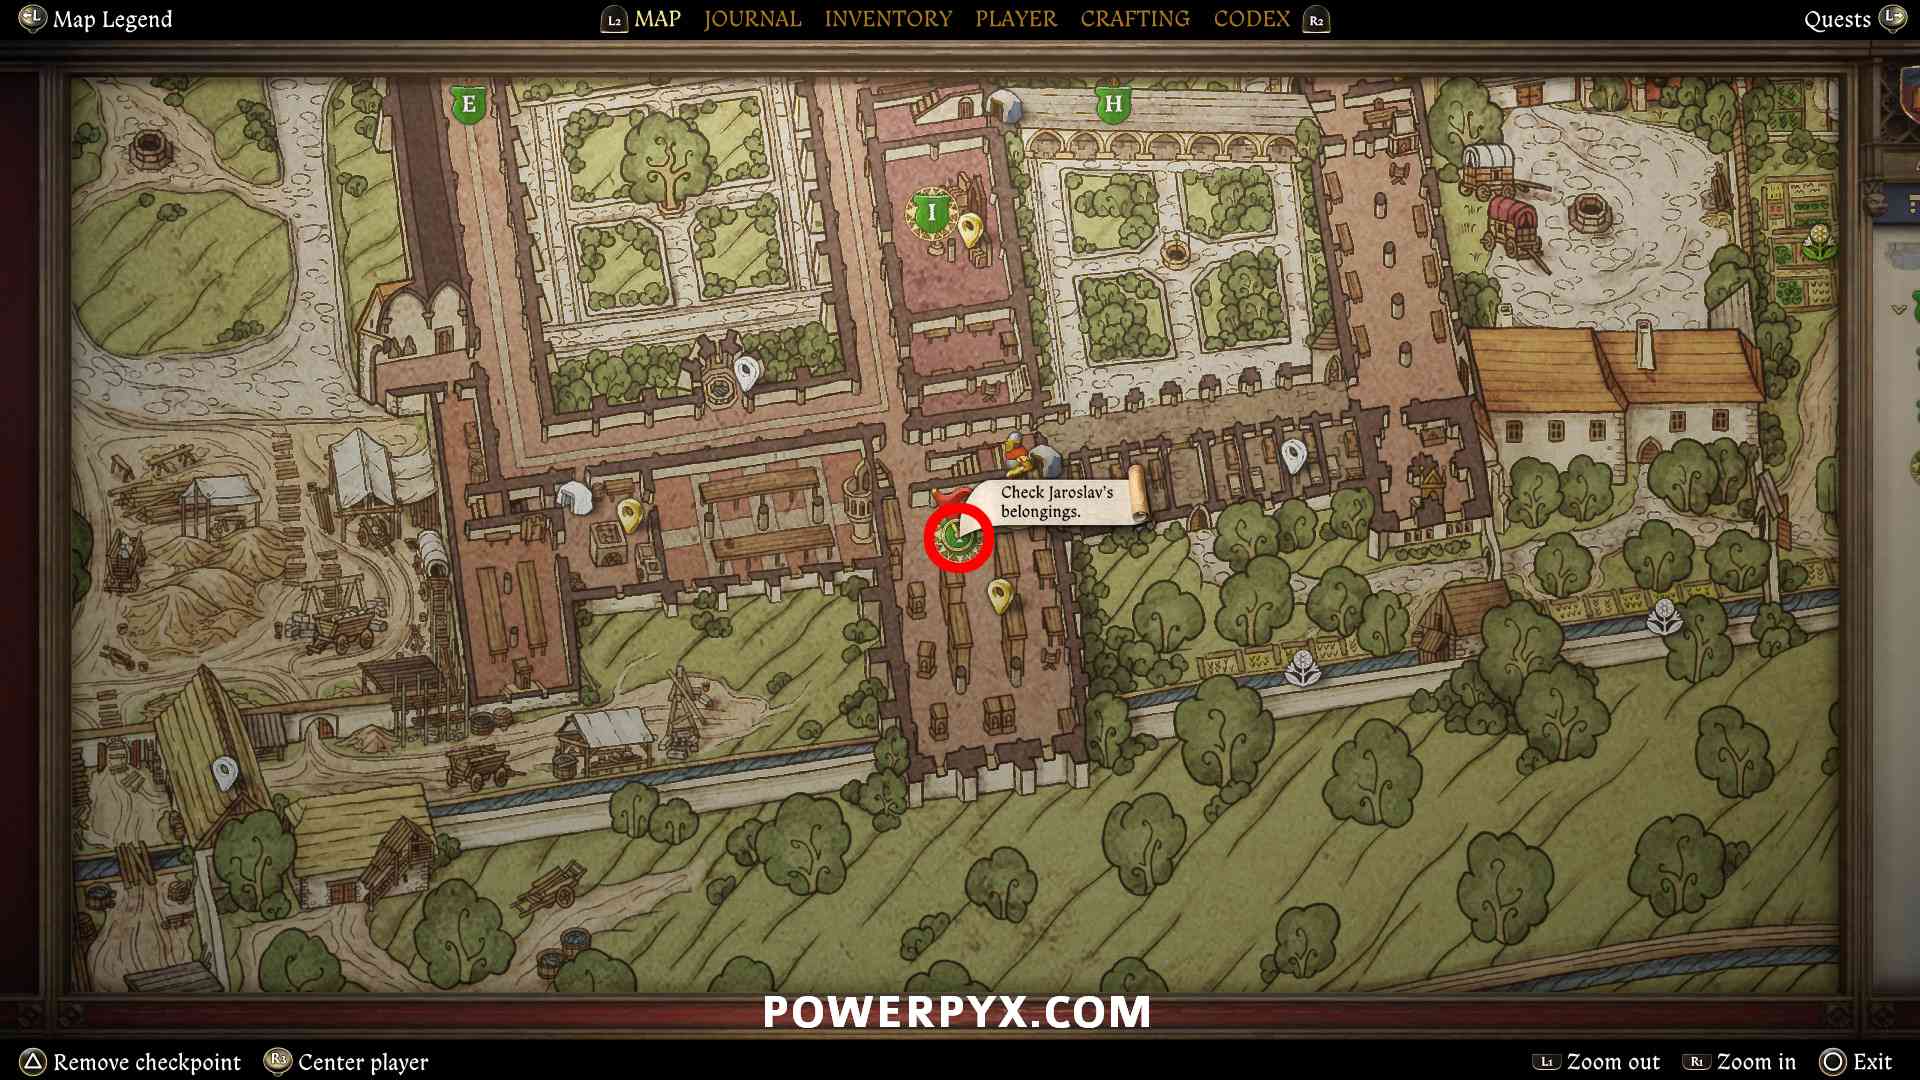
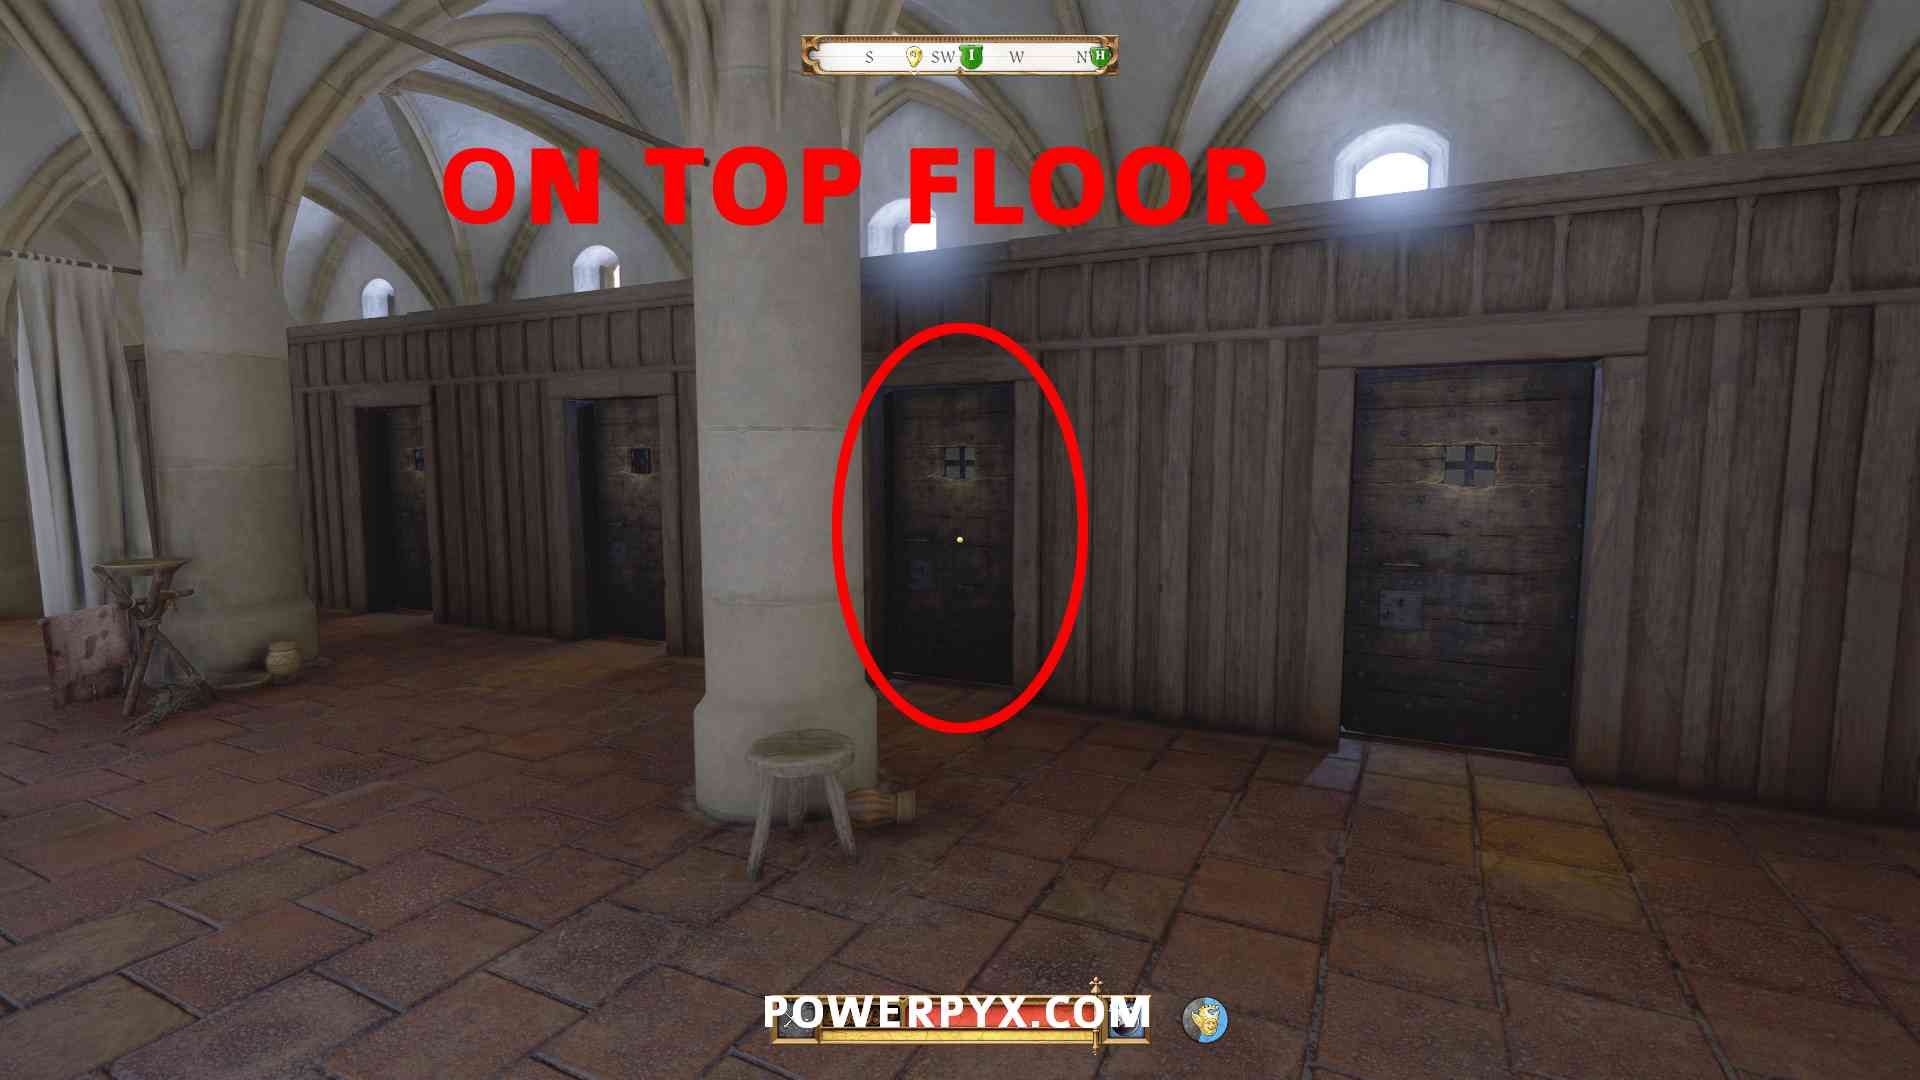
Exit the library, immediately turn right and go up the staircase. On the top floor you will find Jaroslav’s cell. Search the chest in his cell and loot the Old cellar plans.
You can examine the plans under Inventory > Maps.
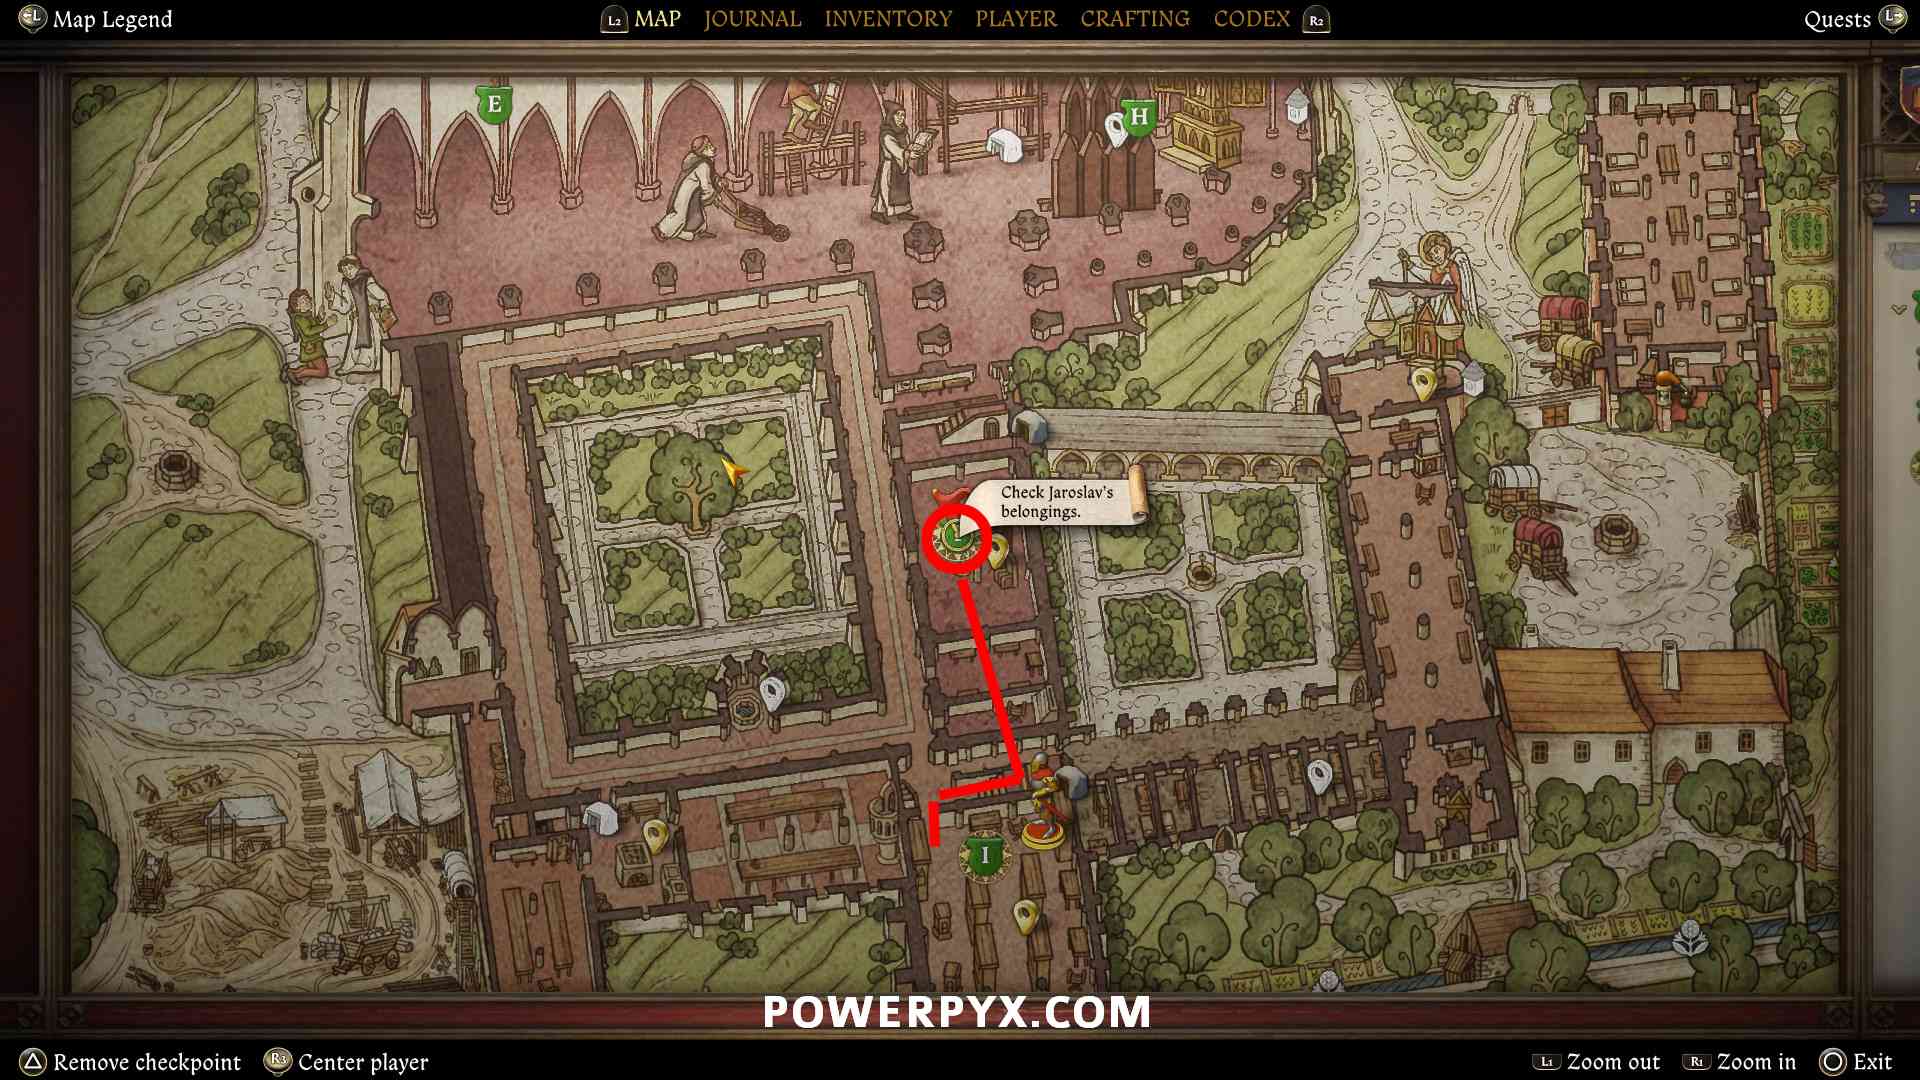
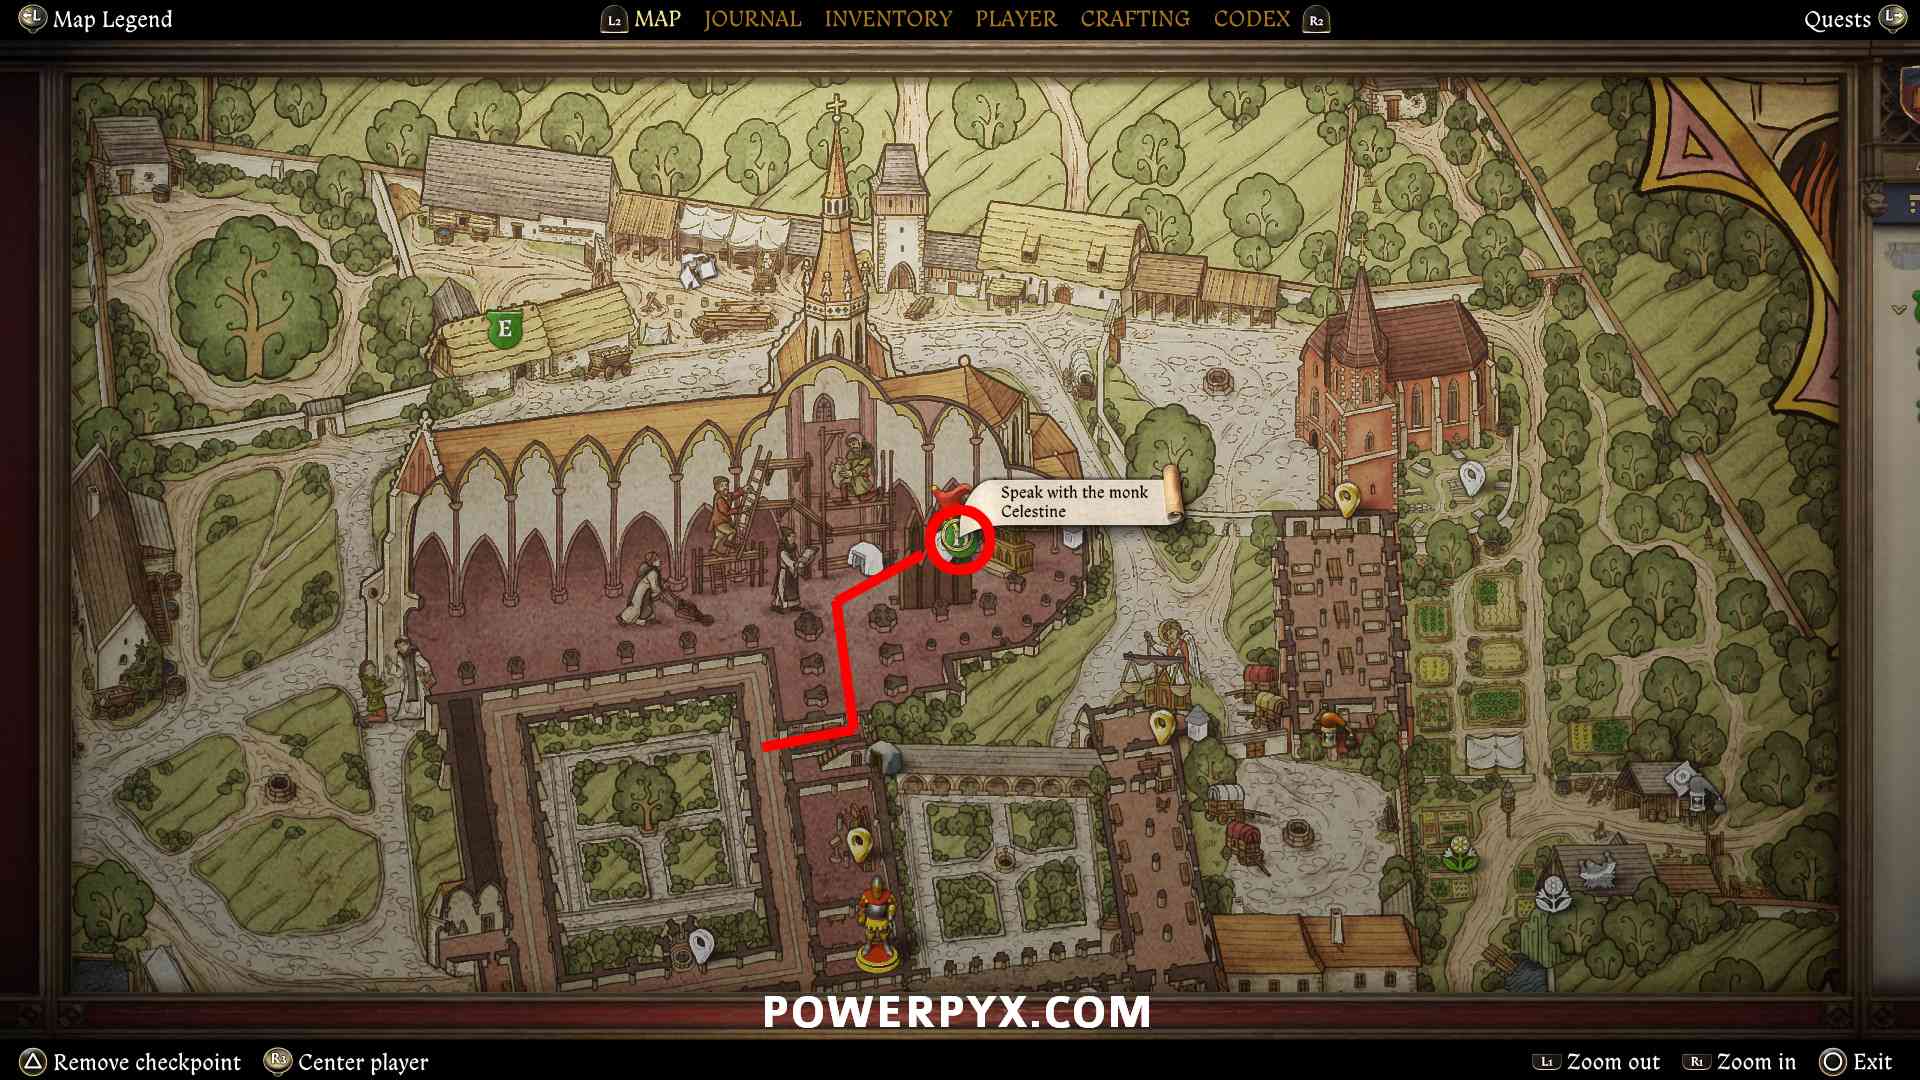
Speak with monk Celestine
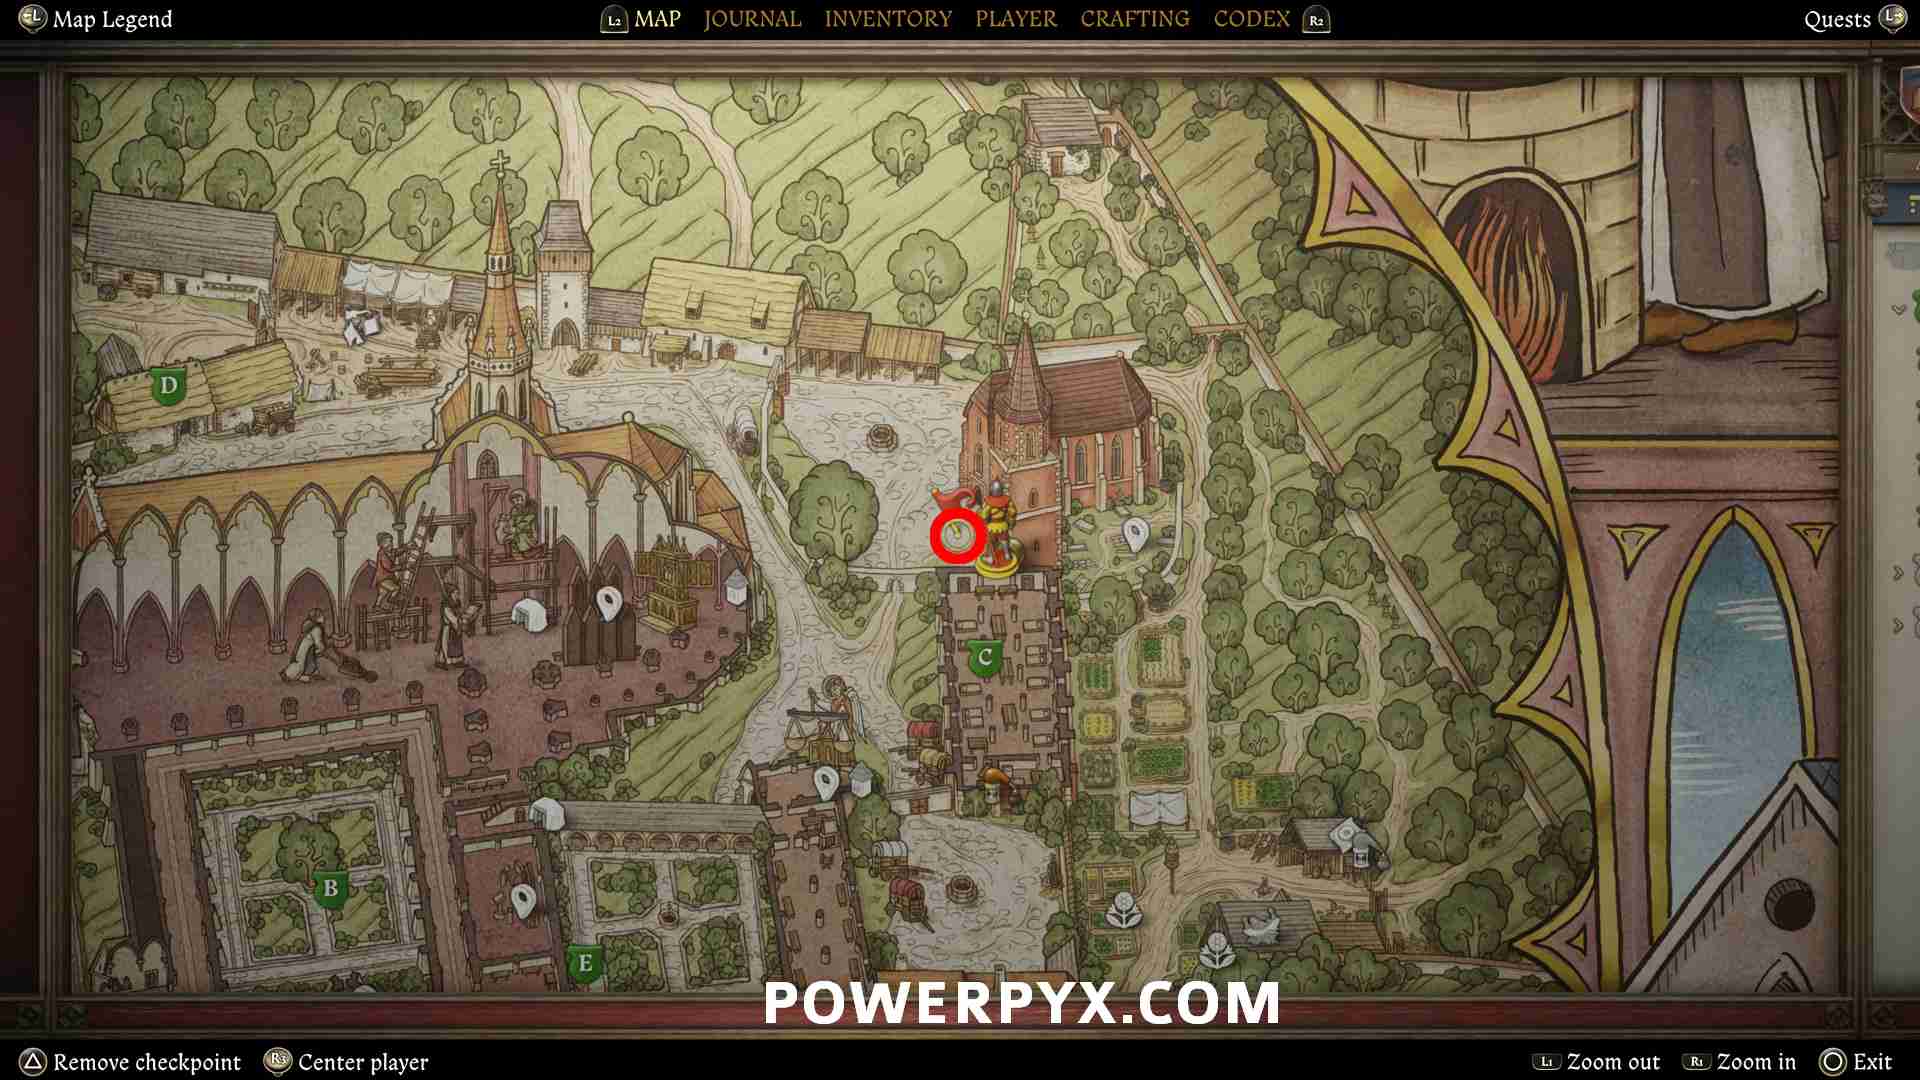
Monk Celestine is in the main church hall. You enter through the door in the north-east of the central courtyard where you started the quest. The path is also outlined in the map image below.
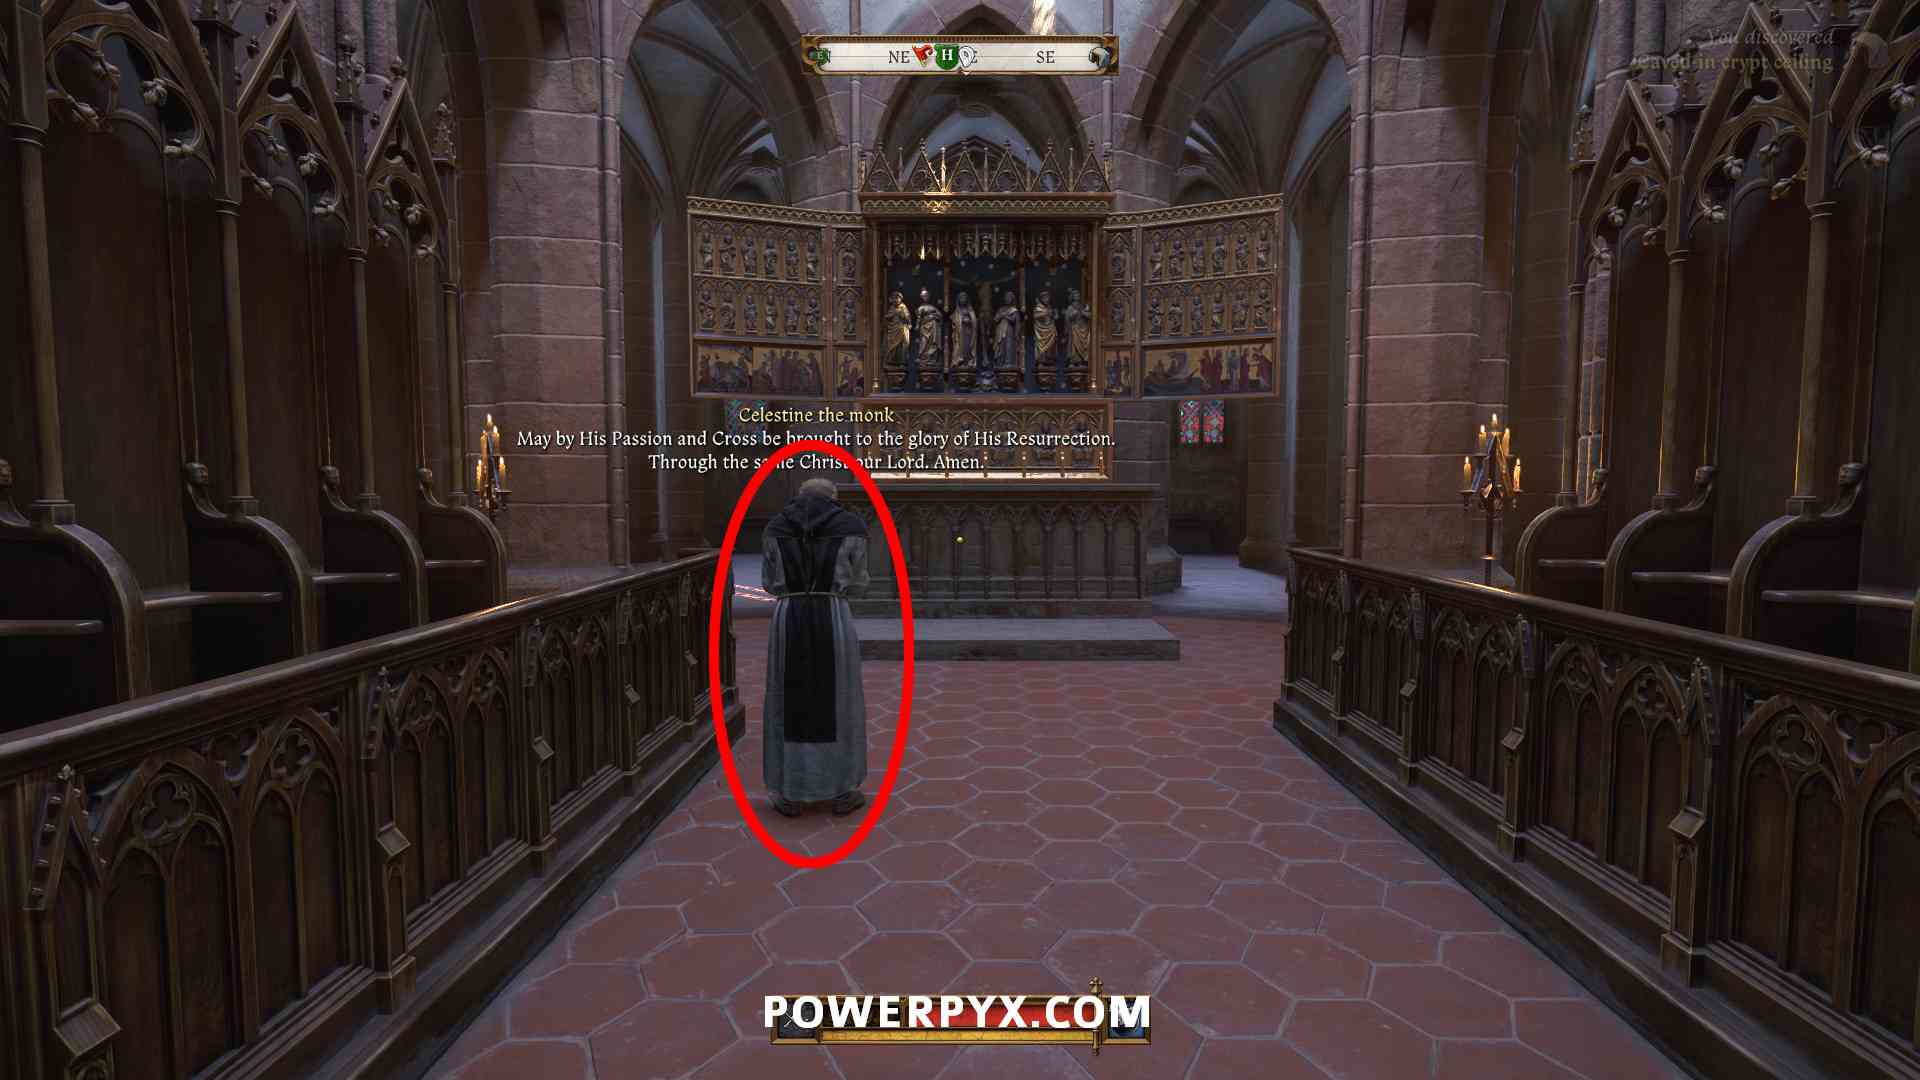
Talk to Celestine and exhaust all questions. If you searched Jaroslav’s belongings you get a new dialogue “He hasn’t translated much lately” > “I promise”. This makes Celestine reveal he saw Jaroslav sneak into the cellar late at night, possibly to meet someone in secret. Alternatively, you can get the same info by passing one of the skill checks. This starts the next objective to investigate the cellar.
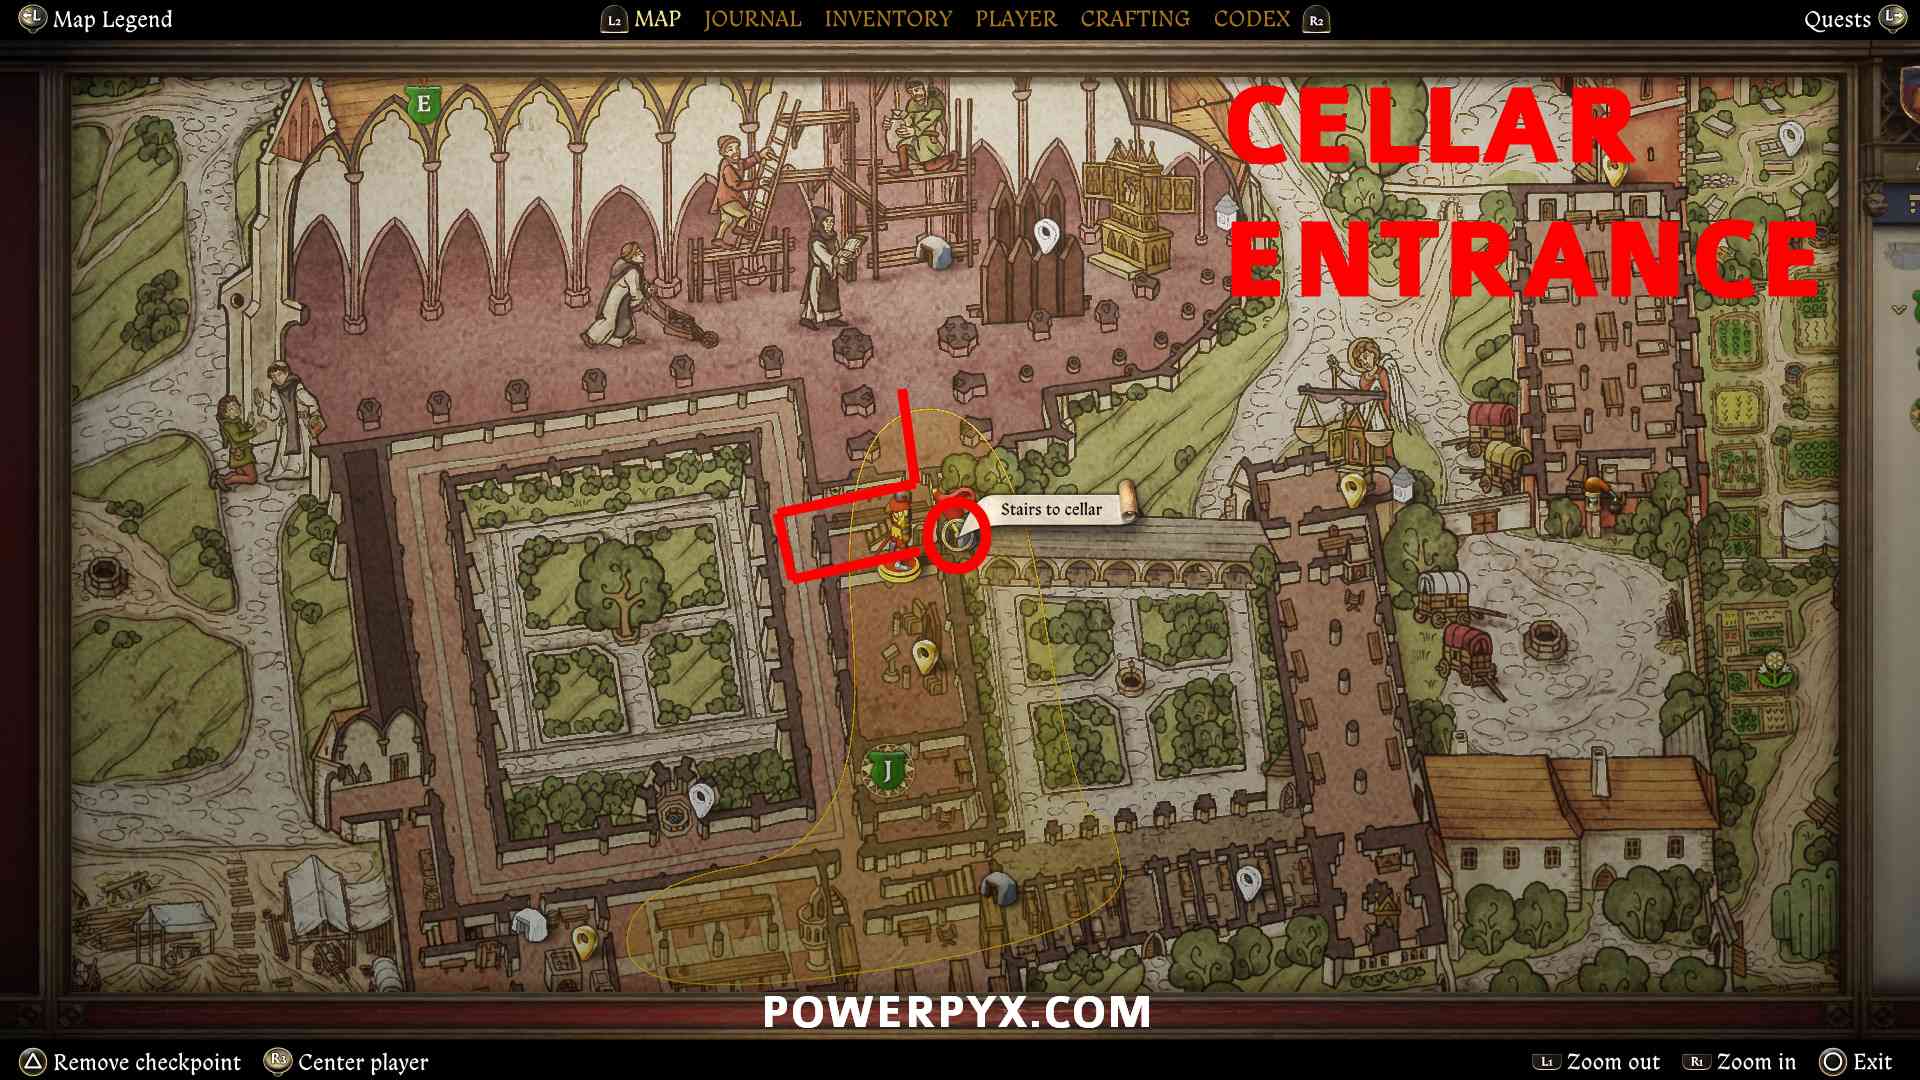
Search the monastery cellar
The “Stairs to the cellar” will get marked on the map as a cave icon. There are multiple entrances. Exit the church through the south door to return to the central courtyard, take the next door on the left, at the end of the corridor under the staircase enter the door to the cellar. It’s very dark so equip your torch by holding  (must have one slotted in your inventory).
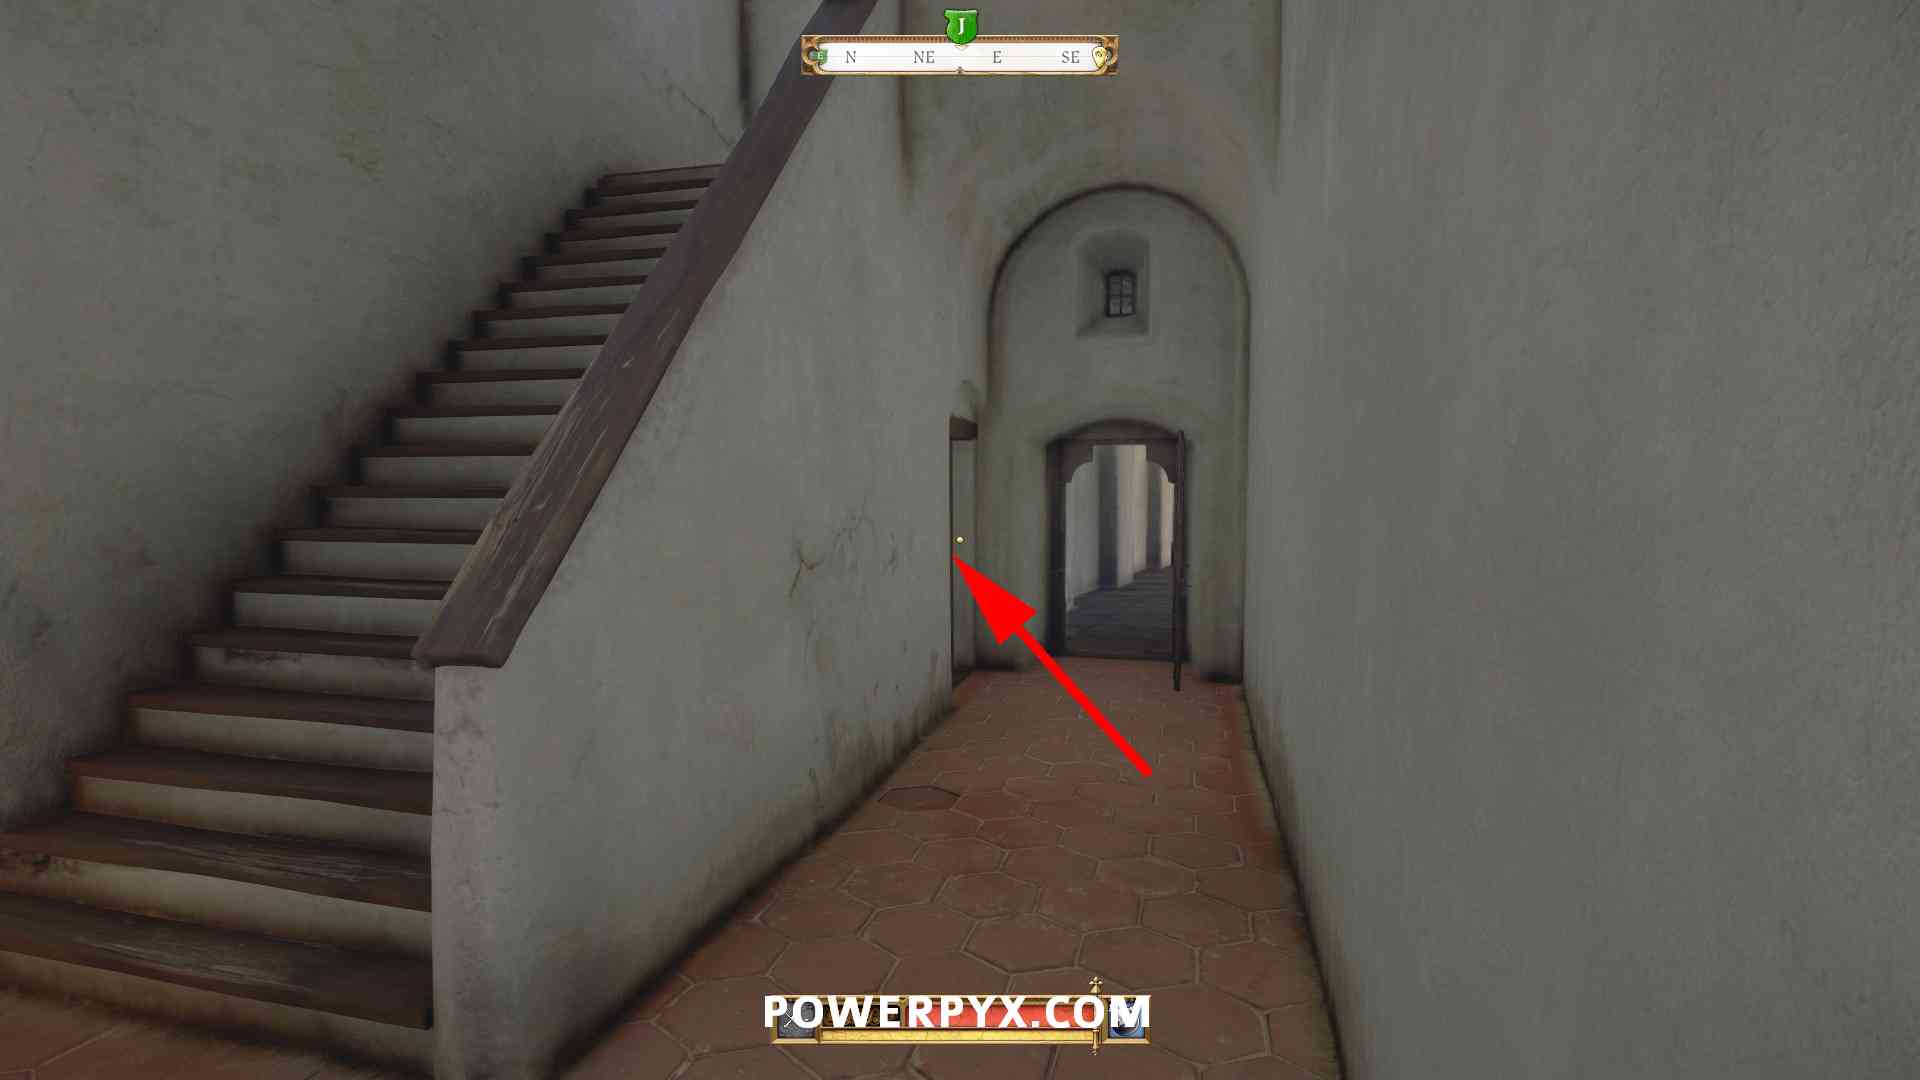
Go downstairs, enter the first door on the left, then keep going straight until Henry comments that this is where Celestine must have lost Jaroslav. It’s just before the staircase leading back up to the scriptorium. There you must examine footprints in spilled wine, directly next to the staircase.
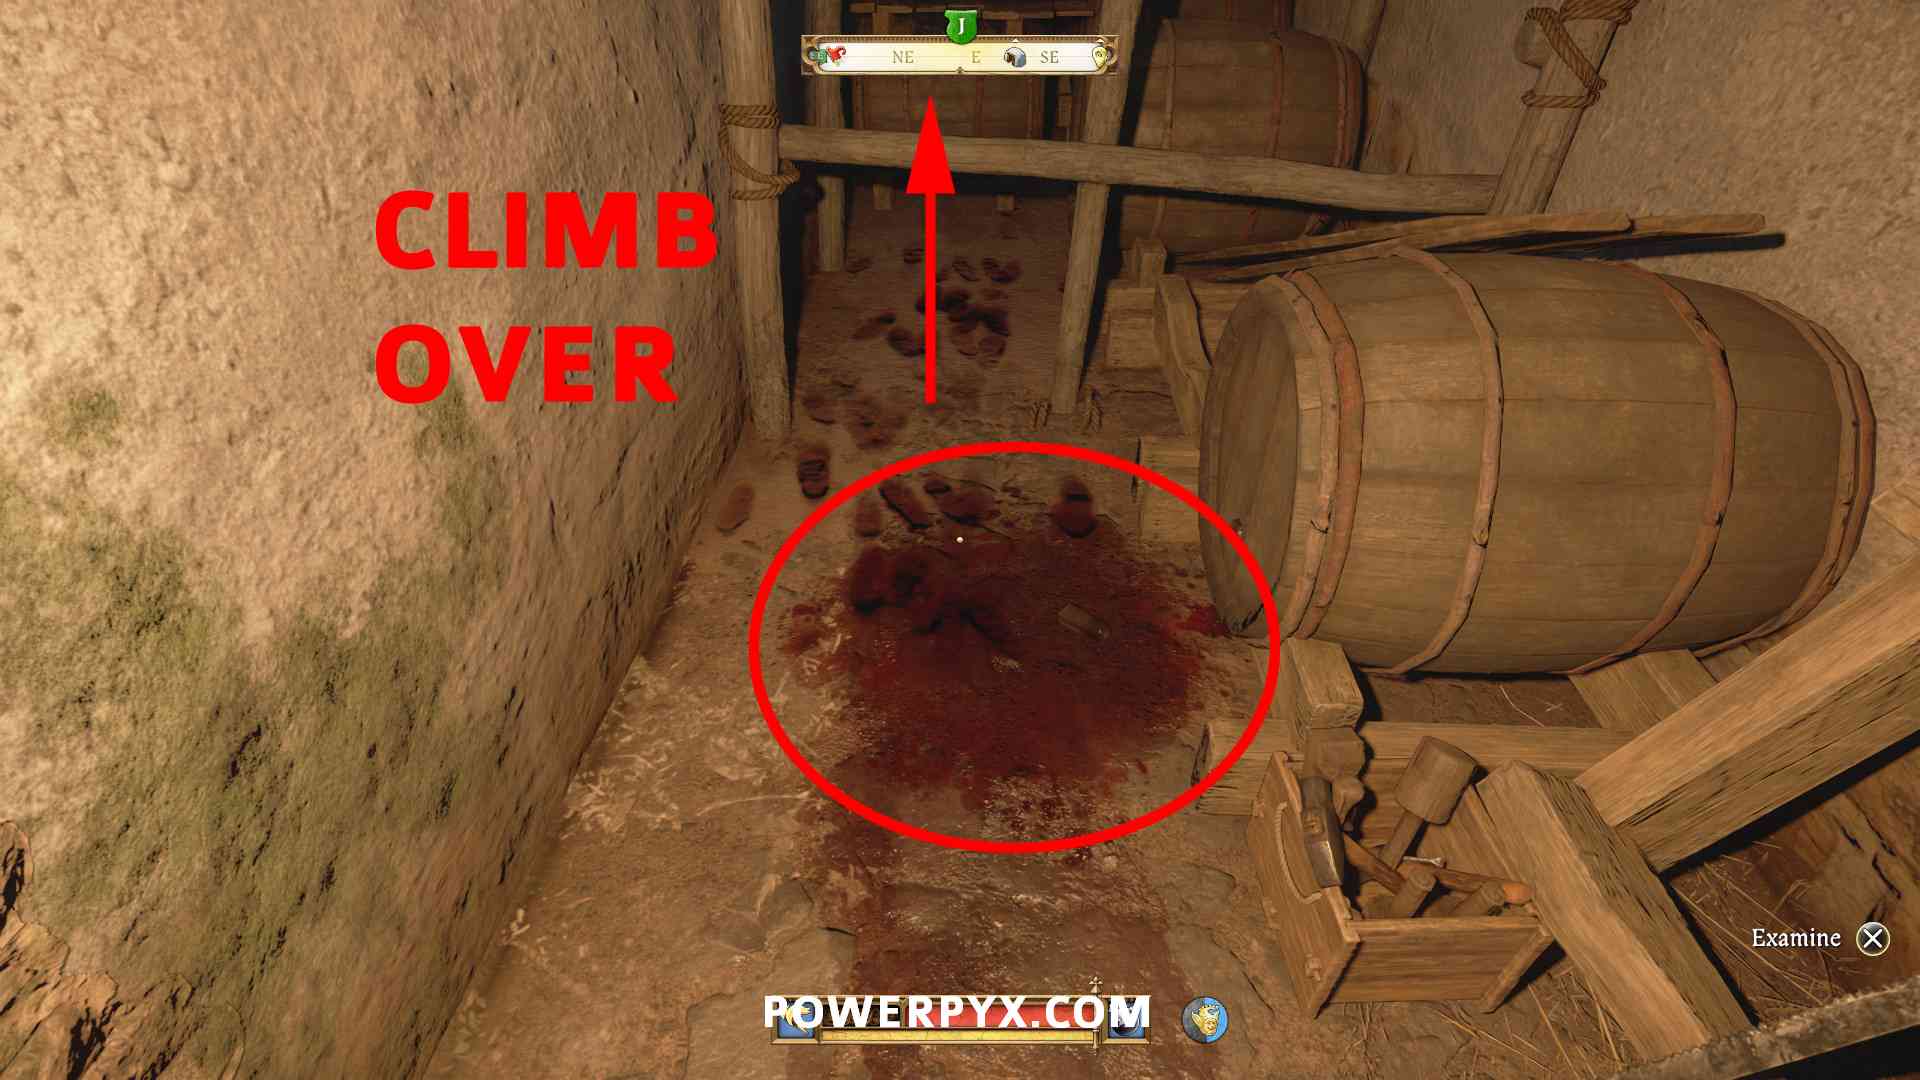
Now climb over the scaffold in the direction where the footprints lead. Walk past the barrels to find a hidden door underneath the staircase. It is locked and you get the objective to find the key.
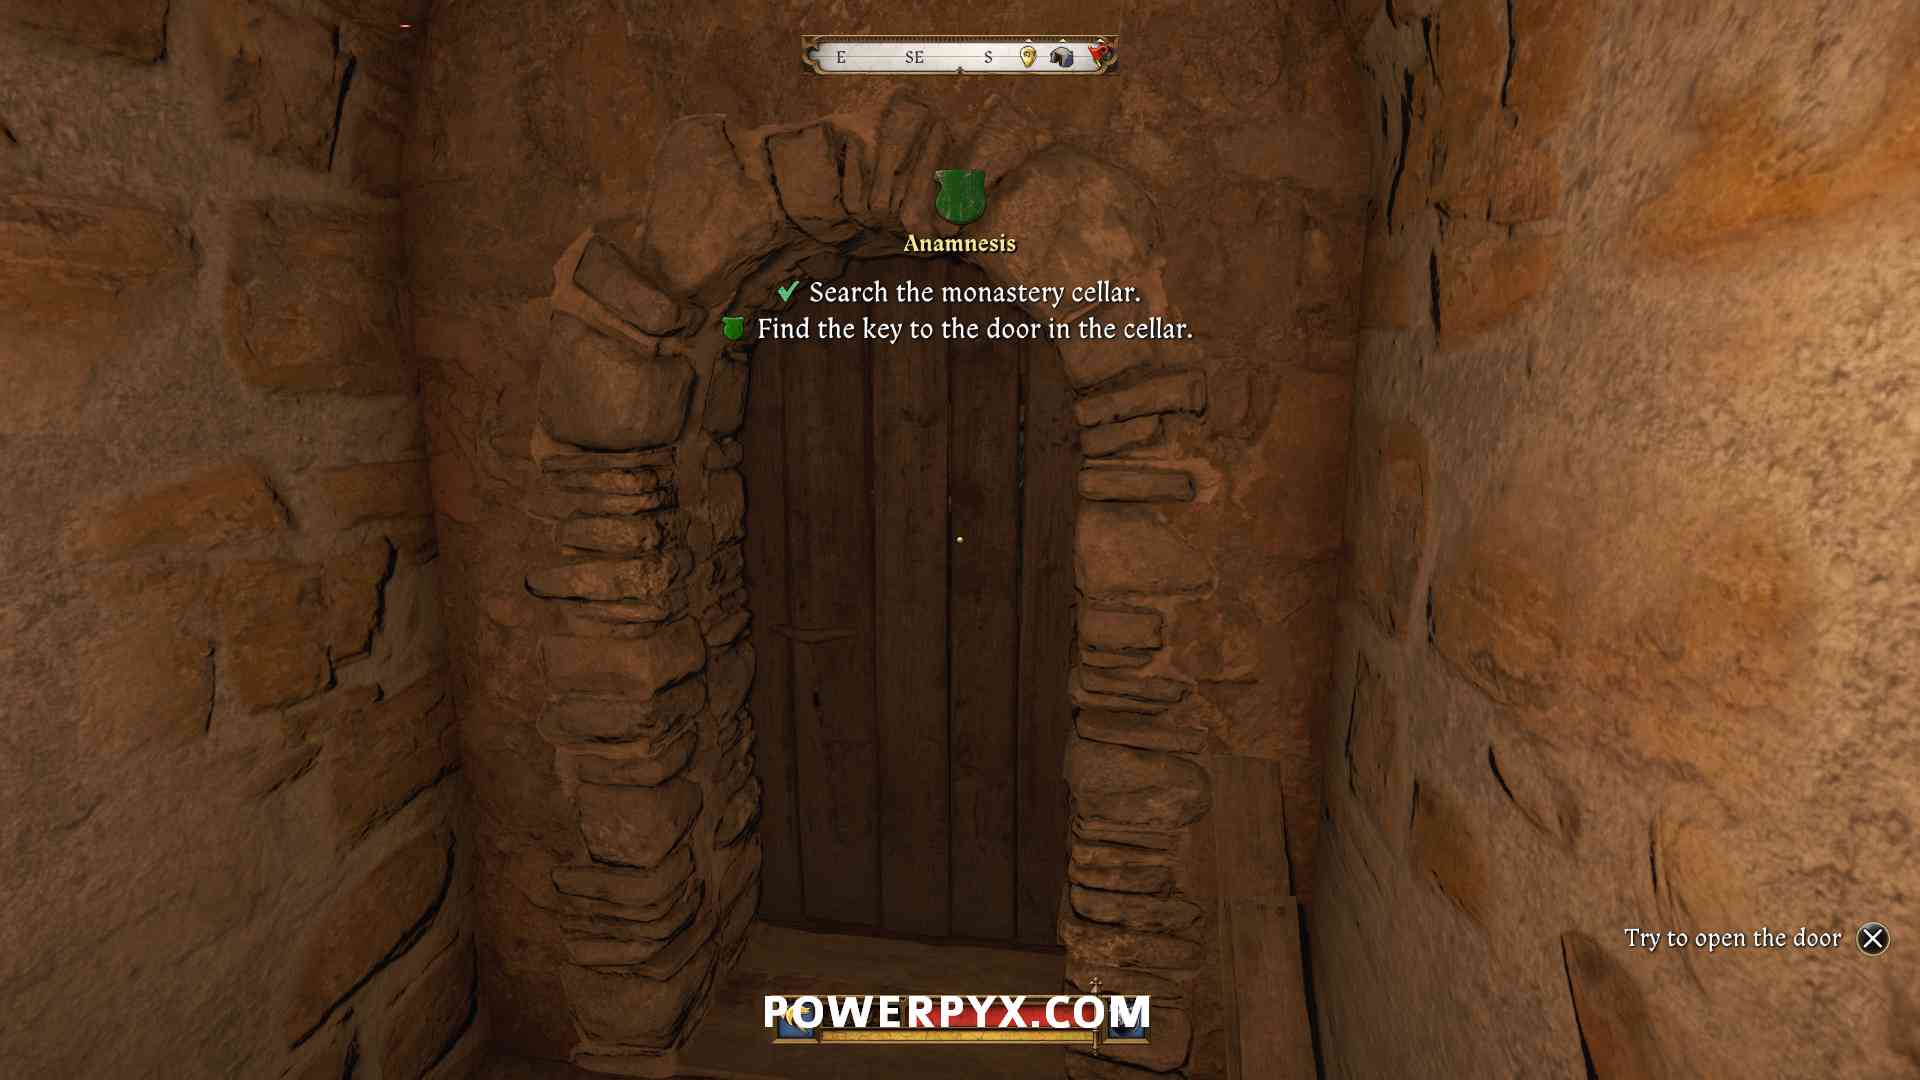
Find the key to the door in the cellar
This objective won’t be marked. You automatically get the key to the door in the cellar by following the next line of objectives to “Speak with Steward Zdenyek“. After you do Zdenyek’s objectives he will give you the key. So proceed at the next objective.
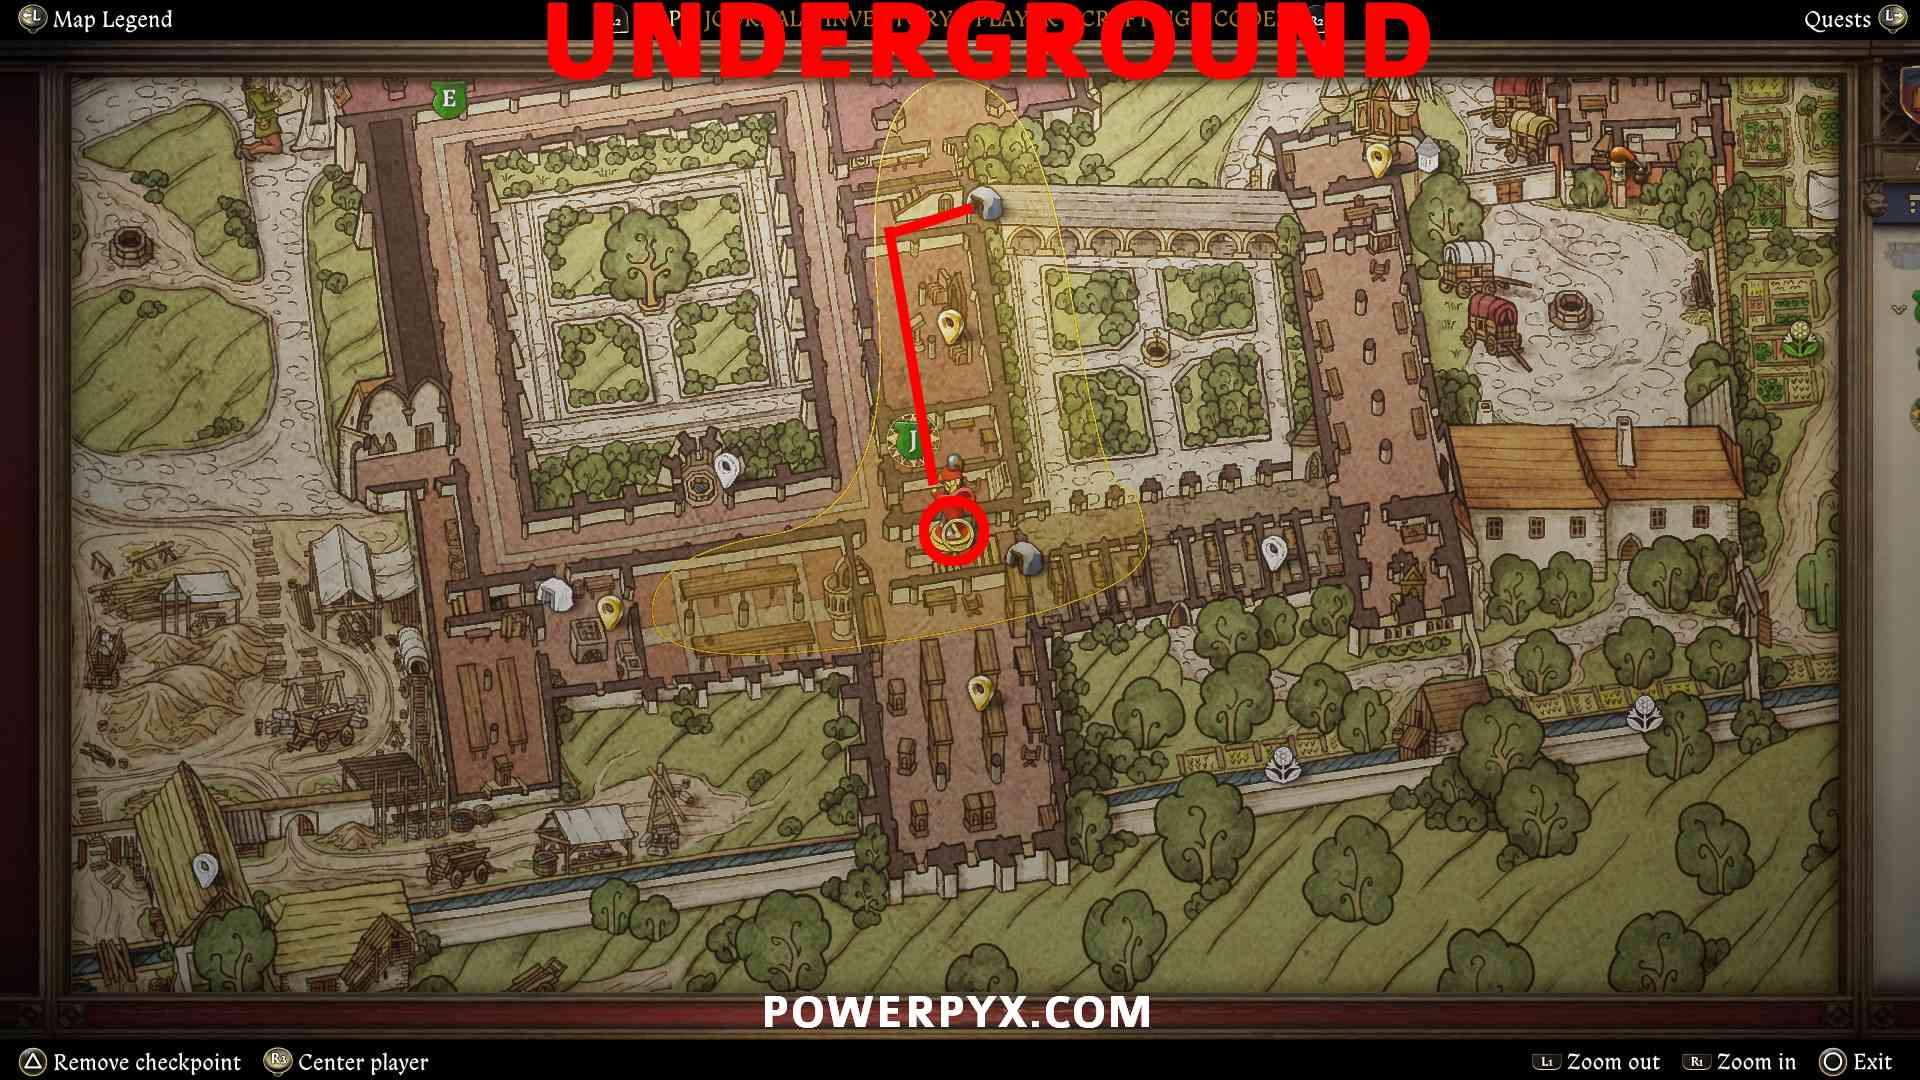
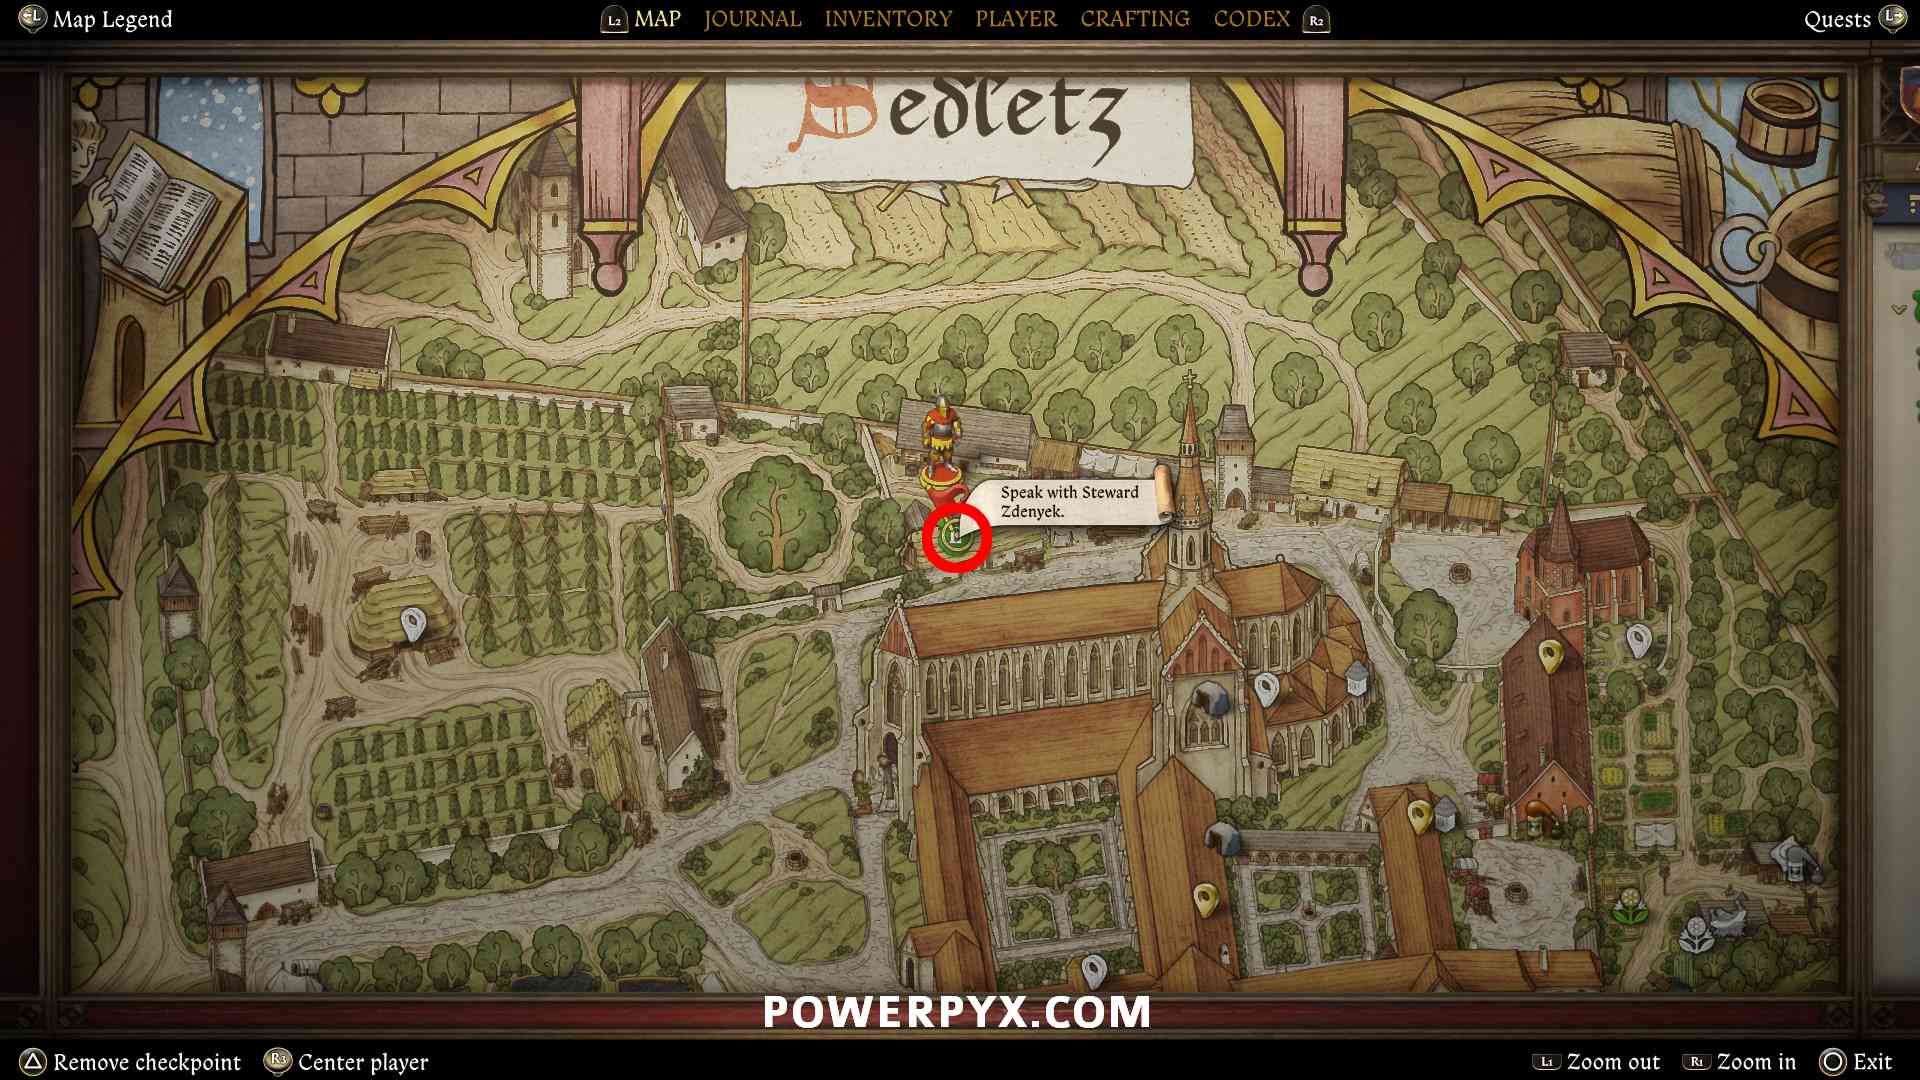
Speak with Steward Zdenyek
You can find Steward Zdenyek in the north of the monastery.
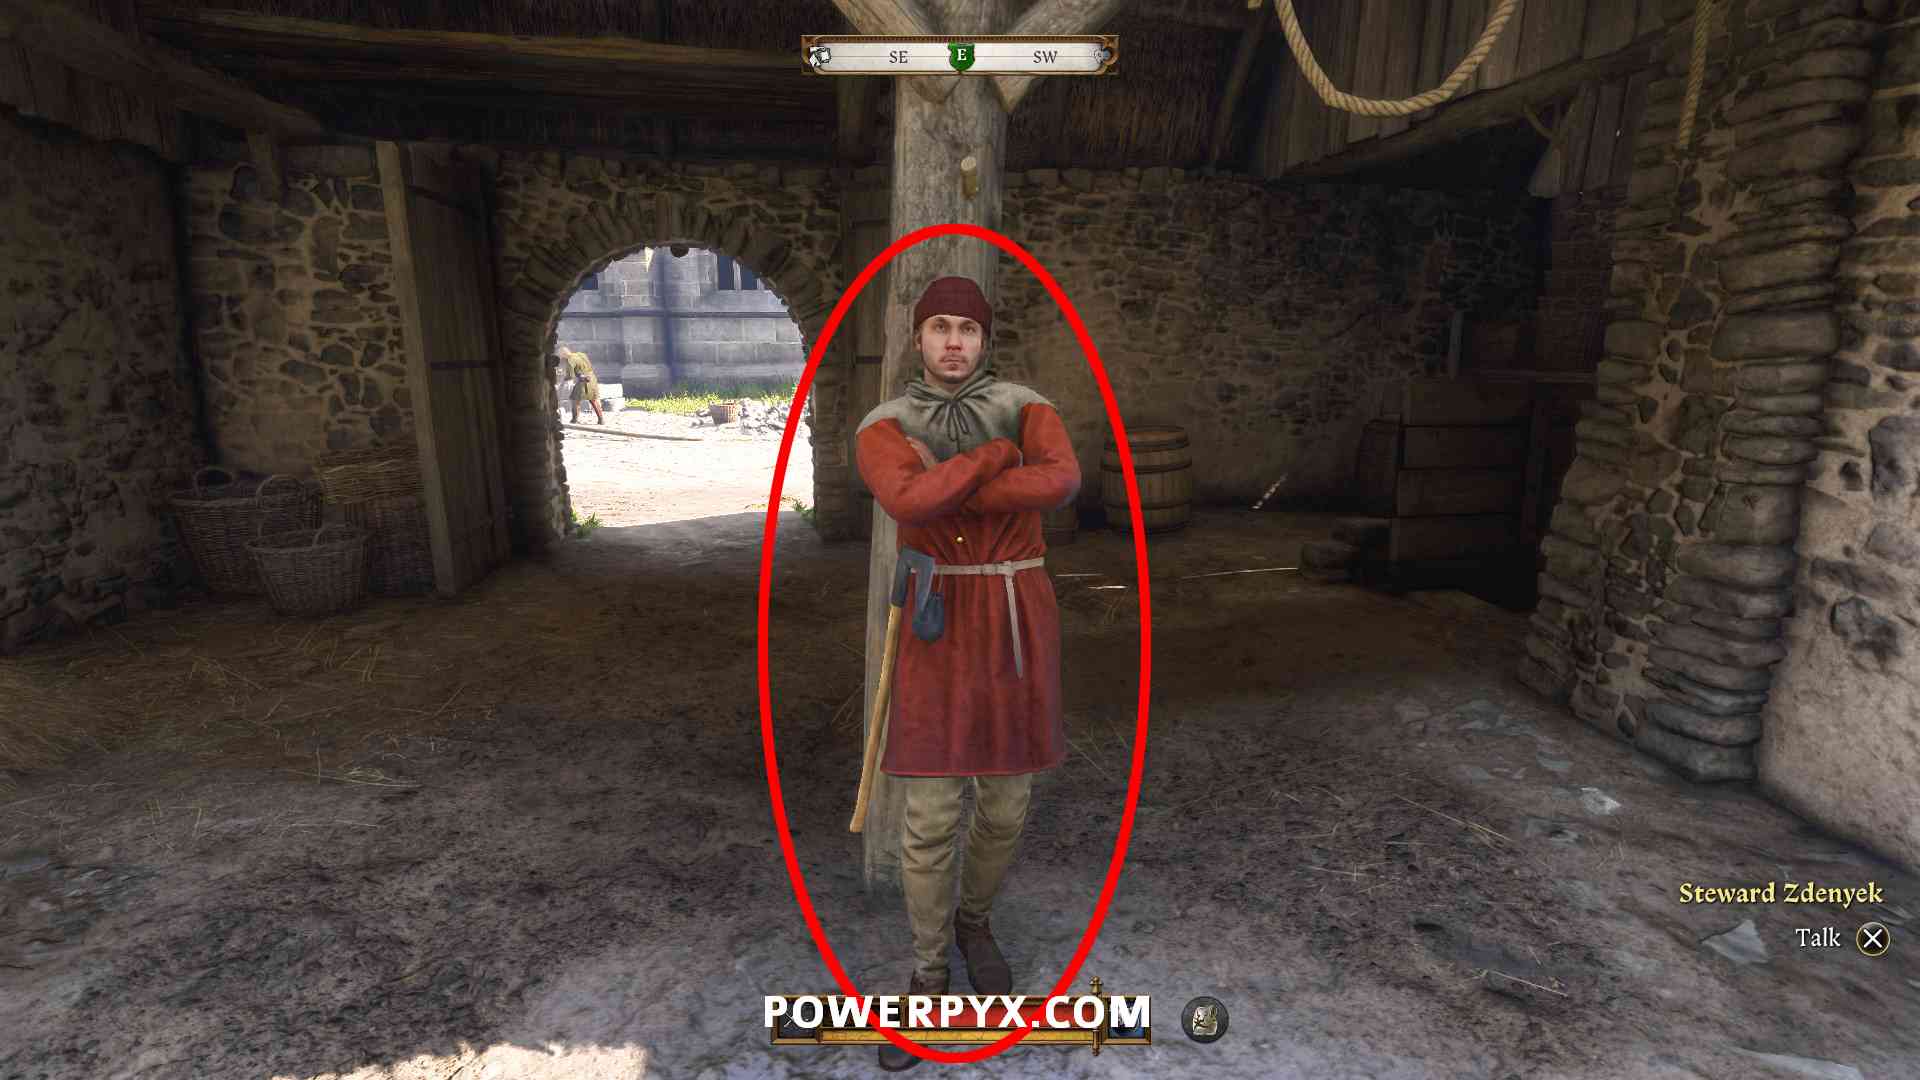
Talk to him and exhaust all questions to learn more about Blazhena, the maid who fell ill. He suggests she’s been stealing food and tells you where to find her room for further investigation. This triggers the next two objectives.
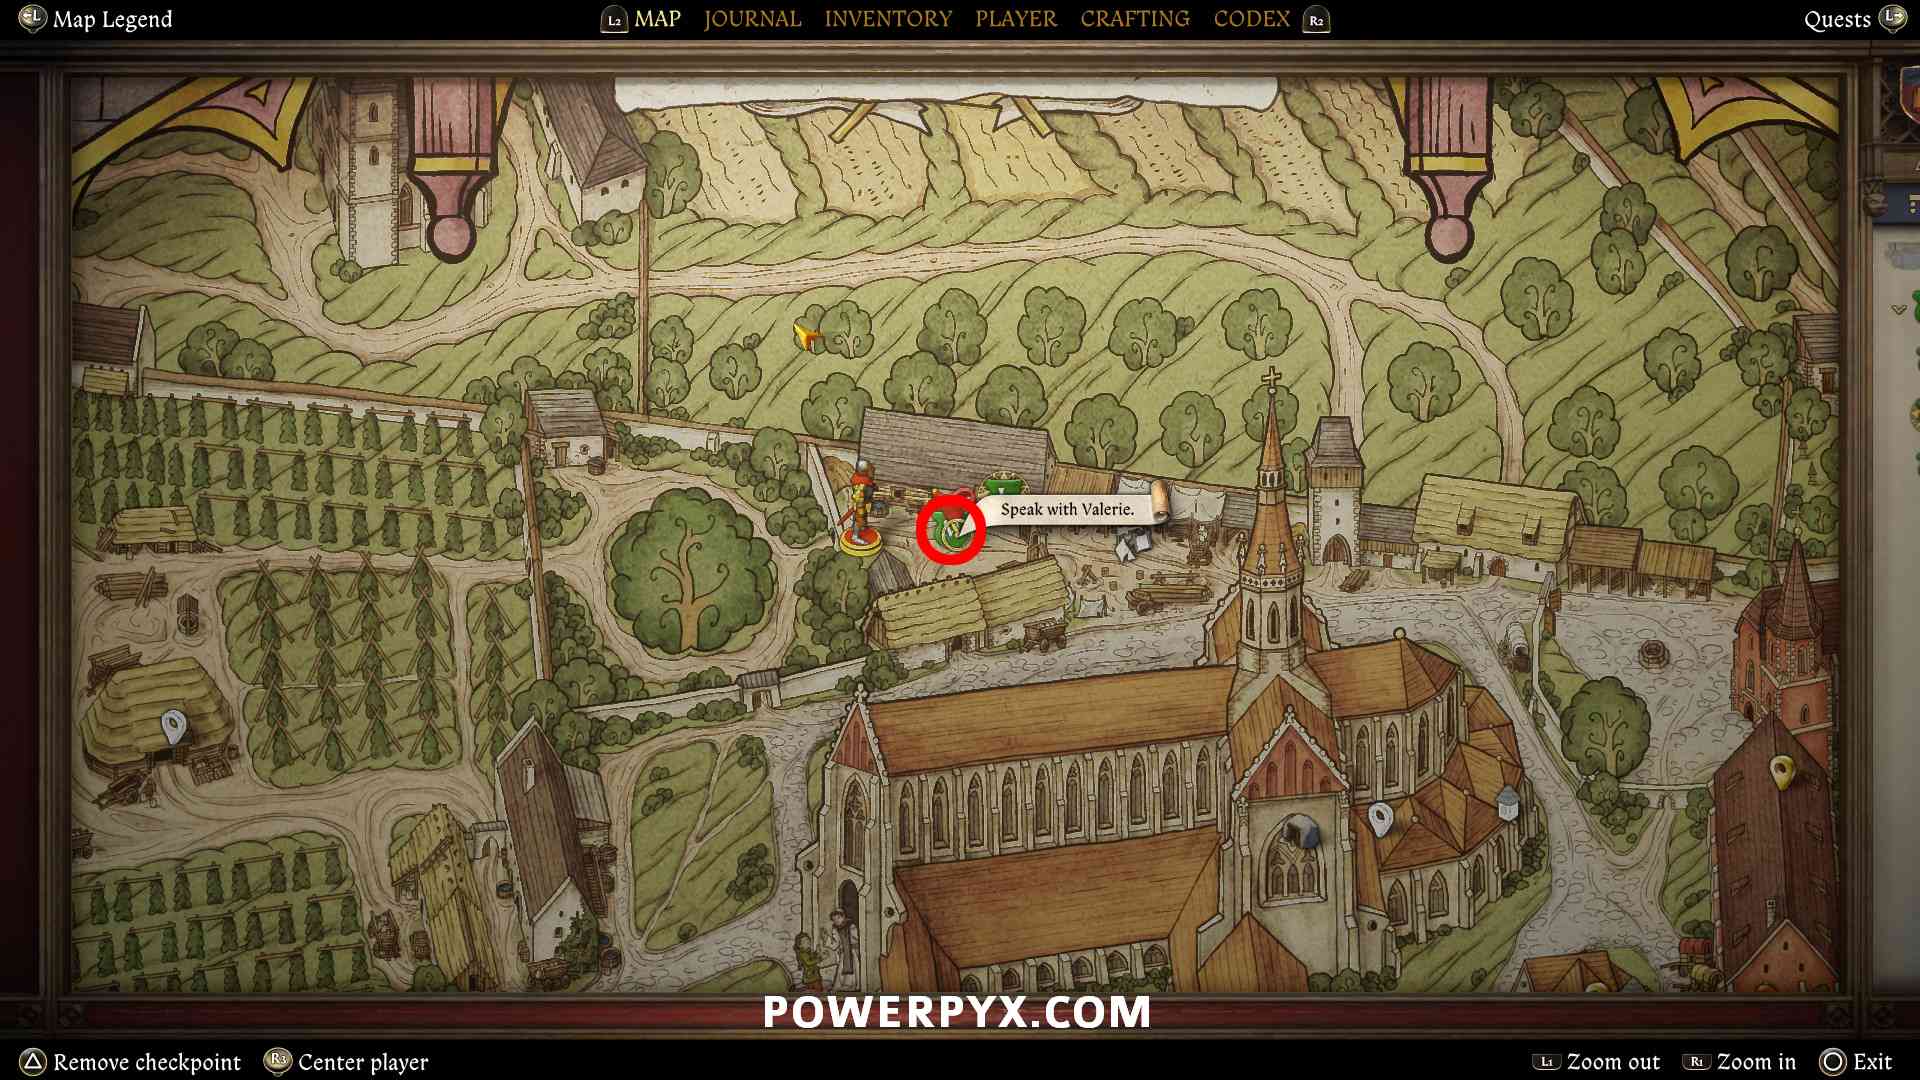
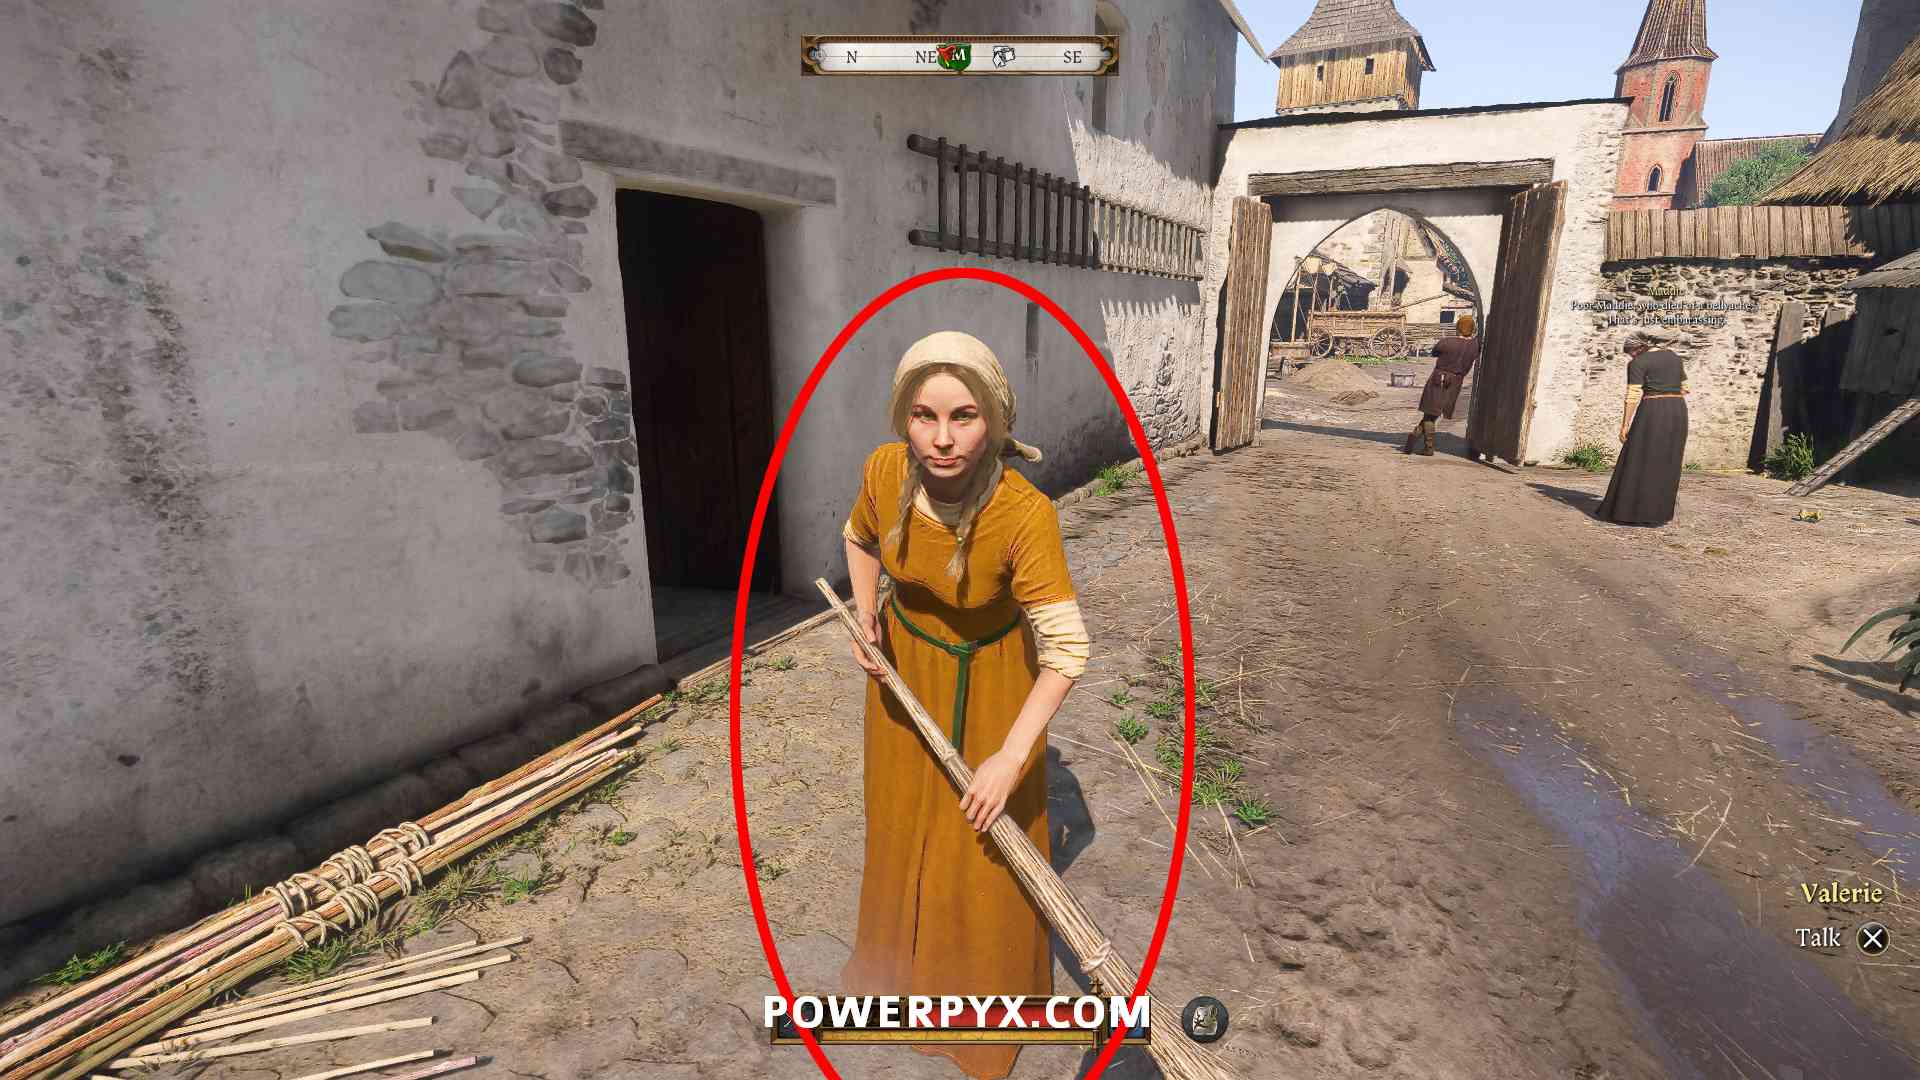
Speak with Valerie
Note: before talking to Valerie, put on a high charisma outfit for a skill check dialogue.
Now talk to Valerie, she’s the only blond maid wearing a bright orange dress. She’s in front of the house, directly across from where you talked to Zdenyek. She has two skill check dialogues, but if you fail them you can still get info from her by talking to Zdenyek again to distract him.
For the optimal outcome pick this: “What can you tell me about Blazhena?” > “Why are you so tense?” (confirmed to succeed at 24 Speech) > “I’ll speak to the Abbot” (confirmed to succeed at 22 Charisma) > Said she was stealing > exhaust all questions.
If you failed the skill checks, Valerie will say she can’t talk while Zdenyek is around. Then just talk to Zdenyek again and choose the dialogue to distract him, then Henry makes up a story about a brawl having broken out and Zdenyek will go away to investigate. After about half a minute he’ll be far enough away that Valerie will talk to you.
Either way, Valerie will point you to investigate the pantry in the cellar because that’s where Blazhena frequently went.
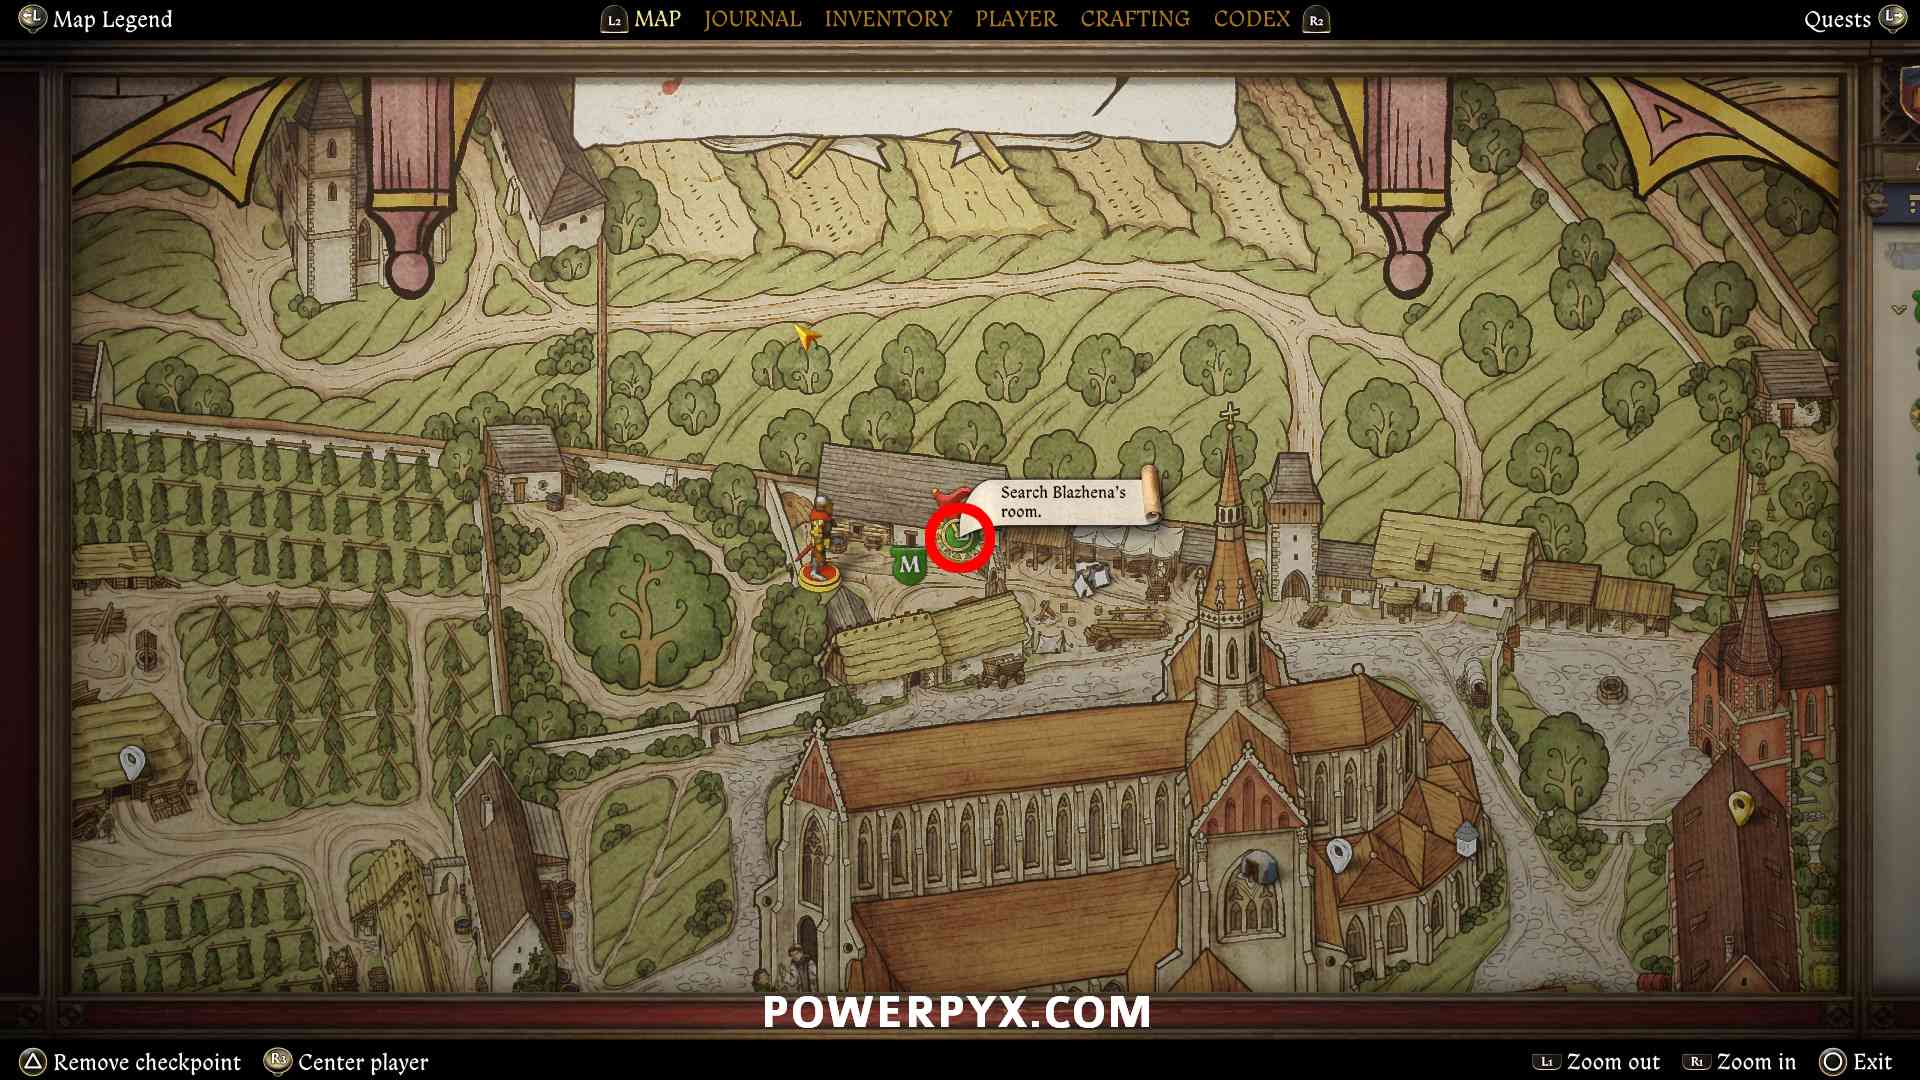
Search Blazhena’s room (Optional)
Enter the house across from where Zdenyek stands, enter the door on the right and go upstairs to reach Blazhena’s room. Open her bedside chest to find lockpicks and a large amount of Groschen.
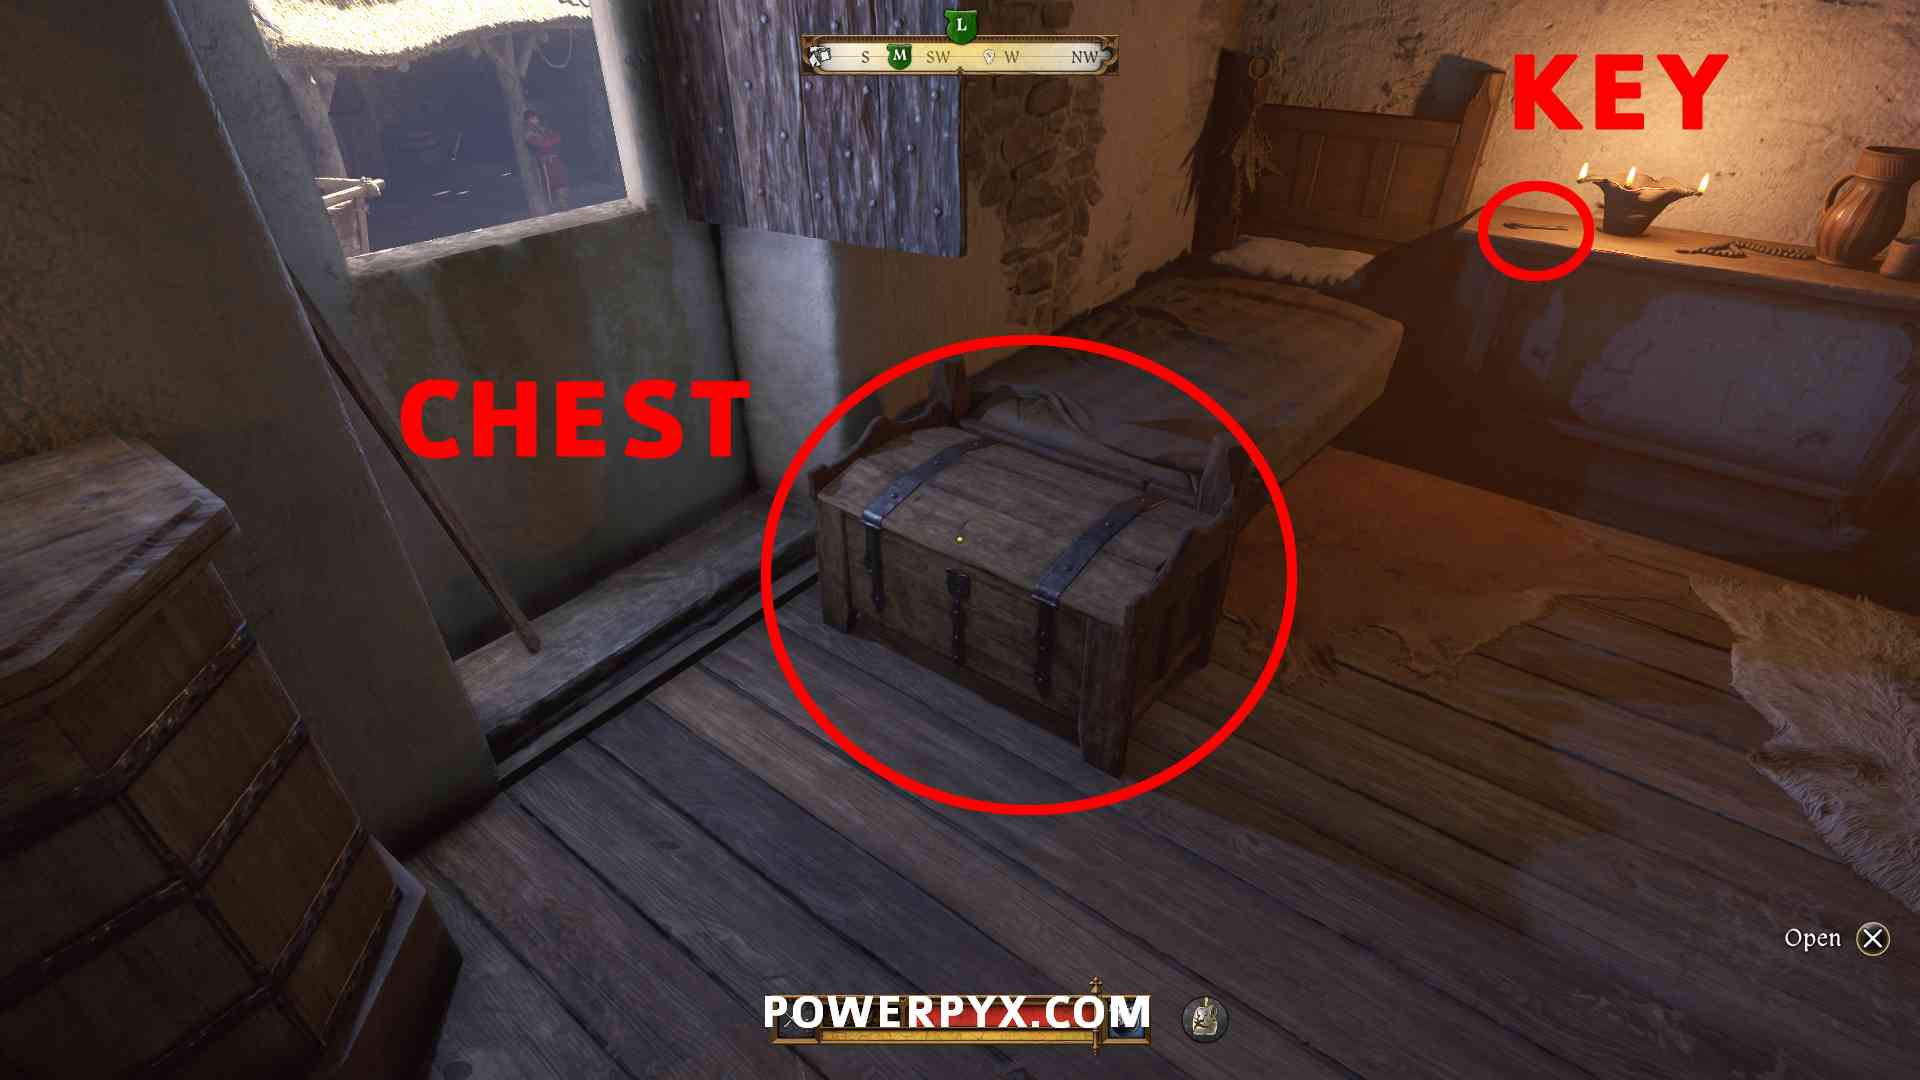
Also pick up the Pantry Key on the shelf next to Blazhena’s bed. You can use it to open a door in the next objective.
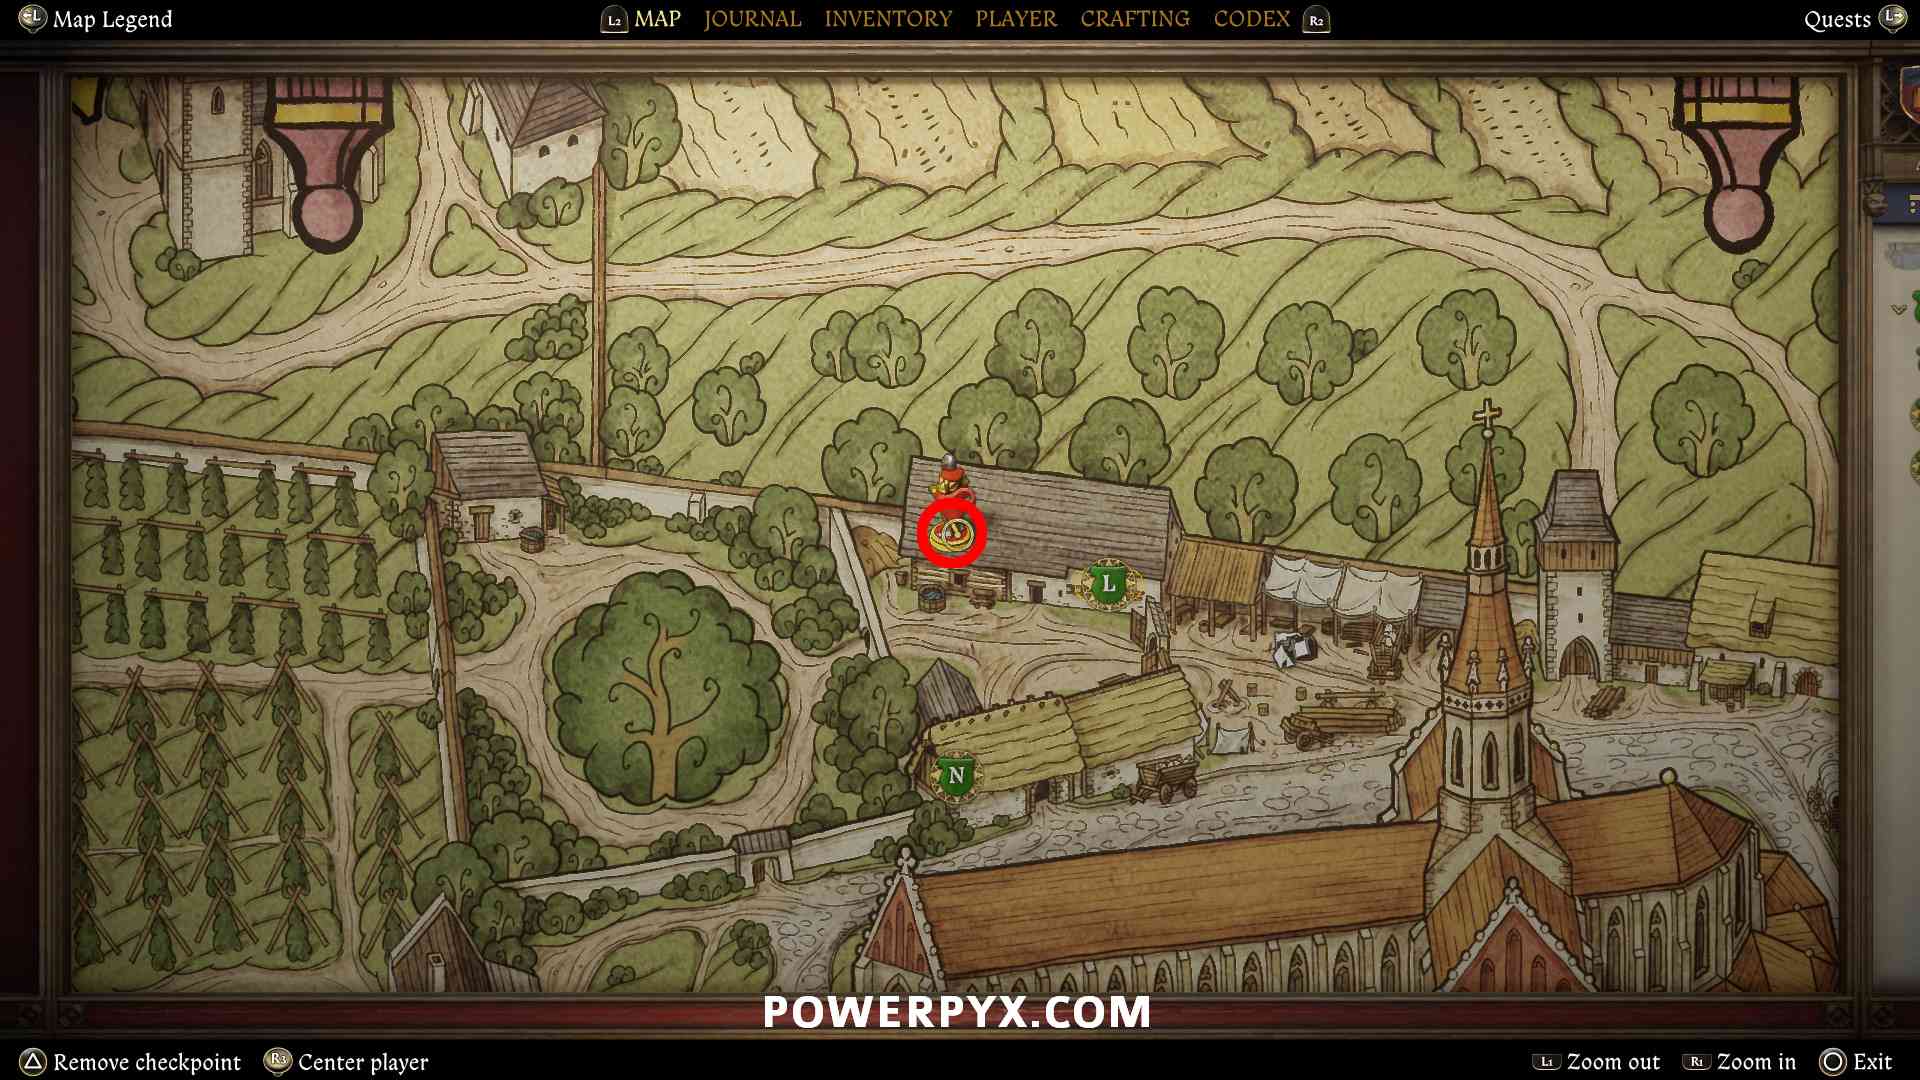
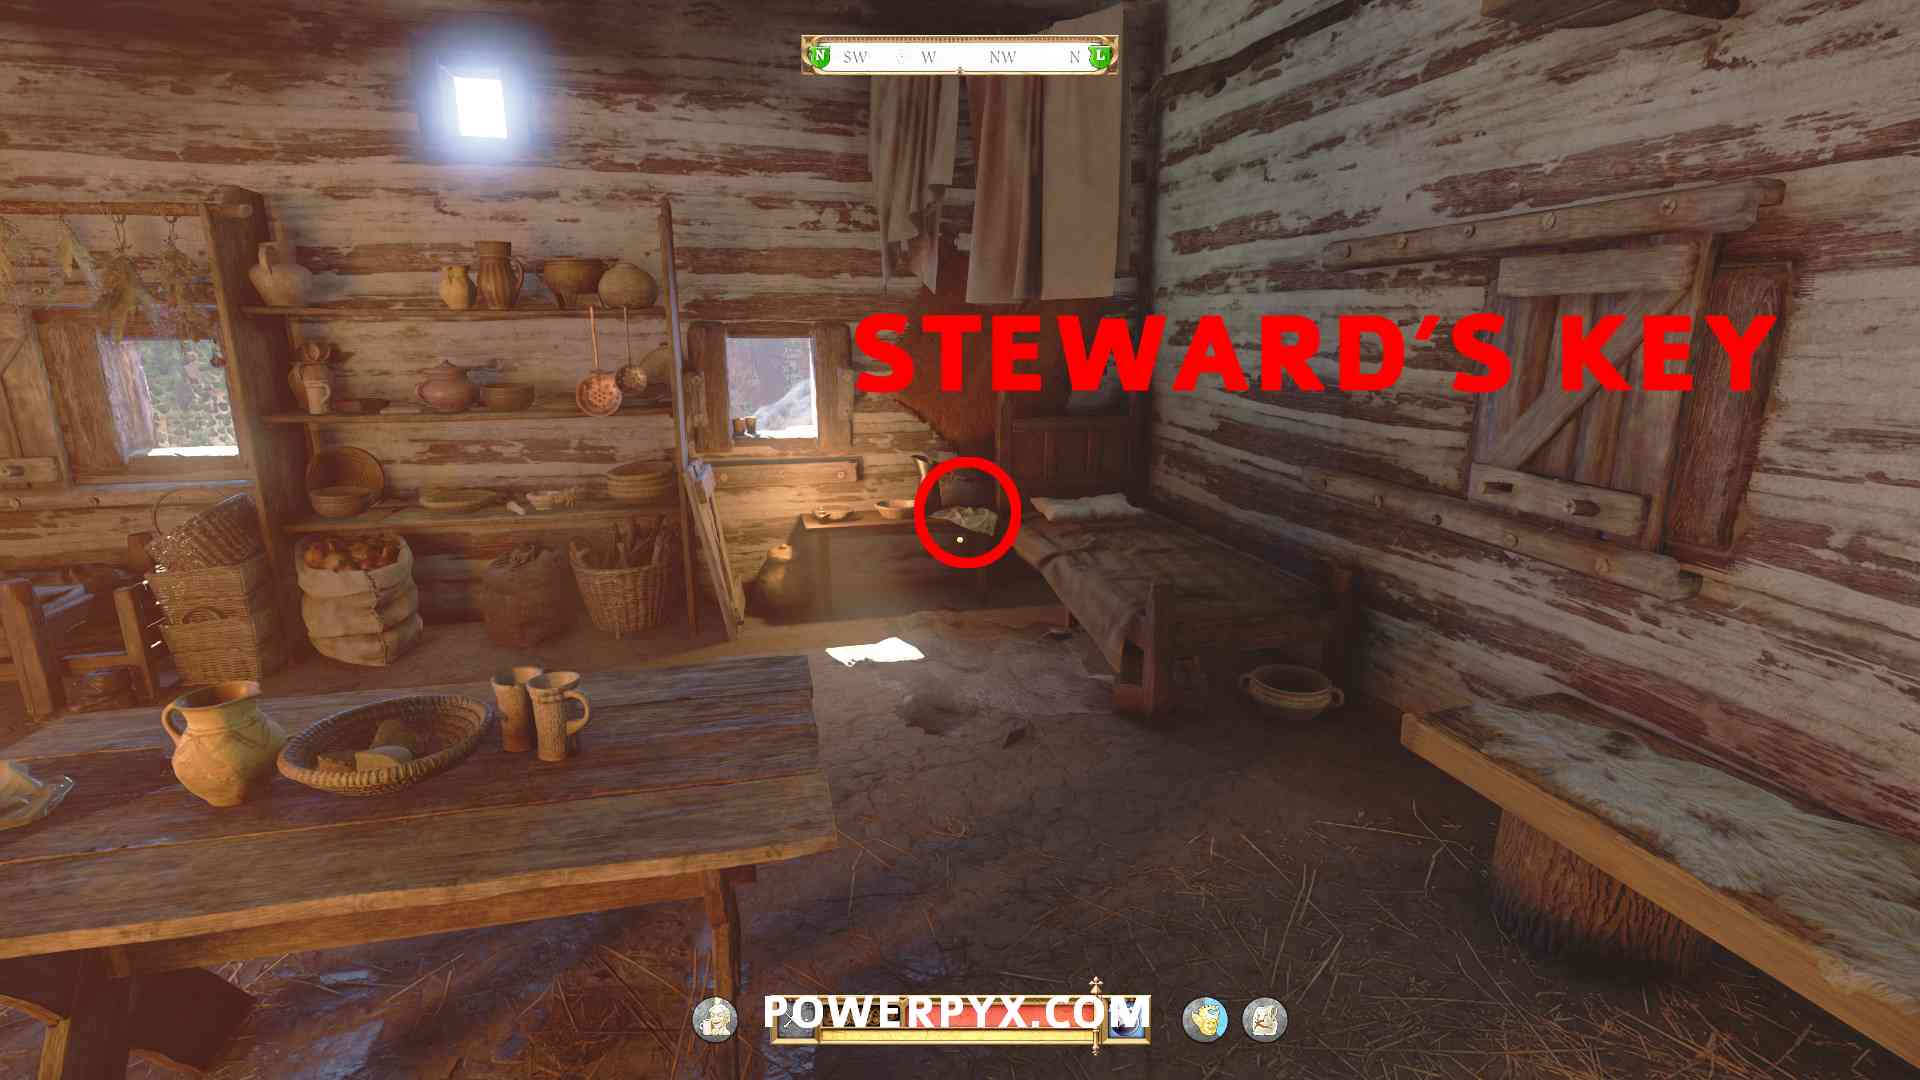
Before you leave the house, be sure to grab the Steward’s Key from the room downstairs (through the left door of where you entered the house). In the back right corner by the bed you find the key. This lets you open the doors in the cellar without lockpicking. In the chest on the left side you can also find a weapon.
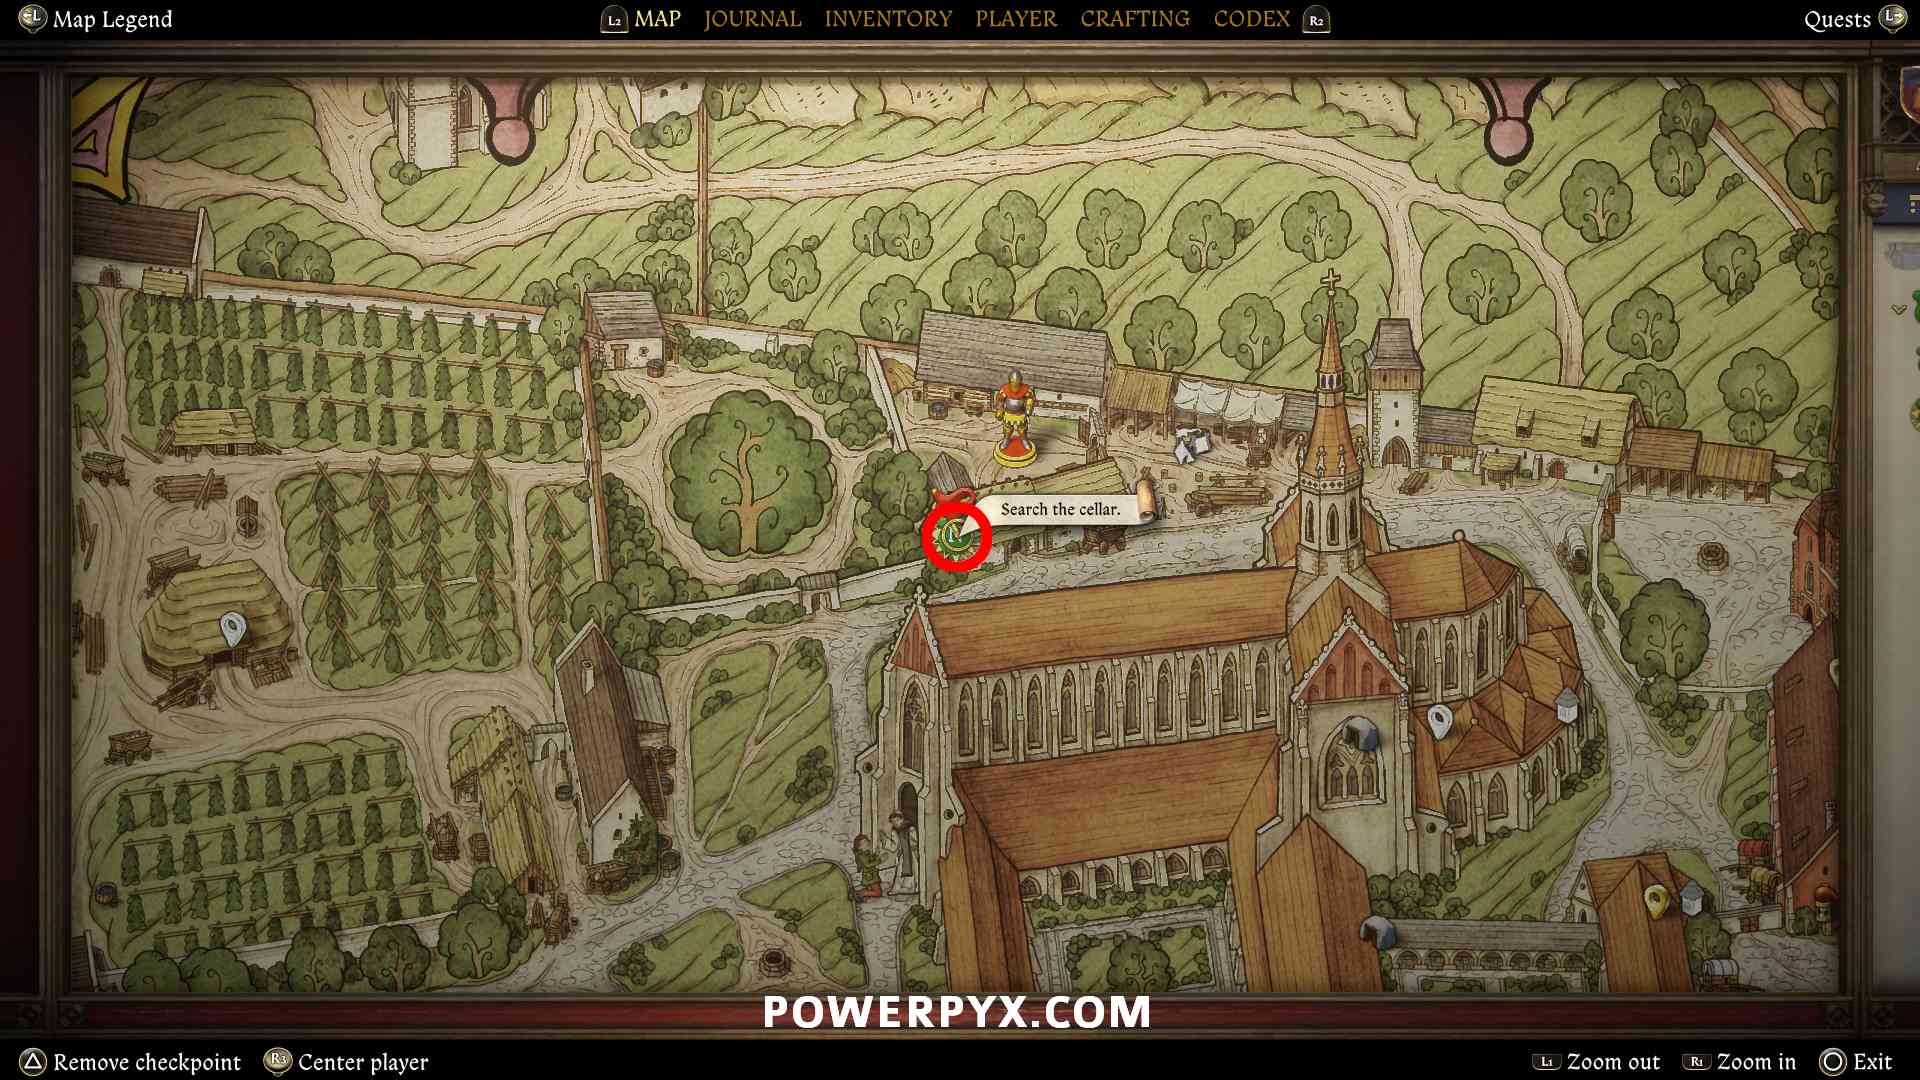
Search the cellar
The cellar entrance is inside the barn where you talked to Zdenyek.
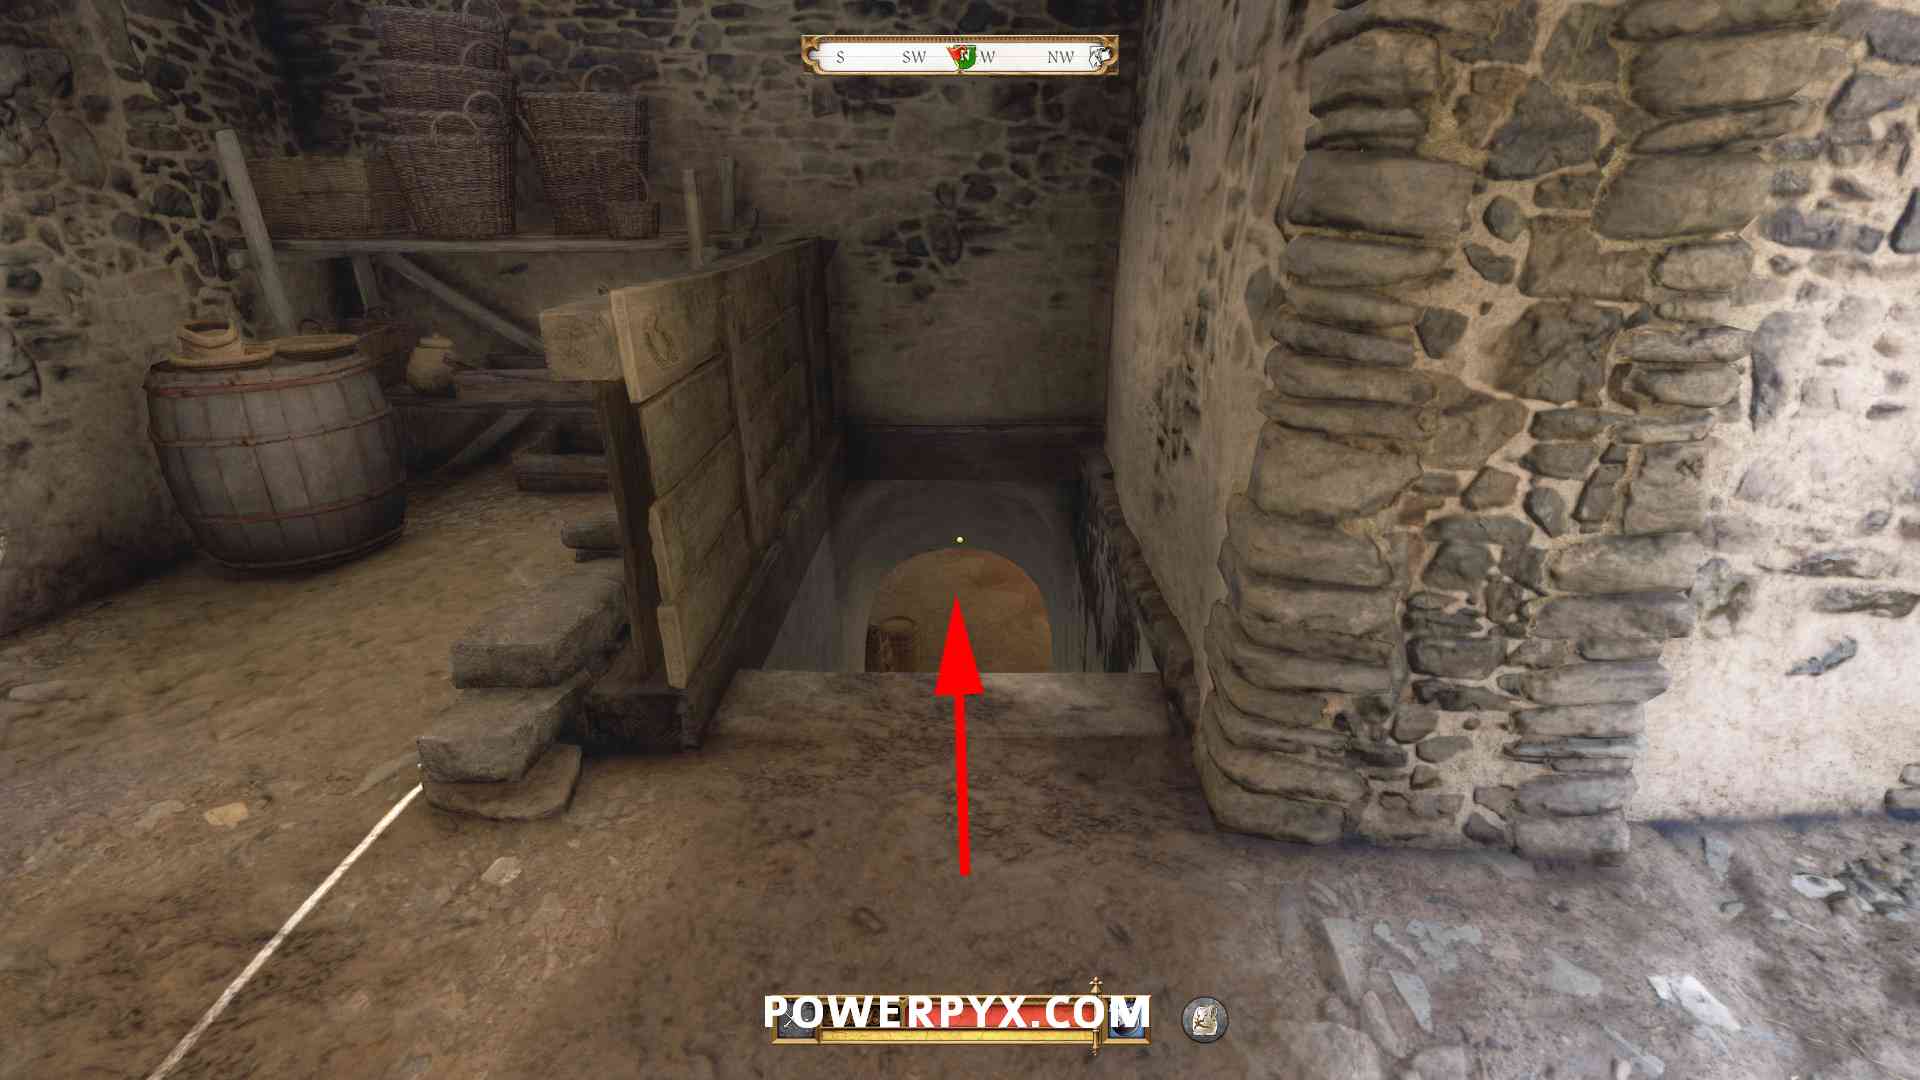
Go downstairs, then immediately turn left to find a hard-locked chest, use the Steward’s Key to open it, loot Zdenyek’s Key from it.
Now use the key to unlock the hard difficulty door in the cellar. Inspect the floor, tubs, barrels, tools.
Go back to the cellar main room and inspect the wet floor, go through the open door and inspect the water tubs.
Lastly, open the medium-locked door using the Pantry key you found in Blazhena’s room (or use the lockpicks scattered around the cellar). Inspect the barrels behind this door.
That’s all of the clues investigated. Henry will conclude that Zdenyek has been watering down the monastery wine to sell the leftovers for a profit. If the Abbot found out, he would be expelled from the monastery.
Confront Zdenyek
The confrontation with Zdenyek can unfold in different ways. If you win the skillcheck you can convince him to cooperate peacefully. If you fail the skillcheck he will attempt to ambush you after you walk with him to the hop fields. No matter what you pick, you will always go with him to the hop fields.
For the best outcome: “I know you’re watering it down” > “I’m not going anywhere” (confirmed to succeed at 24 Coercion) > “Why did you lie about Blazhena?” > “Don’t insult her!” > “I just want the key”.
Go to Zdenyek [If skillcheck failed: Defend yourself against Zdenyek / Speak with Zdenyek]
Follow Zdenyek to the hut at the hop fields. There he will talk to you again. If you won the previous skillcheck he will immediately cooperate without a fight. If you failed the skillcheck or picked the non-skillcheck option, he will threaten you. You can then attempt two more skillchecks to win him over, but if these fail or you pick the option to fight him, you will have to beat him up.
Either way, Zdenyek will give you Blazhena’s Key which opens the cellar door below the library. This is the key that solves the unmarked objective “Find the key to the door in the cellar“.
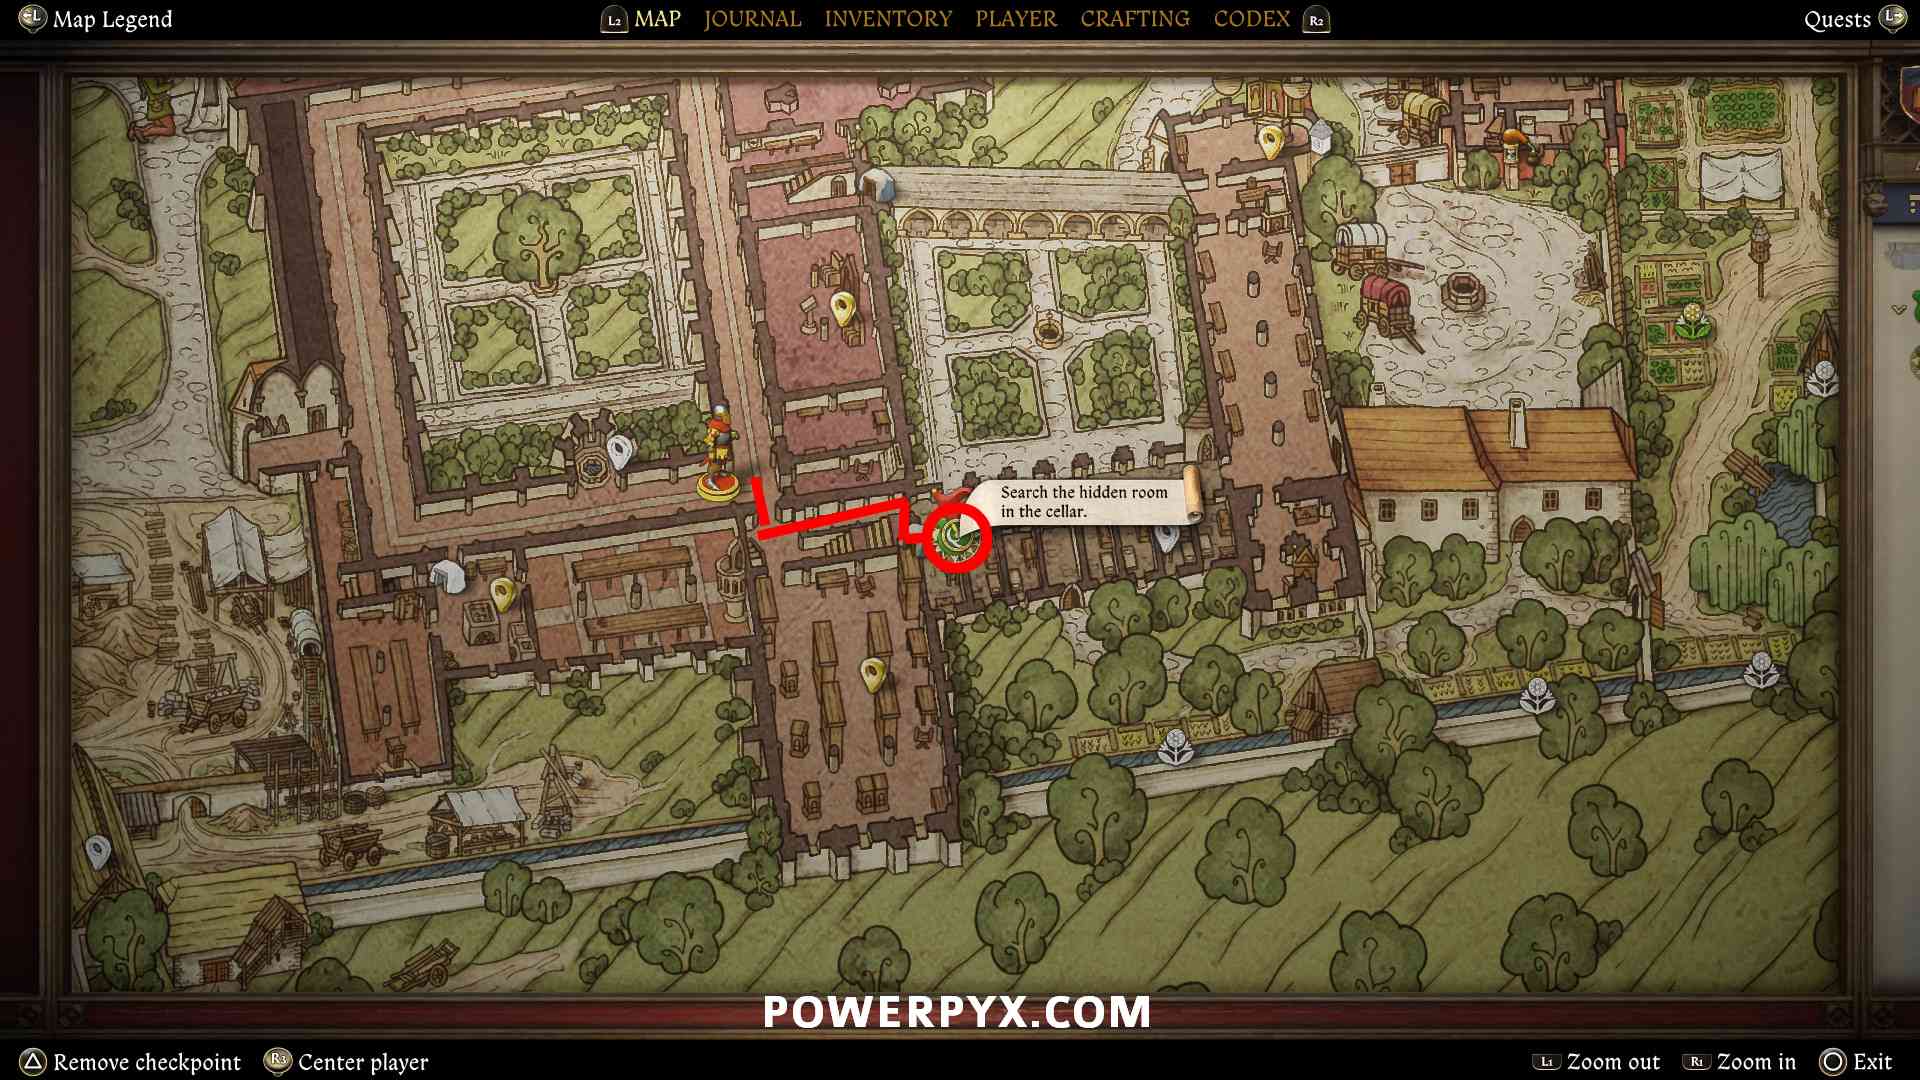
Search the hidden room in the cellar
If you’ve done all other objectives, the cellar will be immediately marked for you. If you did objectives in a different order, do the remaining ones first. It’s the locked door you found during objective “Search the monastery cellar“. You can get back there by going to the library and heading down the stairs. When standing in front of the library door, turn left to find the door at the end of the hallway, below the staircase. After heading downstairs turn right and climb over the scaffold to find the locked door.
MISSABLE TROPHY/ACHIEVEMENT: Survivor – You listened to all of Brother Vojta’s (Vojtiech’s) jokes… and survived.
Make a save before entering the door. During the dialogue that follows, you must repeatedly ask Vojtiech to tell you more jokes until he runs out of jokes.
Behind the door you will find Monk Vojtiech. Exhaust all questions. Then pick the dialogue “Tell me one of your jokes” > keep picking “Tell me another joke” until he runs out. Then exhaust all remaining questions, after the conversation you unlock the Survivor trophy/achievement. Just don’t refuse to listen to more jokes. When you finish up the conversation you can choose if you want to report him to the Abbot, saying “I won’t say a word” gains reputation.
Vojtiech explains that he, Blazhena, Jaroslav and Ernest were inspired by the Dacameron book to write their own book: a joke book! They’ve been meeting here in secret because their joke book is blasphemous and could get them expelled. Blazhena was there because she’s funny and assisted in coming up with jokes.
Before you leave the room, you can take a breath to smell the air, examine the parchments, read the book, drink wine.
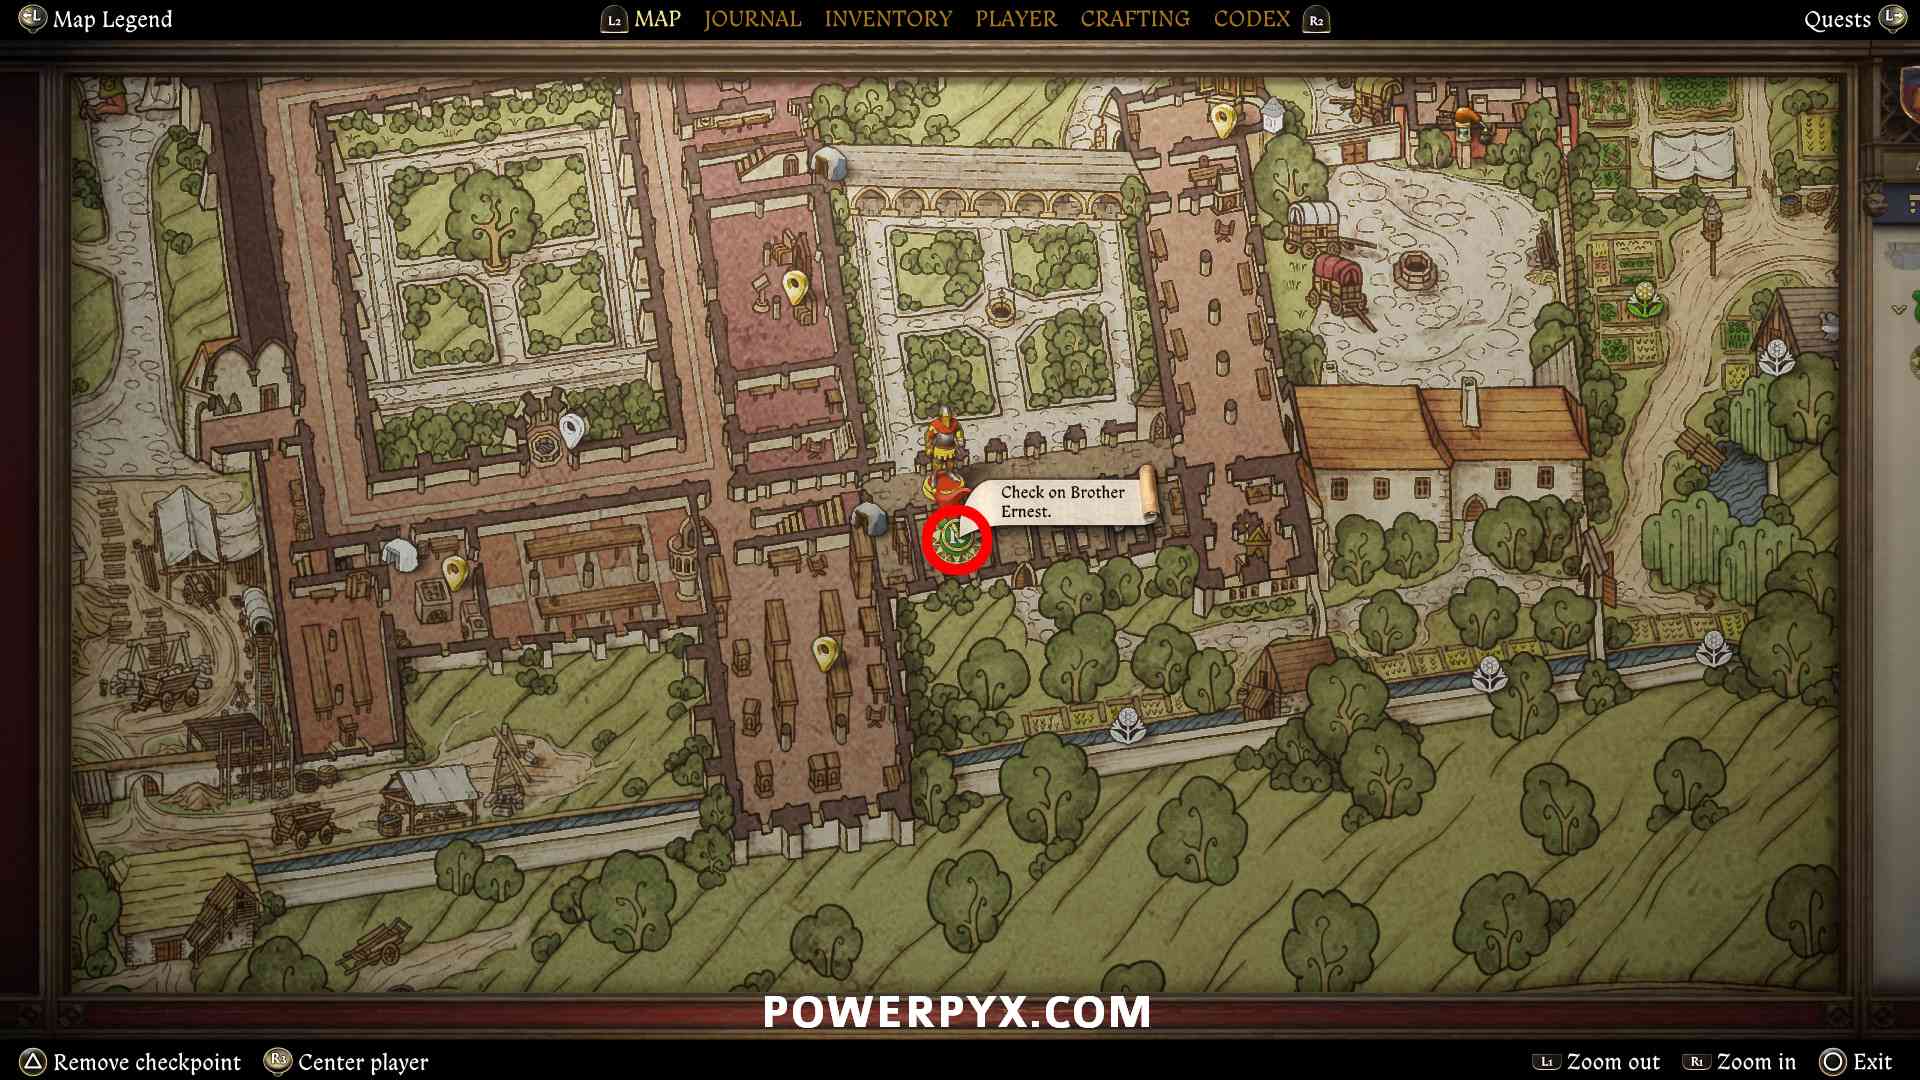
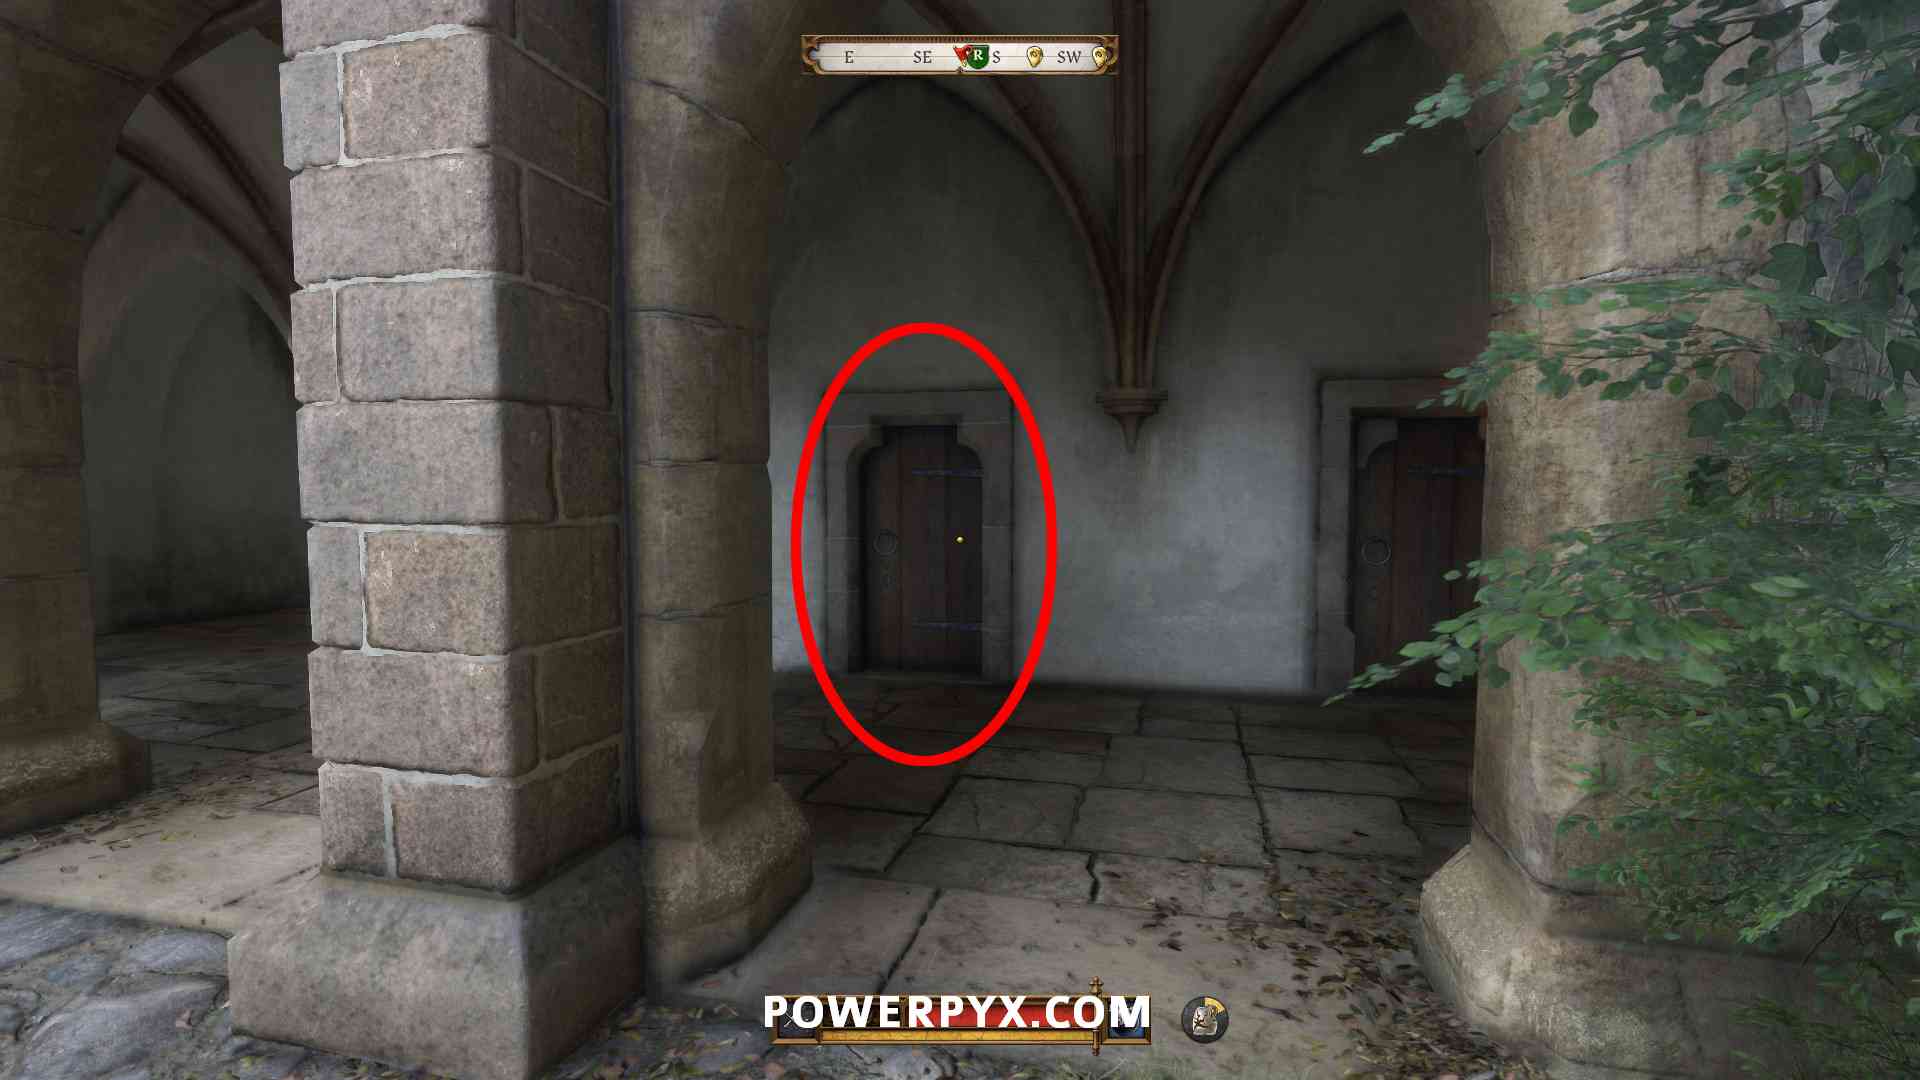
Check on Brother Ernest
Brother Ernest’s cell is accessible from the outer courtyard, the second door from the right. Inside, you will find the deceased Ernest on the floor.
Search Ernest’s Cell
Examine the body and table. Optionally, you can also loot the chest.
Return to Albich
Report back to Albich in the infirmary. Tell him everything you learned: “The overseer is dead” > “I expected it, he was old” > “I discovered a secret scriptorium” > “I’ll tell you everything” > “Stephen had jewellery on him”.
You then automatically go with Albich and Zacharias to report to the Abbot. There you can either reveal the existence of secret scriptorium, or pass a skill check to hide it which increases reputation.
To gain reputation pick “Speech Skillcheck: Keep the secret scriptoriu hidden” (confirmed to succeed at 25 Speech, gives Reputation+) > “I found plans on him” > “I ought to examine the crypt”. Either way, this decision has no impact beyond earning reputation.
You then get a cutscene where the two deceased bodies get carted off and the monastery goes on lockdown. Afterward, tell Albich “I’m happy to help” > “I’ll do what I can”. This starts the next two quests Prevention and Silent Witnesses. Regardless of what dialogues you picked here, the story will progress in the same way and you will always be tasked with examining the crypt.
Before doing Silent Witnesses, you should talk to Zacharias and Denes in the infirmary to get the optional task Our Old Bread. Also do the missable tasks Foreseeing Evil, The Last Wish. Then complete Prevention to not get yourself infected with the illness, and it unlocks the missable Better Safe Than Sorry trophy/achievement. If you skip the Prevention task, you will get a permanent debuff to your stats from exposing yourself to the illness in the crypt.
MISSABLE TROPHY/ACHIEVEMENT:  Quiet as a Church Mouse – The knights never had to escort you to the infirmary.
The monastery now goes on lockdown and if you’re seen outside the infirmary you will be held up by the guards. For the rest of the DLC you are not allowed to be caught by guards. They would escort you back in the infirmary which voids the trophy. If you complete the rest of the DLC in stealth without guards catching you, then the trophy unlocks when completing the DLC. If you are ever caught, reload the previous save.
This finishes Anamnesis quest in Kingdom Come Deliverance 2: Mysteria Ecclesiae DLC.
Next up: Prevention
For all other Quests refer to Kingdom Come Deliverance 2 Walkthrough.
Leave a Reply