
Animus Anomalies are a type of Collectible in Assassin’s Creed Valhalla (ACV). This guide shows where to find all Animus Anomaly Locations in AC Valhalla (10 total). They are needed for the Completionist All the Way trophy or achievement (100% Completion).
Animus Anomalies count as Mysteries. On the world map they are marked by this icon: ![]() . You can still access all regions after the story to find them.
. You can still access all regions after the story to find them.
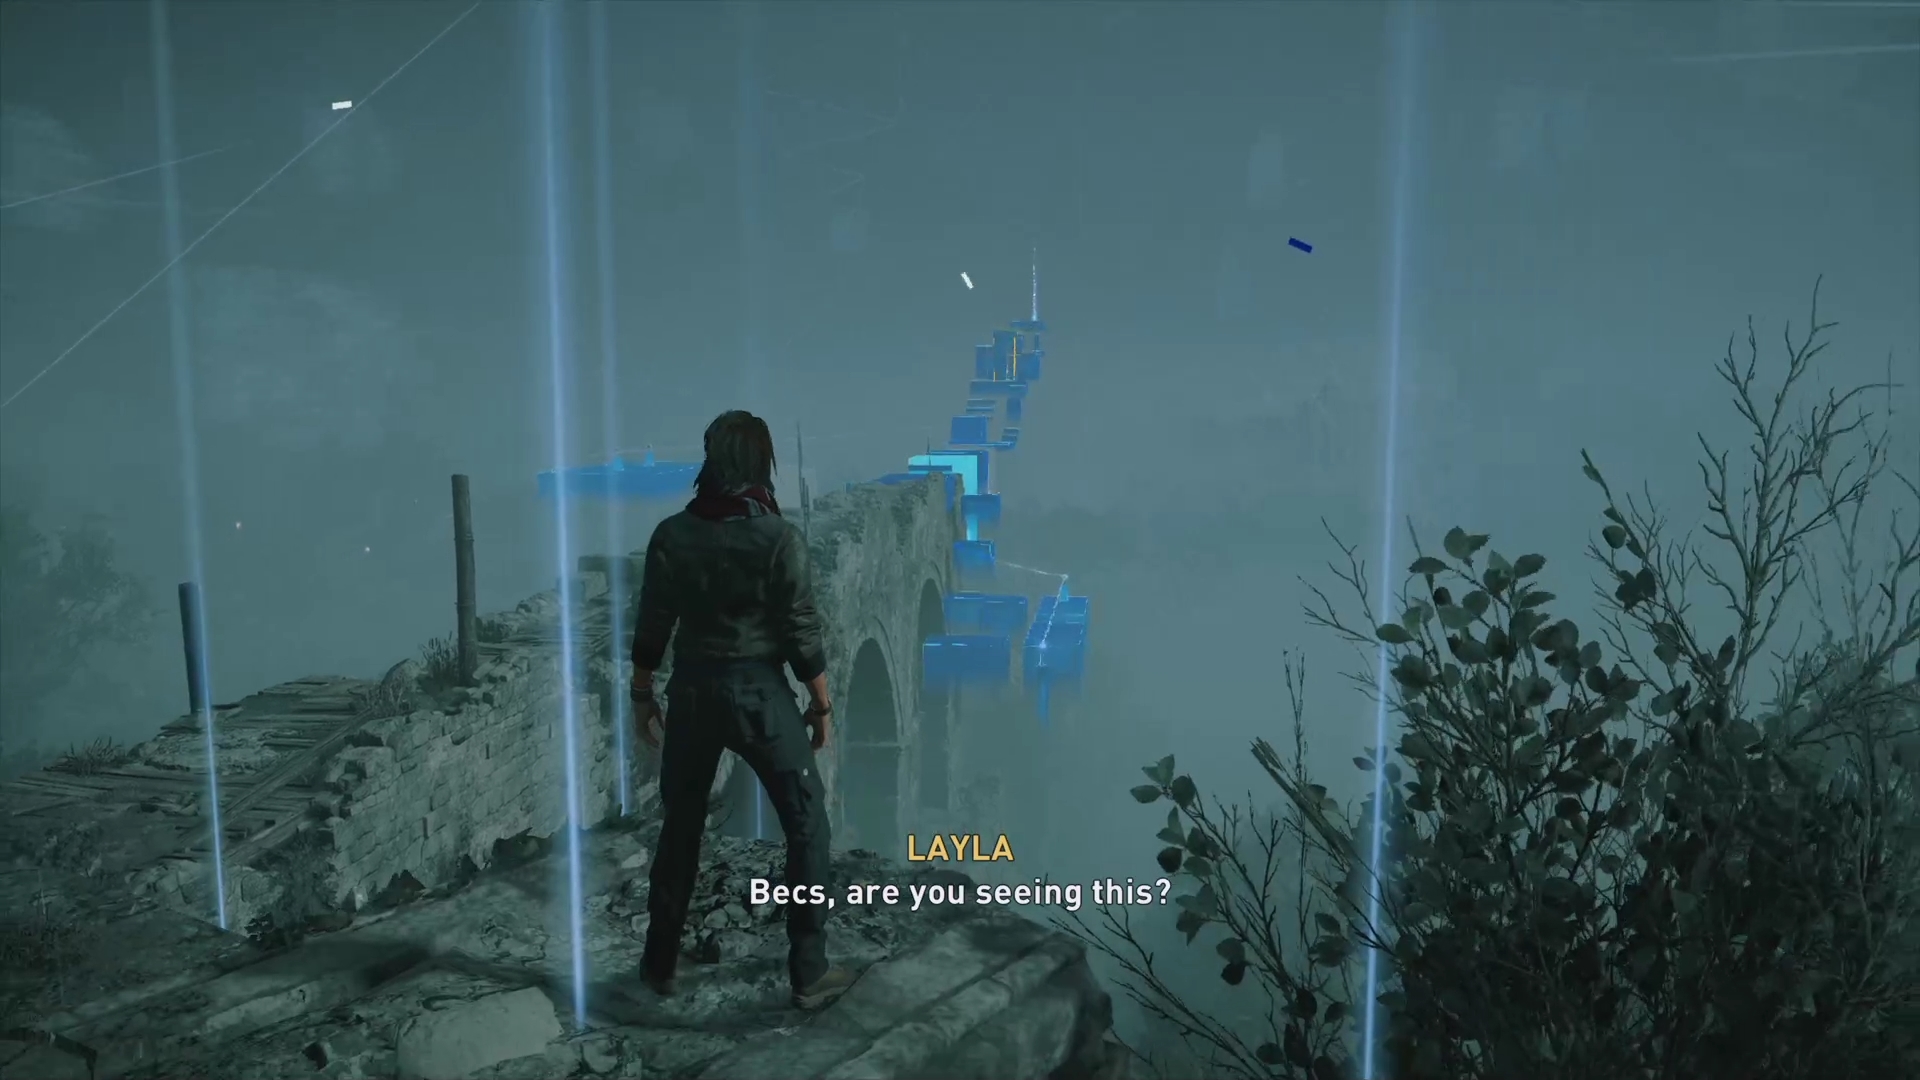
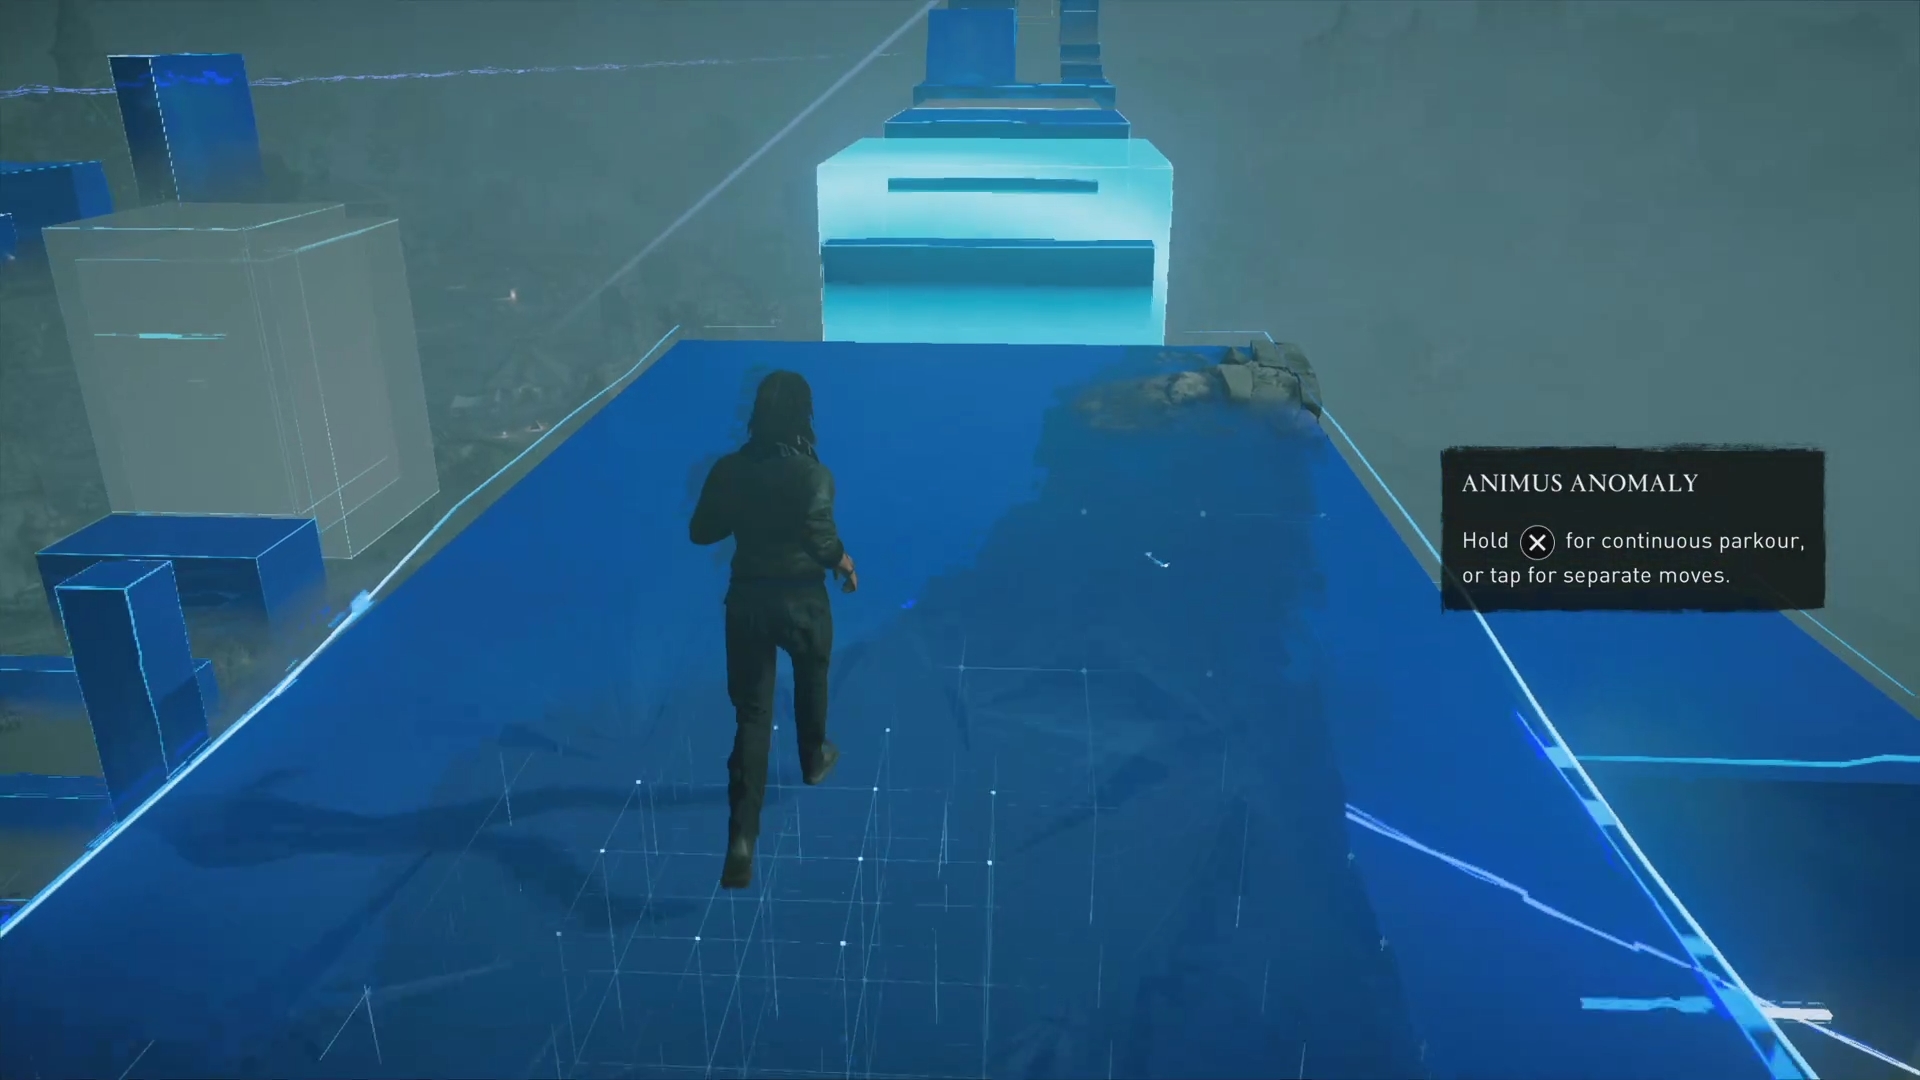
Animus Anomalies are platforming sections. Upon activating them, the world around you will turn into a platforming section. The goal is to reach the end of the platforming section to complete the Anomaly and unlock a video fragment. Doing all of them unlocks the “Hidden Truth” trophy or achievement.
For a region by region guide of all Mysteries refer to this guide: Assassin’s Creed Valhalla Mysteries Guide
Rygjafylke
None
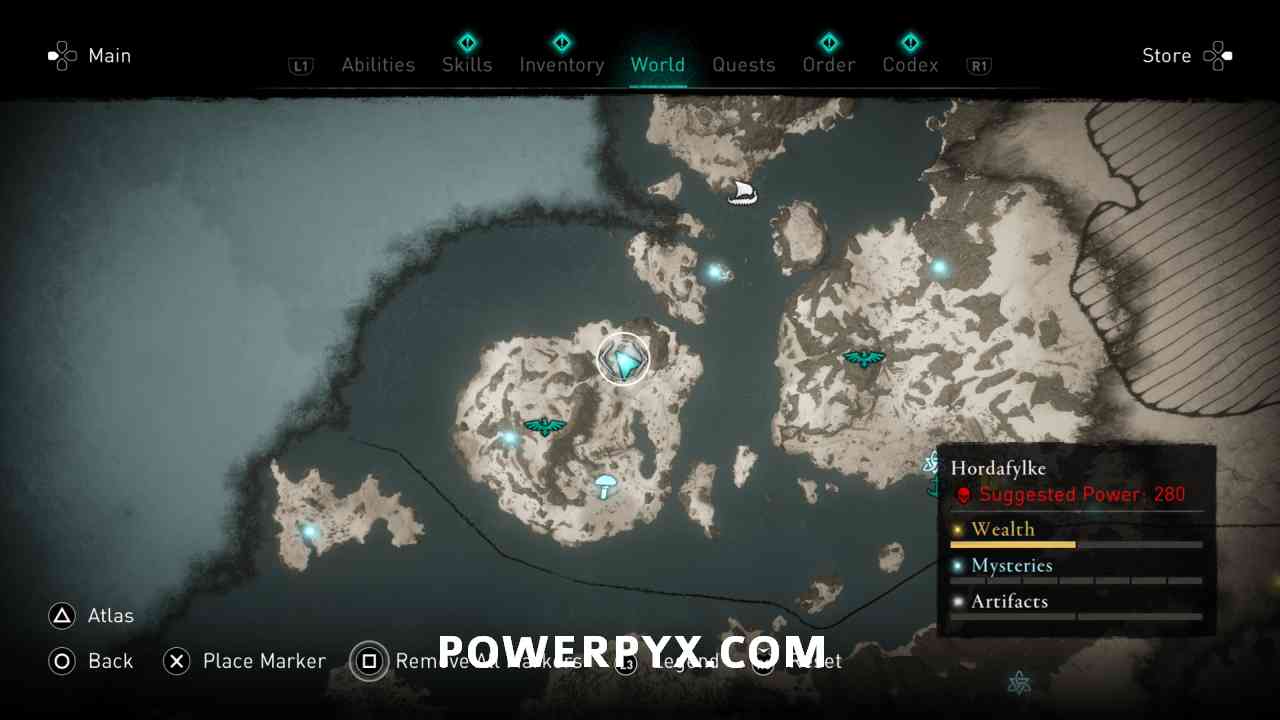
Hordafylke
Animus Anomaly #1
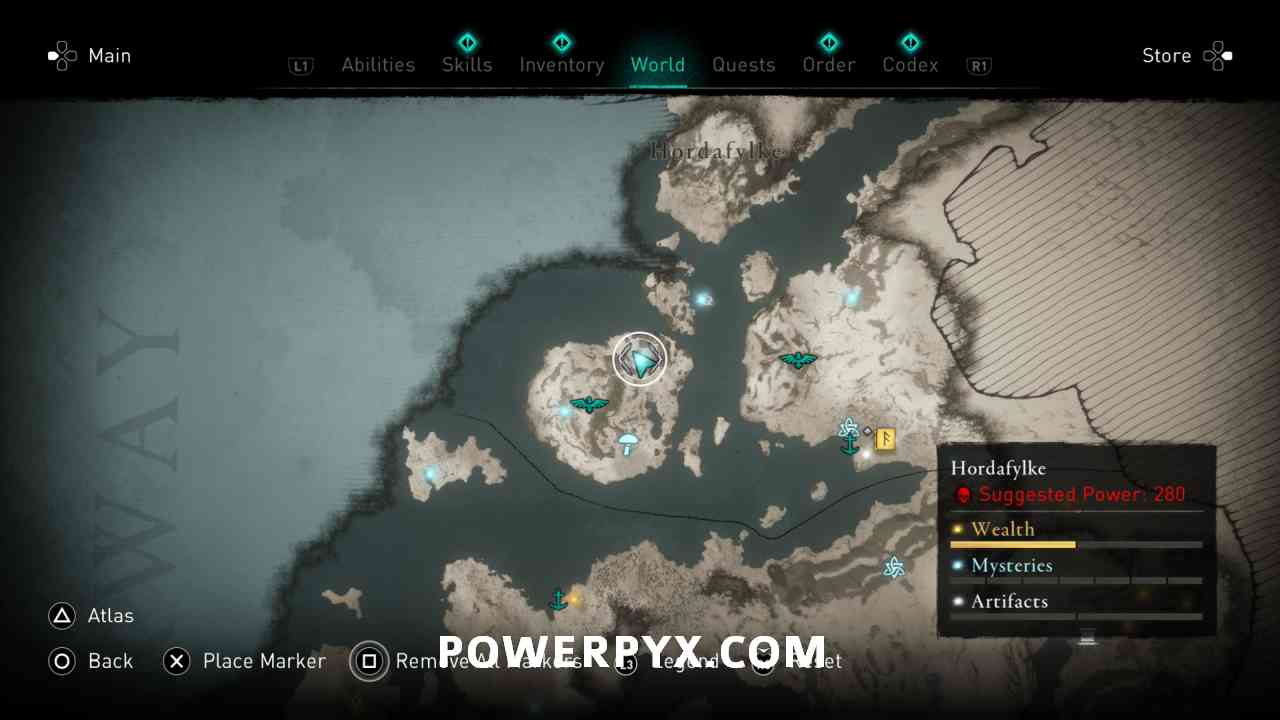
This Animus Anomaly only spawns much later, at the end of the story. It won’t show up during your first visit to Norway so you must come back for it later. Animus Anomalies are platforming challenges. When you arrive at the location, interact with the orb there and it will spawn a blue platforming section in front of you. Reach the top and avoid the red hazard points.

Ledecestrescire
Animus Anomaly #2

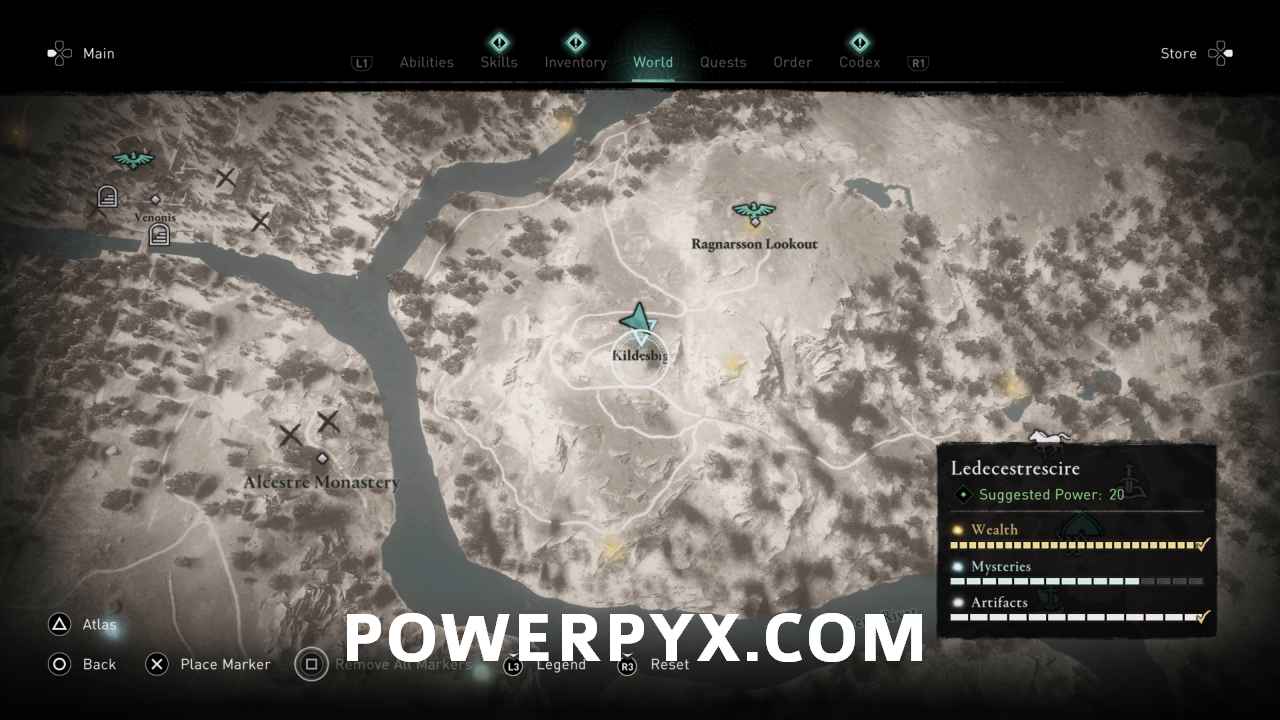
Complete the platforming section and reach the data pack.
Grantebridgescire
None
East Anglia
Animus Anomaly #3

Complete the fairly straightforward platforming section and pick up the data packet.
Lunden
None
Oxenefordscire
Animus Anomaly #4
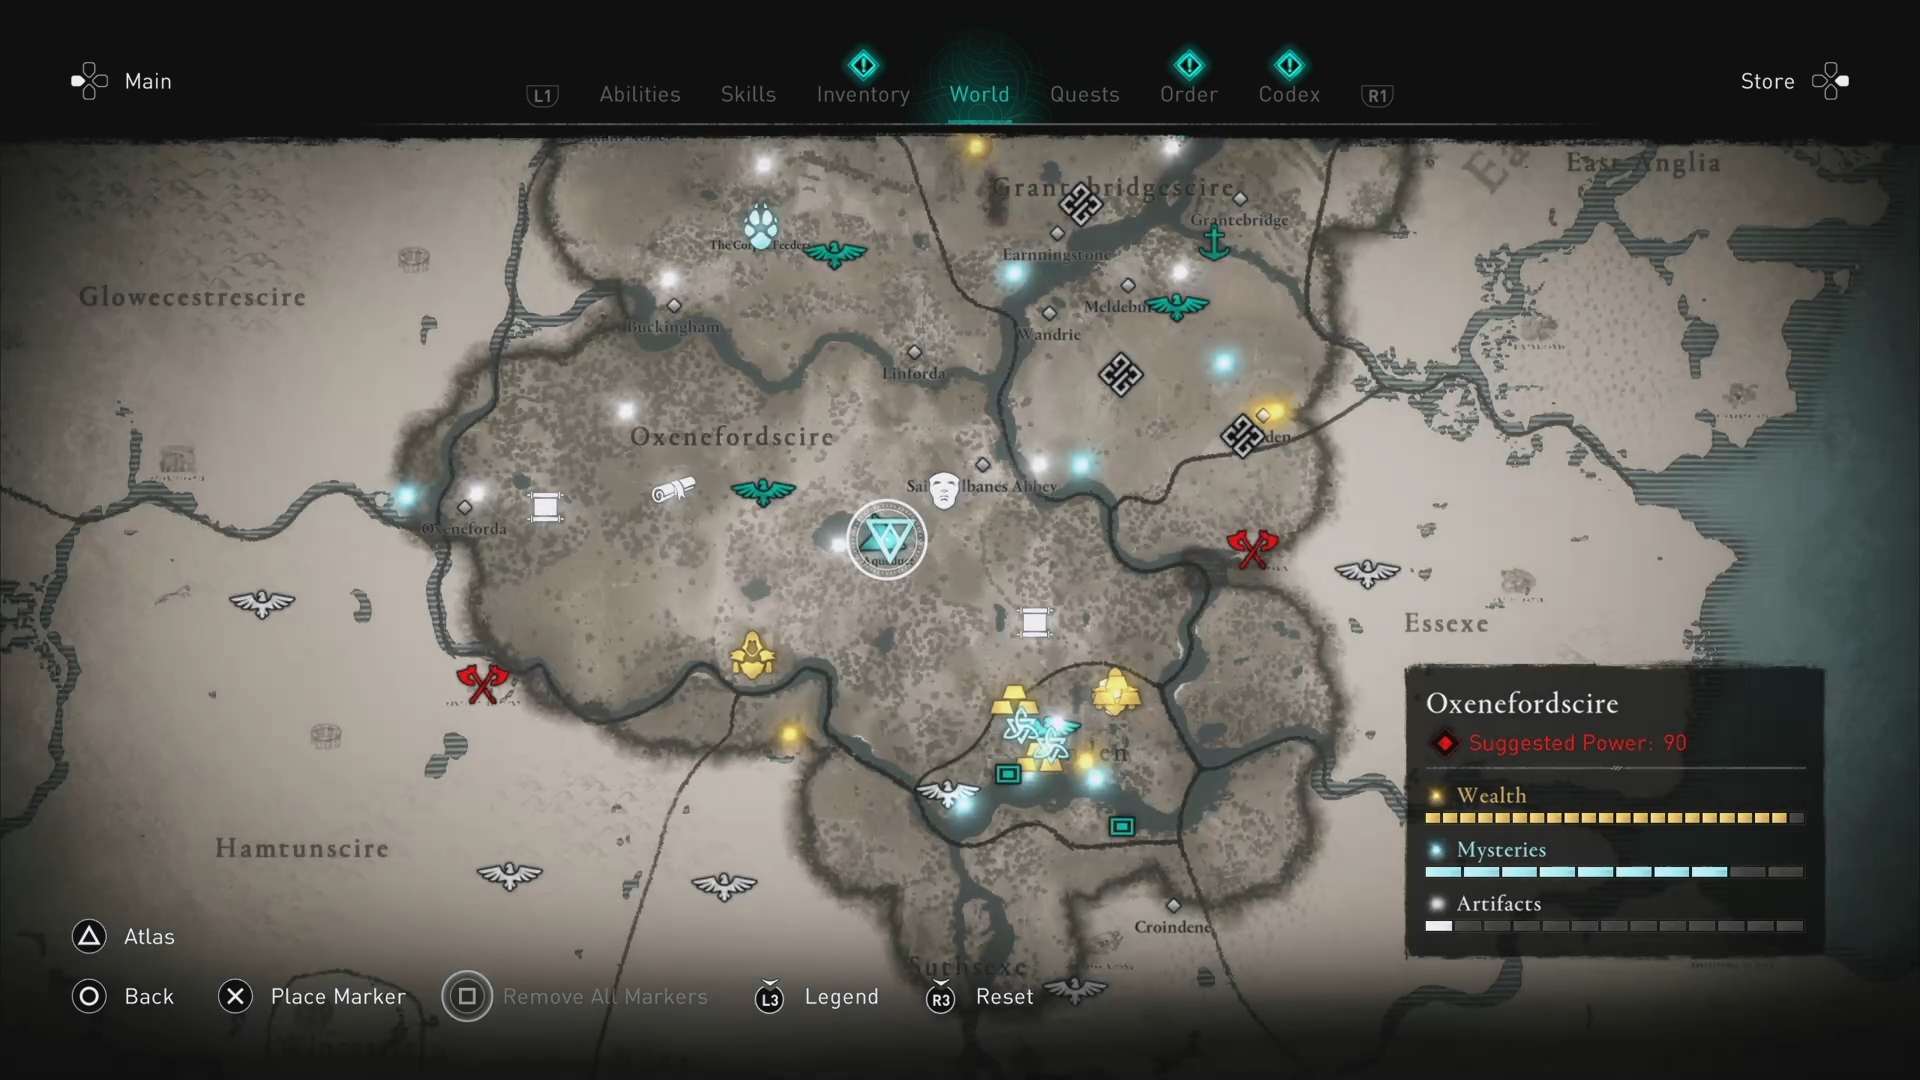

On a cliff near the aqueduct, you’ll discover an Animus Anomaly, and as soon as you touch it the world around you will freeze and you’ll find yourself in control of Layla in a virtual space.

Run along the aqueduct until you reach a blue platform. Turn right and go down the series of blue platforms to a lower level.

At the bottom, turn to the left and go along another set of platforms until you reach a draggable reflector. Pull it back until it reflects the beam onto an unstable platform in the distance, which will stabilize.


Move past the reflector and jump across another series of platforms that lead under the bridge to the other side, climb up at the end and turn to the right. Follow the platforms until you reach the newly stabilized platform, then climb up and turn to the left.


Jump over to a platform with two draggable reflectors that you will have to arrange to reflect the light beam into another unstable platform. The trick is to reverse the position of the reflectors in order to position them properly. Line up one reflector to intersect with the platform, then align the second reflector to cause the beam to hit the first reflector.


Head back the way you came until you reach the first draggable reflector, and push it back into its original position so that it stabilizes the platform in line with the aqueduct. Then climb back up to the original path.


Run along the path until it splits. Take the right path, and keep going until you reach the red hazard. These obstacles will cause desynchronization if you hit them (or if they hit you).


Wait till the way is clear, then jump across to the ledge and immediately jump up to the top of the platform.


Jump across the platforms to the top, then wait for the hazards to clear before continuing. Make sure to take the left path, or the hazard will likely hit you before you can get on top of the platform to the right.


Climb to the top, then slide down the slope in front of you. When the hazards are moving up/right, use continuous parkour to jump to the beam then immediately to the ledge on the other side, climbing up right away.


Straight ahead you will see two hazards that seem like you’ll hit if you jump across, but they’re actually behind the wall ahead of you. Jump across to the ledge, then climb up. Once at the top, turn right and jump to the beam across from you.


From this position its much easier to avoid the hazards. Wait until the path is clear then jump across to the platforms on the other side.


Turn left and jump on the platform, then turn right to have a straight shot to the anomaly. Interact with it to end the mission.


Sciropescire
Animus Anomaly #5


Another weird animus anomaly to platform through. The path is straight forward at first. Climb the ledges to the top, then wait until the hazard has passed before jumping across the bars to the next platform and pull yourself up quickly.


Again, wait for the hazard to pass below your platform then jump forward to the first bar and continuously parkour to the other side, and climb up.


Keep following the ledges upward until you reach the top, where you will be faced with another laser and splitter puzzle.


First jump straight ahead and aim the reflector at the triangular splitter. Then aim the laser at the reflector which will cause the beam to split and stabilize two different unstable platforms.


Traverse across the stabilized platforms and avoid the hazards.


On the next leg of the course, jump across when the coast is clear, but don’t try to pass both hazards at the same time. There isn’t enough time to do it safely. Jump to the middle bar, wait for the second hazard to be clear, then jump across to safety.


Climb up a couple of platforms until you encounter another laser & reflector puzzle. There are two hazards here that sweep across the entire area at right angles to one another, so be sure you’re not going to get blindsided by the second hazard before you jump. First, jump straight ahead, following the horizontal hazard as it moves away from you. At the end, pull yourself up quickly before the hazard reverses direction.


Aim the first laser at the reflector diagonally across from you, then go over to the reflector and aim it at the unstable platform ahead of you to stabilize it. Climb up to the next section.


Last puzzle. Finally! Jump left to the laser, and use it to stabilize the platform between you and the second laser. Then use the second laser to stabilize the platform between you and the reflector.


Jump across to the reflector and point it at the unstable platform directly across from you. Then backtrack to the laser in the corner, and point it at the splitter. You’ll notice that the splitter will cause the laser to stabilize a platform on the left and reflect onto the unstable platform that you pointed the reflector at.


Back to the first laser, and point it at the remaining unstable platform in your path to open the way to the end. Traverse across and climb up to the last platforming sequence. Wait for the upper hazard to be moving away from you and the lower hazard to reverse direction and be moving to the right before jumping down.


Then wait for the upper hazard to reverse direction and pass over your head before climbing up.


Run around the corner and jump to the ledge on the wall opposite you. Hang from this ledge until the lower hazard passes under you, then drop down and follow the lower path.


At the end climb up to the top where you will be safe for a moment. Again wait for the hazard to pass beneath you, then jump ahead before it reverses direction.


At the end climb up, turn right and wait for the hazard to pass overhead before climbing to the top of the next platform. You’ll be safe if you hang on the edge and only pull up after it goes by.


Jump across to the next platform, then jump across to the ledge, following the platforms until you reach a tall tower with hazards moving up and down on all four sides.


The trick to getting through this area is to notice that the hazards are moving at different speeds. Follow the fast hazard directly in front of you until a slower hazard to the left or right moves past you downward, then traverse around the corner to the now safe face with the slower hazard below you unable to catch up.


Finally, jump across the beams, climb up the ledges to the top of the platform and grab the data at the end
Cent
None
Lincolnscire
Animus Anomaly #6


Essexe
None
Suthsexe
Animus Anomaly #7


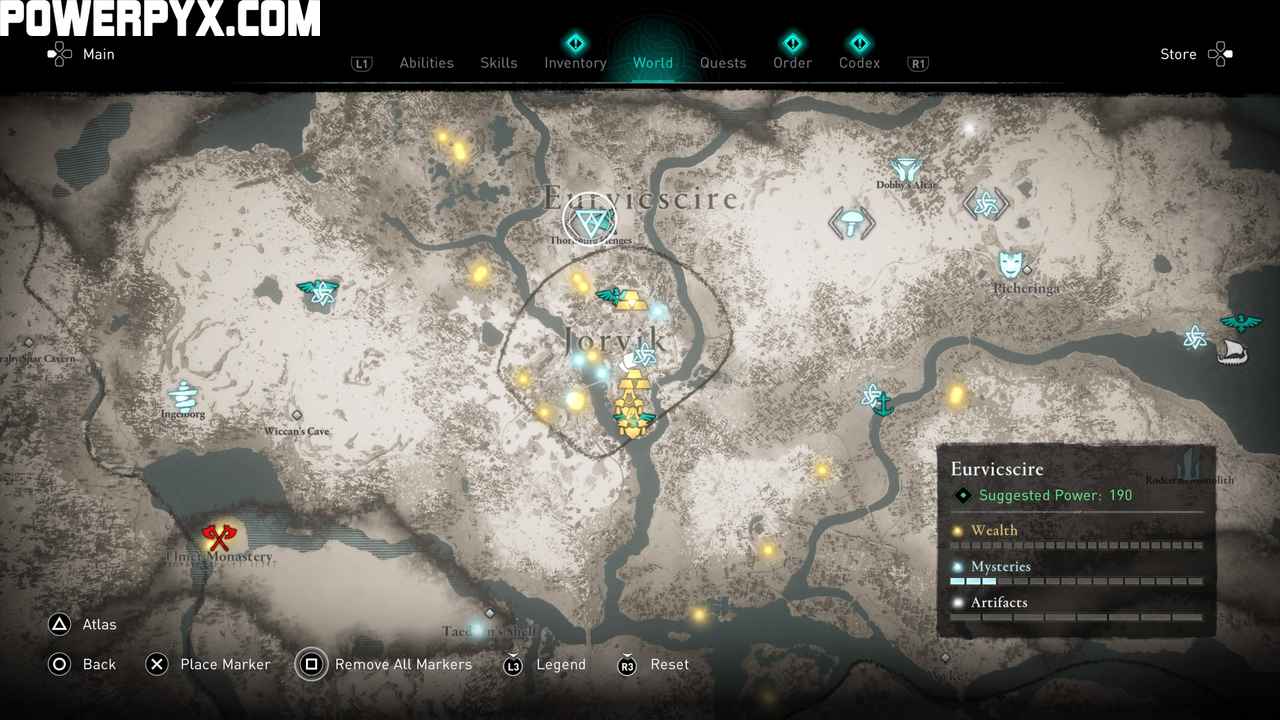
Eurvicscire
Animus Anomaly #8

Jorvik
None
Glowecestrescire
None
Snotinghamscire
Animus Anomaly #9


This Animus anomaly can be found at Briudun Hill, in the East of the region. Head to the anomaly on the path and activate it. Complete the simple platforming challenges to complete it.

Wincestre
None
Hamtunscire
Animus Anomaly #10
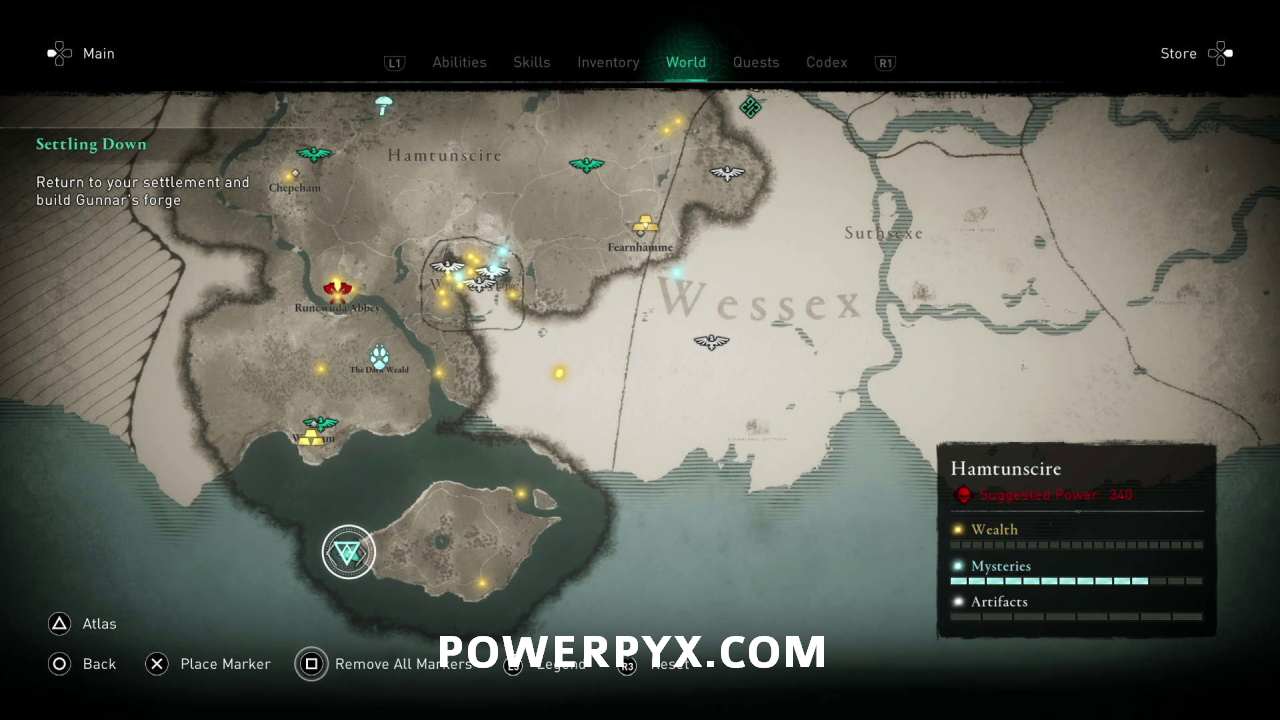

This Animus Anomaly can be found on the very Western tip of the island at the South of Hamtunscire. Complete the platforming puzzle to finish this mystery.
Vinland
None
Asgard
None
Jotunheim
None
That’s all 10 of the Animus Anomalies in AC Valhalla.
For all other Collectible Types check out the complete Assassin’s Creed Valhalla Collectibles Guide.
Devilhaze says
need 10 or 9 anomalies
i have 9fragments an 1 video,is it all?
MrDeathWeapon says
That’s the same with me, so I assume it would be yes to your question.
Yiannakis Yiousef says
I’ve done them all and the trophy didn’t apper, the same for the secret video. But when a log out from the animus i can see the video and the clips from my laptop