PowerPyx.com

PowerPyx

  • Trophy Guides
  • Game Guides
  • Wikis
  • Reviews
  • Next Guides
  • Contact
Show SearchHide Search
Home » Game Guides » Borderlands 3 » Borderlands 3 ECHOnet Neutrality Side Mission Walkthrough

Borderlands 3 ECHOnet Neutrality Side Mission Walkthrough

September 25, 2019 by PowerPyx Leave a Comment

ECHOnet Neutrality is a side mission in Borderlands 3 (BL3). This walkthrough will guide you through all objectives of the ECHOnet Neutrality Side Quest.

ECHOnet Neutrality is unlocked when you reach Devil’s Razor during main mission Blood Drive.

Planet: Pandora
Area: Devil’s Razor
Quest Giver: Claptrap / Notice Board in Devil’s Razor
Requirement: Reach Devil’s Razor region during main mission Blood Drive.
Recommended Level: 28
Reward: $8958 + 6983 XP + The Two Time unique sniper rifle
Mission Info: From the Clapslist: Help remove a device that’s throttling some of the locals’ ECHOnet devices

Objectives:

  • Talk to Edgren
  • Go to ECHO Repeater Center
  • Locate UG-THAK
  • Destroy UG-THAK
  • Kill the COV
  • Open Tubes
  • Destroy UG-THAK (again)
  • Talk to Edgren

Starting Location: ECHOnet Neutrality

This side mission can be accepted in two places. Either from the Notice Board in Devil’s Razor (Pandora) or from Claptrap in the cargo hold of Sanctuary (your space ship):

Location #1 (Devil’s Razor Notice Board):

Location #2 (Sanctuary – Claptrap):
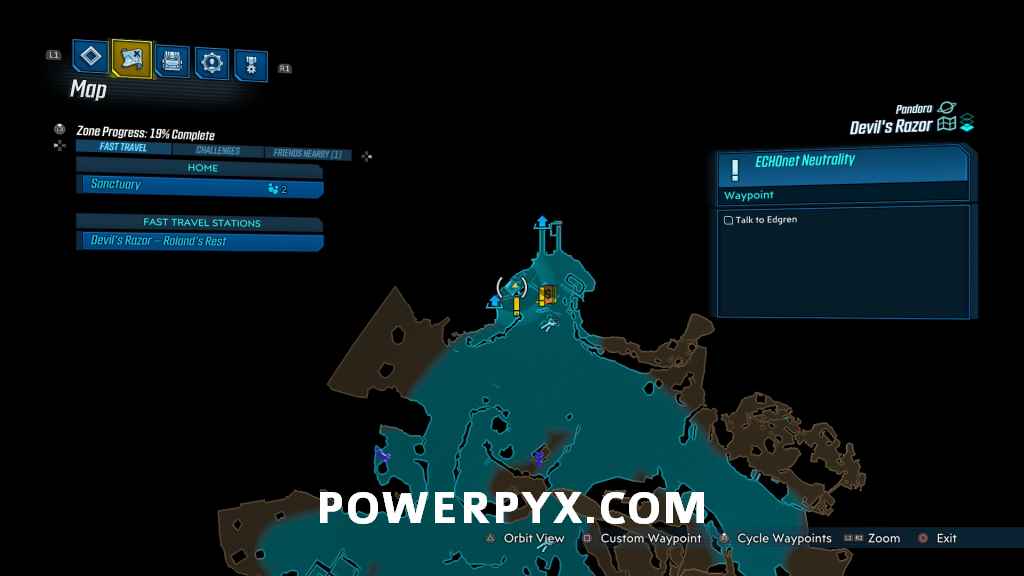
Talk to Edgren

Edgren is found in a container at Roland’s Rest fast travel point (Devil’s Razor). Talk to that guy.

Go to ECHO Repeater Center

Head up the road to the place with the big satellite dish. It’s not far away.

Locate UG-THAK

You are now given a fairly large search area for the UG-Thak.

Here’s where you find the UG-Thak location: Head inside the tallest tower in the middle of the camp. You must shoot the wooden barricade on the backdoor to enter. Inside you find the UG-THAK.

Interact with the computer behind the barricade. It opens a door.

Destroy UG-THAK

Shoot the red-glowing machine behind the door that just opened. However, it can’t be destroyed yet – an orange firewall will protect it. We must kill the hordes of enemies first.

Kill the COV

Step back outside and kill everyone.

Open Tubes

After all COV are dead, there are 5 tubes marked around the area. Interact with all of them.

Destroy UG-THAK

Head back inside the central building. Now the firewall is gone and you can destroy the UG-THAK.

Talk to Edgren

Head back to Edgren at Roland’s Rest (where you first talked to him in him). He gives you some money, XP, and a unique sniper rifle.

This finishes ECHOnet Neutrality side mission in Borderlands 3.

For all other Side Mission Walkthroughs, check out our complete Borderlands 3 Side Missions Walkthrough.

« PrevBorderlands 3 Pandora’s Next Top Mouthpiece Side Mission WalkthroughNext »Borderlands 3 The Feeble and the Furious Side Mission Walkthrough
Share
Tweet
Shares 0

Filed Under: Borderlands 3, Game Guides

Leave a Reply Cancel reply

Your email address will not be published. Required fields are marked *

Youtube 869,000Subscriber
Facebook 10,006Fans
Twitter 11,270Followers

Latest Trophy Guides

Cyberpunk 2077 Trophy Guide

Assassin's Creed Valhalla Trophy Guide

Call of Duty: Black Ops Cold War Trophy Guide

Demon's Souls PS5 Remake Trophy Guide

Spider-Man Miles Morales Trophy Guide

Astro's Playroom Trophy Guide

Sackboy: A Big Adventure Trophy Guide

Bugsnax Trophy Guide

Yakuza Like a Dragon Trophy Guide

Watch Dogs Legion Trophy Guide

Red Dead Redemption 2 Trophy Guide

Latest Game Wikis

Cyberpunk 2077 Wiki

Assassin's Creed Valhalla Wiki

Ghost of Tsushima Wiki

The Last of Us 2 Wiki

Final Fantasy VII Remake Wiki

Nioh 2 Wiki

Pokemon Sword & Shield Wiki

Borderlands 3 Wiki

Days Gone Wiki

Sekiro Shadows Die Twice Wiki

Kingdom Hearts 3 Wiki

Red Dead Redemption 2 Wiki

God of War Wiki

Far Cry 5 Wiki

Recent Posts

  • Hitman 3 Trophy List
  • Cyberpunk 2077 Meetings Along the Edge Walkthrough
  • Cyberpunk 2077 Poem of the Atoms Walkthrough
  • Cyberpunk 2077 Stairway to Heaven Walkthrough
  • Cyberpunk 2077 Love Rollercoaster Walkthrough

Borderlands 3 Wiki

  • Wiki Home
  • Walkthrough
    • Children of the Vault
    • From the Ground Up
    • Cult Following
    • Taking Flight
    • Sanctuary
    • Hostile Takeover
    • The Impending Storm
    • Space-Laser Tag
    • Atlas, At Last
    • Beneath the Meridian
    • Hammerlocked
    • Lair of the Harpy
    • The Guns of Reliance
    • The Family Jewel
    • Going Rogue
    • Cold as the Grave
    • Blood Drive
    • Angels and Speed Demons
    • The Great Vault
    • The First Vault Hunter
    • Footsteps of Giants
    • In the Shadow of Starlight
    • Divine Retribution
  • Side Missions
    • Powerful Connections
    • Bad Reception
    • Golden Calves
    • Dump on Dumptruck
    • Under Taker
    • Skag Dog Days
    • Head Case
    • Just a Prick
    • Healers and Dealers
    • Maliwannabees
    • Rise and Grind
    • Dynasty Diner
    • Kill Killavolt
    • Porta Prison
    • Proof of Wife
    • Holy Spirits
    • Invasion of Privacy
    • Opposition Research
    • Technical NOGout
    • Ratch’d Up
    • Don’t Truck with Eden-6
    • Get Quick, Slick
    • On the Blood Path
    • The Kevin Konundrum
    • Witch’s Brew
    • Sacked
    • Malevolent Practice
    • Irregular Customers
    • Capture the Frag
    • Swamp Bro
    • Dynasty Dash: Eden 6 / Floodmoor Basin
    • Rumble In The Jungle
    • Sell Out
    • Raiders of the Lost Rock
    • Pandora’s Next Top Mouthpiece
    • ECHOnet Neutrality
    • The Feeble and the Furious
    • Dynasty Dash: Pandora / Devil’s Razor
    • Buff Film Buff
    • Boom Boom Boomtown
    • Sheega’s All That
    • Life of the Party
    • The Homestead
    • The Homestead (Part 2)
    • The Homestead (Part 3)
    • Just Desserts
    • Let’s Get It Vaughn
    • The Demon in the Dark
    • Childhood’s End
    • Wildlife Conservation
    • Cannonization
    • Bad Vibrations
    • Fire in the Sky
    • Homeopathological
    • It’s Alive
    • Transaction-Packed
    • Baby Dancer
    • Kill Demoskaggon
    • Kill Borman Nates
    • Kill Wick and Warty
    • Kill Urist McEnforcer
    • Kill Dinklebot
    • Kill Power Troopers
    • Kill the Grogans and Their Mother
    • Kill IndoTyrant
    • Kill El Dragón Jr
    • Kill Red Jabber
    • Kill The Unstoppable
    • Kill Maxitrillion
    • Kill Rakkman
    • Kill Road Dog
    • Kill Tarantella
    • Kill Captain Thunk and Sloth
  • Boss Guide
  • All Named Locations
    • Pandora
    • Promethea
    • Athenas
    • Eden-6
    • Nekrotafeyo
  • Circles of Slaughter Locations
  • Proving Grounds Locations (Trials)
  • Eridian Writings (Slabs)
  • Red Chests
  • Crew Challenges
    • Hammerlock’s Legendary Hunts
    • Zero’s Targets of Opportunity
    • Typhon Logs & Dead Drops
    • Hijack Targets (Vehicle Parts)
    • Crimson Radios
    • Dead Claptraps
    • Pieces of Resistance
    • Mayor’s Killer Looks
    • Torgue’s Marketing Mistakes
    • Hammerlock’s Occult Hunts
    • Gaige’s Gifts
    • Mancubus’ Eldritch Statues
    • Creature Feature Film Reels
    • Sato’s Saga Journals
    • Sato’s Caches
    • Good Prospects
    • Skin to Win
    • Gehenna’s Most Wanted
    • Signal to Noise Probes
  • How to Invite Friends to Co-Op
  • How to Reset Skill Points
  • How to Get Eridium
  • Duplication Exploit & Infinite Money
  • Easter Eggs
  • Trophy List
  • Trophy Guide
  • DLC #1: Moxxi’s Heist of the Handsome Jackpot Trophy Guide
  • DLC #2: Guns, Love, and Tentacles Trophy Guide
  • DLC #3: Bounty of Blood Trophy Guide
  • DLC #4: Psycho Krieg and the Fantastic Fustercluck Trophy Guide
  • Terms of Service
  • Privacy Policy
  • Cookie Policy
  • Review Policy
  • YouTube
  • Facebook
  • Twitter

© 2008-2021 PowerPyx.com, all rights reserved.