PowerPyx.com

PowerPyx

  • Trophy Guides
  • Game Guides
  • Wikis
  • Trophy Lists
  • Next Guides
  • Contact
Show SearchHide Search
Home » Game Guides » Crimson Desert » Crimson Desert Sanctum of Revelation Walkthrough

Crimson Desert Sanctum of Revelation Walkthrough

March 30, 2026 by imbroken963 Leave a Comment

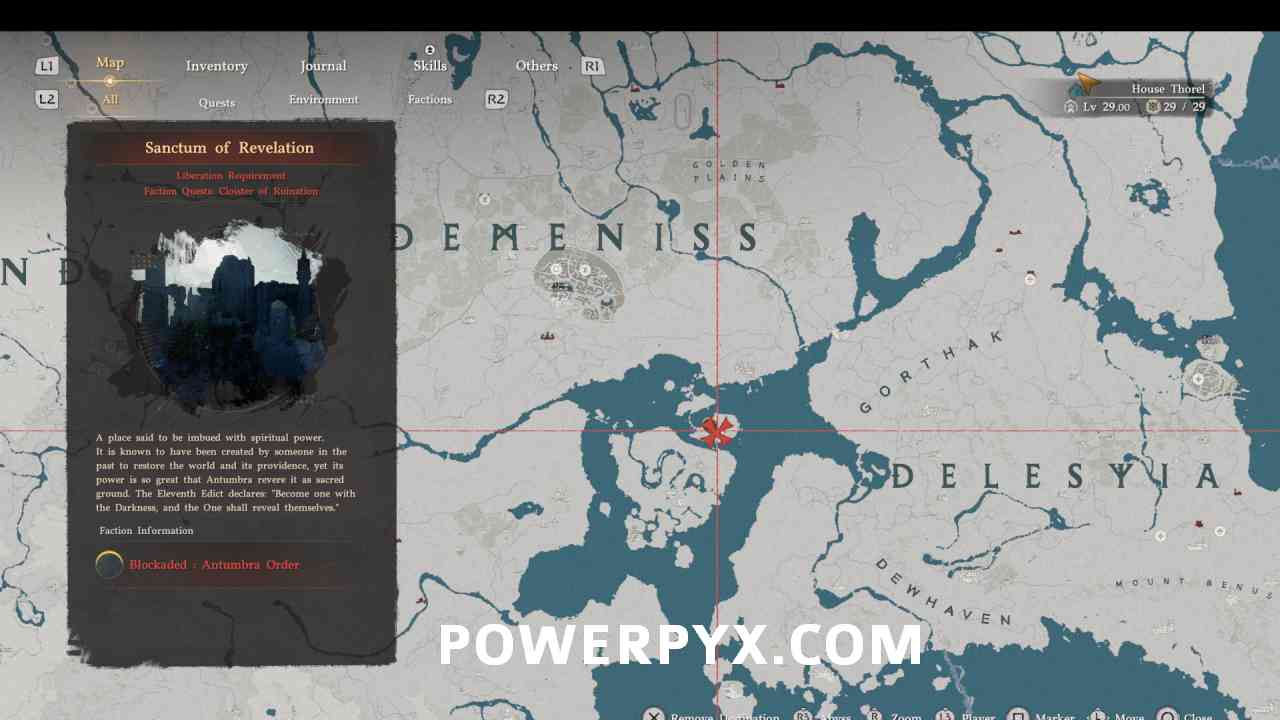
Sanctum of Revelation is a Sanctum and Exploration Challenge in Crimson Desert.

Sanctum of Revelation Location

Sanctum of Revelation is a Sanctum in the Demeniss region, located North of the Bamboo Forest.


Sanctum of Revelation Solution

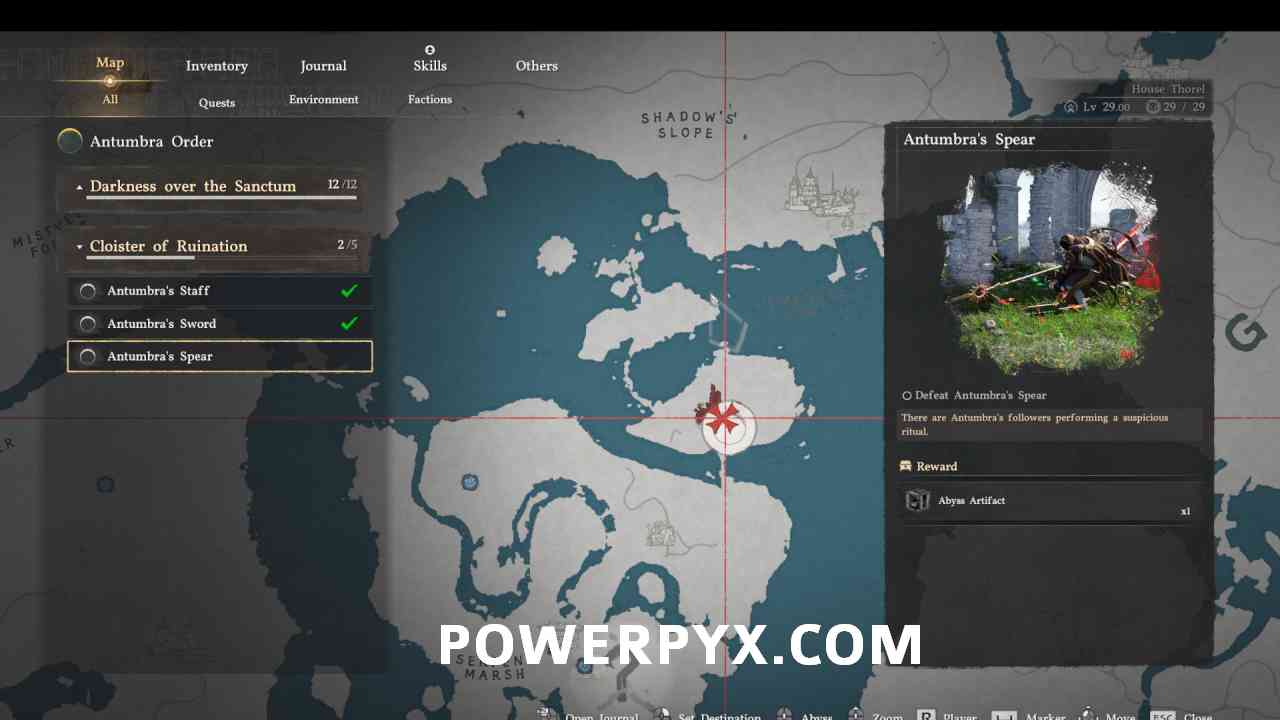
Requirement: Listen to the Request from Witch of Strength – Areciel – see Witch Locations.

Step 1: Approach the sanctum from the South side. This sanctum is overrun with Antumbra enemies. Make your way through the sanctum defeating enemies until you have brought the percentage down to 0%. Once you get to 0% you will have liberated this Sanctum. Once all the minor enemies are defeated head into the fogged part of the Sanctum where you will find Antumbra’s Spear. This is a boss that uses magic based attacks that need to be dodged instead of blocked. Keep dodging those attacks and parry the normal attacks and use heavy attacks in response to fill up the meter under his health bar. Once defeated the sanctum will be liberated. Be careful as this boss is very fast.

Step 2: Once liberated you will spawn in the boss courtyard. Head West and locate the building by itself just outside the ruins:

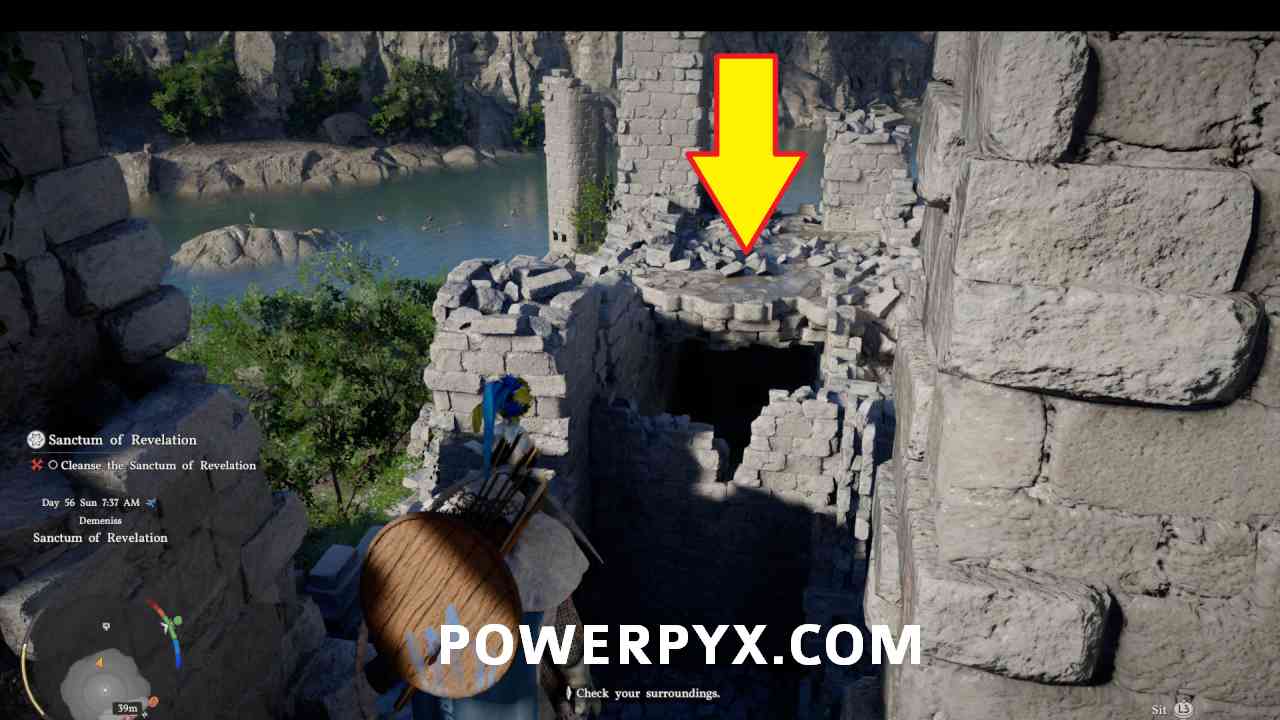
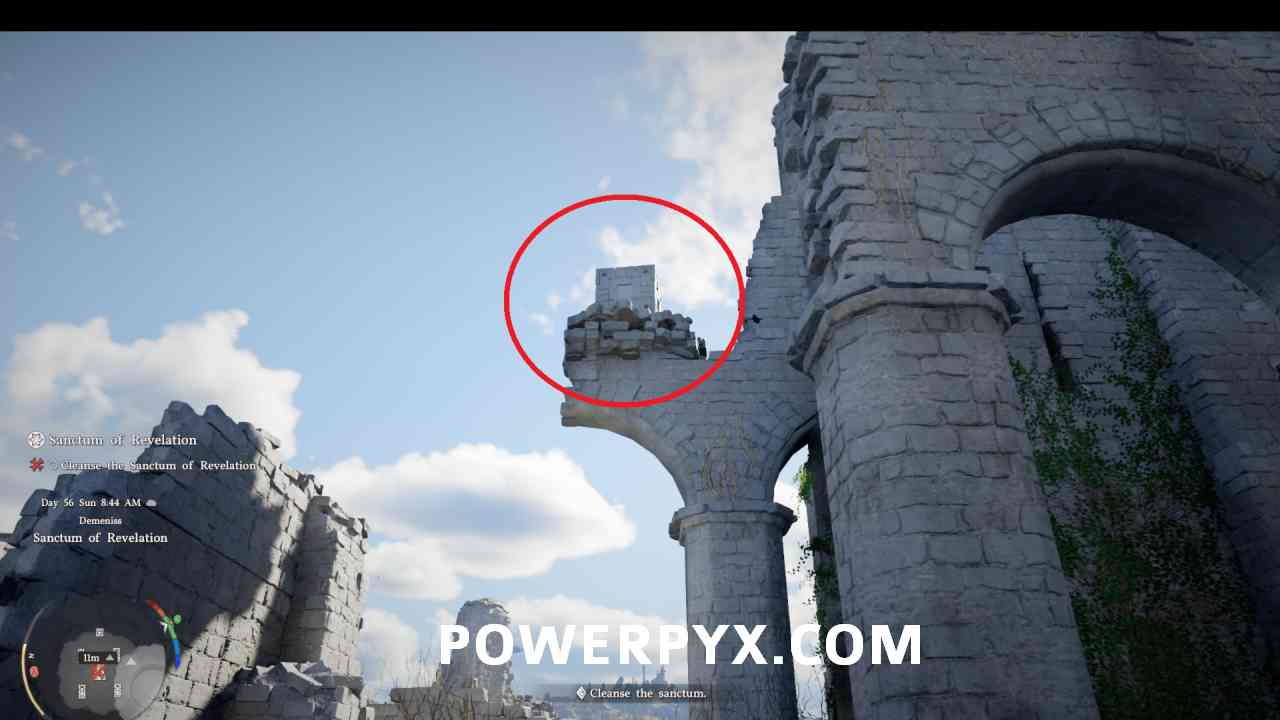
It has a collapsible roof that will fall in when stepped on. Do so to open it up and look inside and you will see the pillar piece:

Grab the piece and head back to the device with it. Locate the broken pillar in the West corner and place the piece of pillar above it and rotate until the piece has leaves surrounding it:

Once in the correct position climb on top of it and do a jumping Force Palm to slot it in (jump and :r3: / Mouse Wheel).

Step 3: From the device look directly East with the device to your back and you will see the block floating on a ledge above:


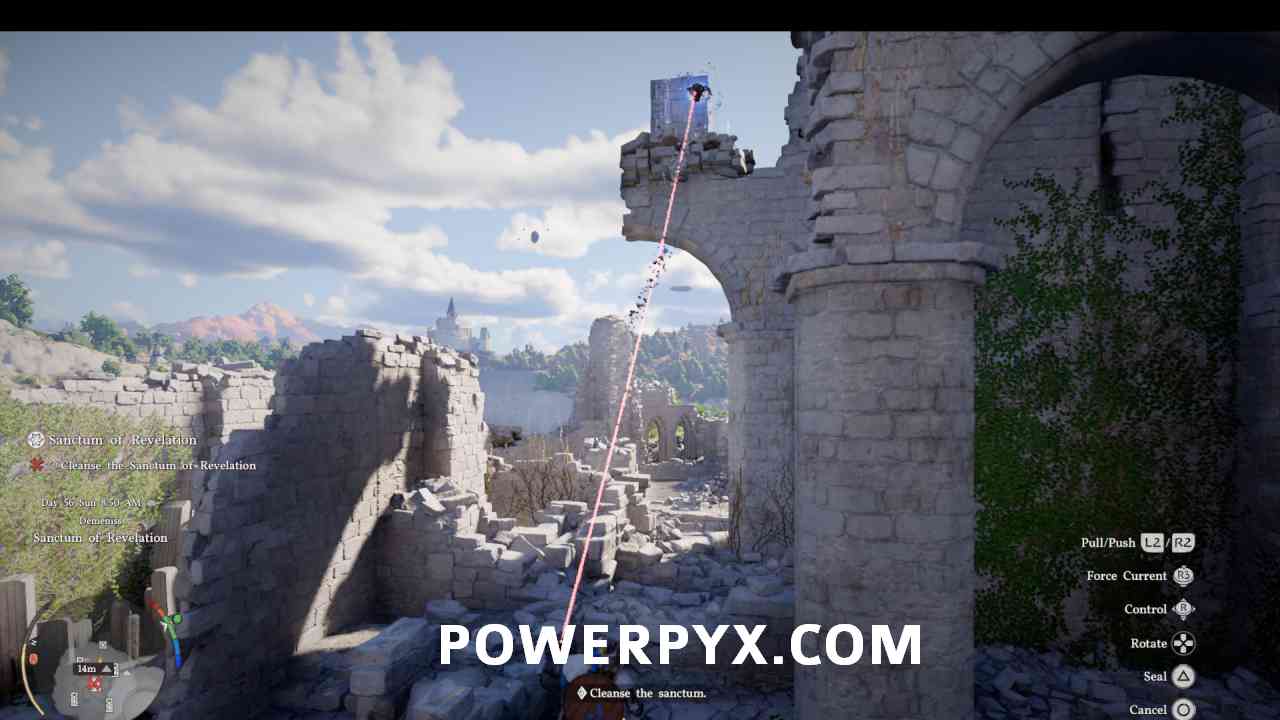
Grab the block and locate the hole in the device on the North side. Align the block with the hole until you see leaves that indicate the correct position.

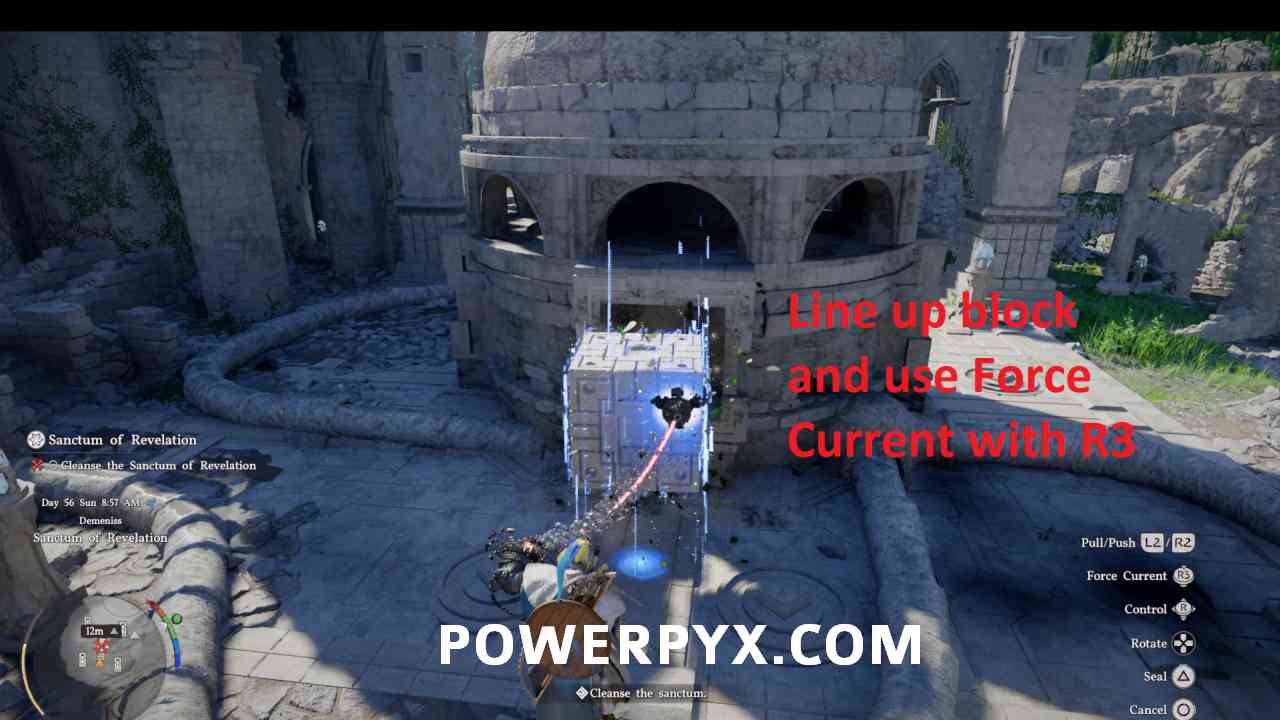
Once in the correct position use Force Palm to shove the block into the hole ( :r3: / ‘TAB’ key).

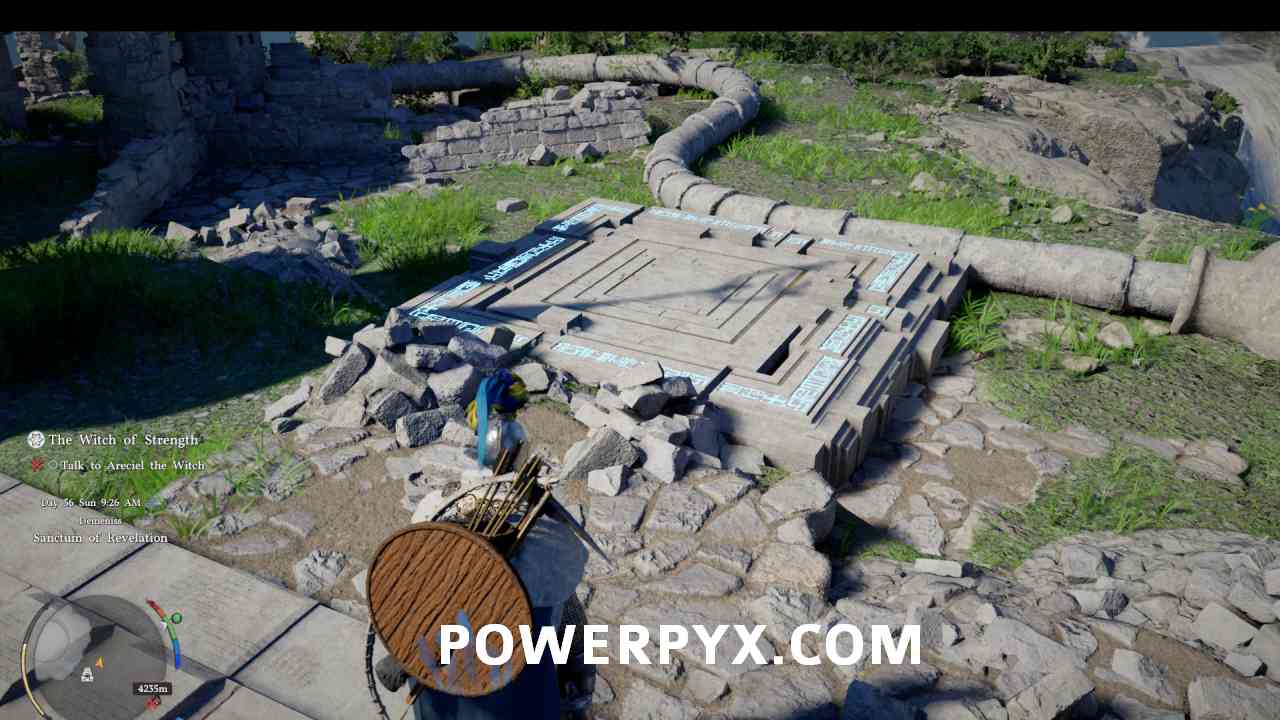
Step 4: If the witch Areciel doesn’t automatically appear, walk toward the square with lights in it.

For all other Sanctums refer to Crimson Desert Sanctums and for other Exploration Challenges see Crimson Desert Challenge Guide.

« PrevCrimson Desert Sanctum of Renunciation WalkthroughNext »Crimson Desert Sanctum of Mortification Walkthrough
Share
Tweet
Shares 0

Filed Under: Crimson Desert, Game Guides

Leave a Reply Cancel reply

Your email address will not be published. Required fields are marked *

Youtube 1,220,000Subscriber
Facebook 15,000Fans
Twitter 19,200Followers

Latest Trophy Guides

Crimson Desert Trophy Guide

God of War Sons of Sparta Trophy Guide

Marathon Trophy Guide

Resident Evil Requiem Trophy Guide

Reanimal Trophy Guide

Nioh 3 Trophy Guide

Code Vein 2 Trophy Guide

Arknights: Endfield Trophy Guide

Ghost of Yotei Trophy Guide

Silent Hill f Trophy Guide

Borderlands 4 Trophy Guide

Kingdom Come Deliverance 2 Trophy Guide

Red Dead Redemption 2 Trophy Guide

Latest Game Wikis

Crimson Desert Wiki

Resident Evil Requiem Wiki

Ghost of Yotei Wiki

Borderlands 4 Wiki

Kingdom Come Deliverance 2 Wiki

Elden Ring Wiki

Hogwarts Legacy Wiki

God of War Ragnarok Wiki

Cyberpunk 2077 Wiki

Red Dead Redemption 2 Wiki

Recent Posts

  • Crimson Desert Sanctum of Revelation Walkthrough
  • Crimson Desert Sanctum of Renunciation Walkthrough
  • Crimson Desert Sanctum of Expiation Walkthrough
  • Crimson Desert Darkbringer Sword Location
  • Crimson Desert Sanctum of Veneration Walkthrough

Crimson Desert Wiki

  • Wiki
  • Walkthrough
    • Unfamiliar Lands
    • In Ashes
    • Realm of Uncertainty
    • New Journey
    • Where Rumors Gather
    • Mysterious Man
    • True Wisdom in Kindness
    • Actions Speak Louder than Words
    • Heart Beyond Borders
    • Mystical Key
    • Polar Opposites
    • Abyss Without Balance
    • Woman in White
    • Where the Light Leads
    • Memory Fragment
    • Reunion
    • For Honor
    • Awestruck
    • Shadow Cast Over the River
    • Where Misery Gathers
    • Trial After Trial
    • The Man Trapped in the Mire
    • Missing Companion
    • Secrets Hidden in the Dark
    • The Dark Veil
    • The Flames of Greed
    • Kidnapped Healer
    • Rebellion or Revolution
    • Cheers Echoing From the Edge
    • Old Friend
    • First Step to Rebuilding
    • A Fresh Start
    • Reward for Their Sweat
    • Return of the Comrade
    • Familiar Curses
    • Return
    • Traces in the Manor
    • Nonhuman
    • Seed of Unease
    • Dance with the Devil
    • Hope After the Draught
    • Scattered Comrades
    • Rumors from the Sawmill
    • A Gentle Touch
    • Bustling Hill
    • Greymanes Reunited
    • Kilnden Workshop
    • Kiln Repair at the Kilnden Workshop
    • The Mysterious Pot
    • The Iron Pot’s Usage
    • Disturbance at the Arena
    • Skilled in Archery
    • The Words of Alustin
    • Scholastone
    • On the Right Path
    • Gate to the Otherworld
    • Spire of the Stars
    • Obsession and Madness
    • Casted Shadow
    • Double-sided Invitation
    • Unwelcomed Guests
    • Demenissian Delegation
    • Exposed Plot
    • The Missing Seal
    • Crowcaller
    • The Crow’s Warning
    • Bloodwind
    • Secret at the Church
    • Toward the Nest (Spire of Soaring)
    • News
    • To the Battlefield
    • The Counterattack
    • Cradle of Defense
    • The Touch of Deliverance
    • Fire on the Frontlines
    • Fire Support
    • In Ashes
    • Hidden Fangs
    • Reclamation
    • A Thousand Troops
    • Traitor
    • All Quiet on the Front
    • News of Victory
    • Return Home
    • Ashes of Treachery
    • Trust Lost
    • Bared Fang
    • Rekindled Hope
    • Podium of Resolve
    • Shadows Over Pailune
    • Driving out the Shadows
    • Lurking Wolves
    • Reclamation
    • Lonely Jackals
    • Resolution
    • The Counterattack
    • Unleashed Fury
    • The Final Bridge
    • Broken Claws
    • Battle at Silverwolf Mountain
    • Incomplete Victory
    • Ludvig’s Whereabouts
    • Time to Face Justice
    • Healing Pailune
    • A Bond
    • Ritual Preparations
    • Where the Wind Guides You
    • Chasing a Shadow
    • Blazing Fire
    • Whispering Shadows
    • Bloodied Invitation
    • Resolve Amidst a Storm
    • Preparations for Advance
    • Rebel Suppression
    • The Cursed Knight
    • The Blood Coronation
    • Clue
    • A Fleeting Dream
    • An Unknown Voice
    • Cloister of Enlightenment
    • Mark of the Scar
    • Shackles of Fate
    • Crossing Point
    • Unwavering Steps
    • Morning Fog
    • Jijeong Temple in Chaos
    • Path to Enlightenment
    • Path of the Disciple
    • True Strength
    • Face the Inner Self
    • Fragments of Darkness
    • Pursuit Beyond the Veil
    • Black Witch
    • The Cloister of Enlightenment
    • The Sage of the Desert
    • New Perspectives
    • Lust for Power
    • Untouchable
    • The Gate of War
    • Master of the Ironworks
    • Hidden Ace
    • Clockwork Insect Clash
    • Beating Heart
    • Invaders from the East
    • Frozen Hearted Predator
    • Lingering Shadow
    • The City of Steel
    • Crossroads
    • Strange Manor
    • Fortress Keys
    • Truth and Lies
    • Master of a Forgotten Land
    • Whispers in the Wind
    • Cloud Fortress Orbian
    • Precise Execution
    • Deferred Advance
    • Departure of the Brave
    • Forbidden Gate
  • Bosses
  • Bells
  • Sealed Abyss Artifacts
  • Fast Travel Points
  • Secret Places
  • Ancient Ruins
  • Spires
  • Sanctums
    • Sanctum of Absolution
    • Sanctum of Temperance
    • Sanctum of Penitence
    • Sanctum of Benediction
    • Sanctum of Exaltation
    • Sanctum of Solace
    • Sanctum of Deliverance
    • Sanctum of Atonement
    • Sanctum of Devotion
    • Sanctum of Veneration
    • Sanctum of Oblation
    • Sanctum of Faith
    • Sanctum of Expiation
    • Sanctum of Renunciation
    • Sanctum of Revelation
    • Sanctum of Mortification
  • Witches
  • Challenges
    • Sword
    • Shield
    • Bow
    • Spear
    • Two-Handed Weapon
    • Cannon
    • Rapier and Shield
    • Gun
    • Special Weapons
    • Horse
    • Training
    • Battle
    • Operation
    • Hunting
    • Life
    • Trade
    • Above the Law
    • Challenges and Changes
    • Test of Strength
    • Duel
  • Crafting Items
    • Timber & Fine Timber
    • Iron Ore
    • Copper Ore
    • Bloodstone
    • Scolecite Ore
    • Gold Ore
    • Silver Ore
    • Bismuth Ore
    • Azurite
    • Garnet
    • Epidote
    • Diamond
    • Small Bone
    • Large Bone
    • Thin Hide
    • Thick Hide
    • Short Hair Hide
    • Long Hair Hide
    • Sturdy Hide
    • Fang
    • Cloth Pieces
    • Fleece
    • Feather
    • Ivory
  • Tips & Tricks
    • How To Get Money Fast
    • How to Use Storage Chest
    • How to Unlock Dragon
    • How to Unlock Robot Mount
    • How to Upgrade Weapons / Armor
    • How to Increase Inventory Size
    • How to Get Healing Items
    • How To Sheathe Weapon
    • How to Skip Time
    • How to Get Pets
    • How to Fish
    • How To Tame Horses
  • World Map
  • Trophy Guide
  • Terms of Service
  • Privacy Policy
  • Cookie Policy
  • YouTube
  • Facebook
  • Twitter

© 2008-2026 PowerPyx.com, all rights reserved.