
Now or Never is a Story Quest (Main Mission) in Dying Light 2. This walkthrough will guide you through all objectives of the Now or Never Story Mission.
Region: Garrison
Quest Giver: Not available
Requirement: Complete The Breakthrough, Assassination, or The Colonel
Reward: 4000 Combat XP, 4000 Parkour XP, Shoelace Machete weapon, 2 Military Medkit, 1000 Old World Money
Mission Info: It was time to beard a lion in his den. I needed to get into the Stronghold and confront the Butcher. / I had to reach Williams before Lawan did. Something told me he could answer my questions. But reaching him would not be easy. / Lawan was going to avenge Frank’s death by killing Colonel Williams. I had to stop her, because it seemed only Williams could help me find Waltz.
Objectives:
- Escape!
- Find a way to the van.
- Get into the Stronghold
- Kill the Renegades OR Kill the Peacekeepers
NOTE: Because of the major variance that can occur in this quest, the objectives after this will be split up into two sections based on the major possible things that can occur, with those being if you agree to go along with the Colonel’s plan and don’t let the Peacekeepers in, or if you don’t agree and let the Peacekeepers in.
The first section will assume you are doing most of the “good” actions, which result in Lawan not coming, and agreeing to go along with the Colonel’s plan instead of letting the Peacekeepers in.
The second section will assume you are doing the “bad” actions, which results in Lawan coming, and you not agree to go along with the Colonel’s plan, and results in you draining the water and letting the Peacekeepers in.
If you had assigned VNC Tower to Frank and you save Frank
- Find the Colonel
If you agree to go along with the Colonel’s plan
- Find Waltz’s quarters
- Search Waltz’s quarters
- Meet the Colonel outside
If you assigned VNC Tower to Jack Matt, Juan, or don’t save Frank
- Find Lawan
- Find a way out
- Follow Lawan
If you don’t agree to or don’t convince Lawan to go along with the Colonel’s plan
- Kill the Colonel’s guards
- Check on Lawan
- Lower the bulkheads
- Eliminate the remaining enemies
- Kill the Colonel’s champion
- Plug in the pumps
- Lower the bulkheads
- Check on Lawan
- Search for the Colonel in the stronghold/Investigate the screams
- Meet Jack Matt outside
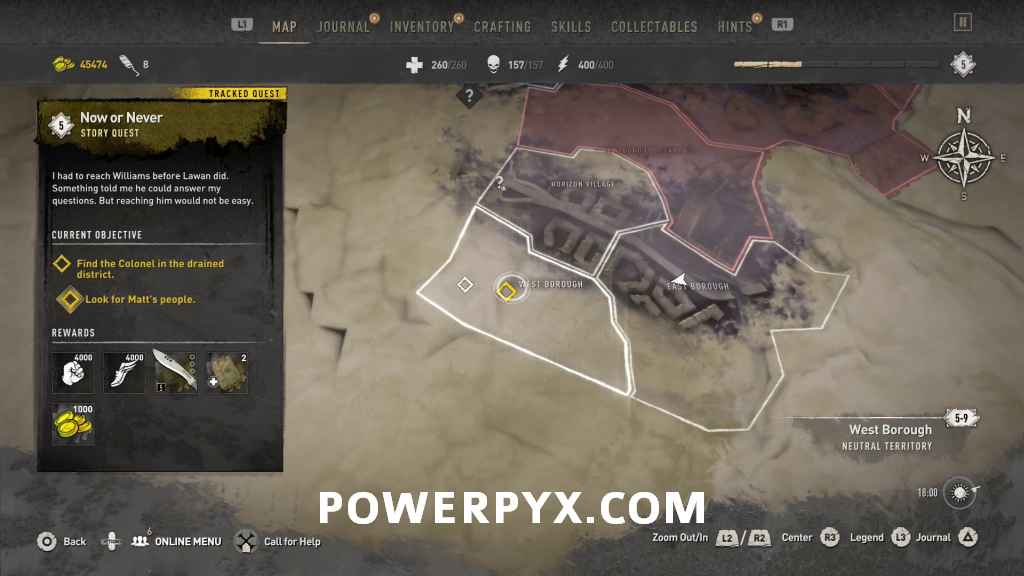
- Find the Colonel in the drained district
- Look for Matt’s people
- Find a way into the bunker
- Leave the Bunker
- Return to Jack Matt
Starting Location: Now or Never
 |
 |
Escape!
As soon as this quest starts you will end up dropping into the lower part of a building and need to escape from hordes of infected.
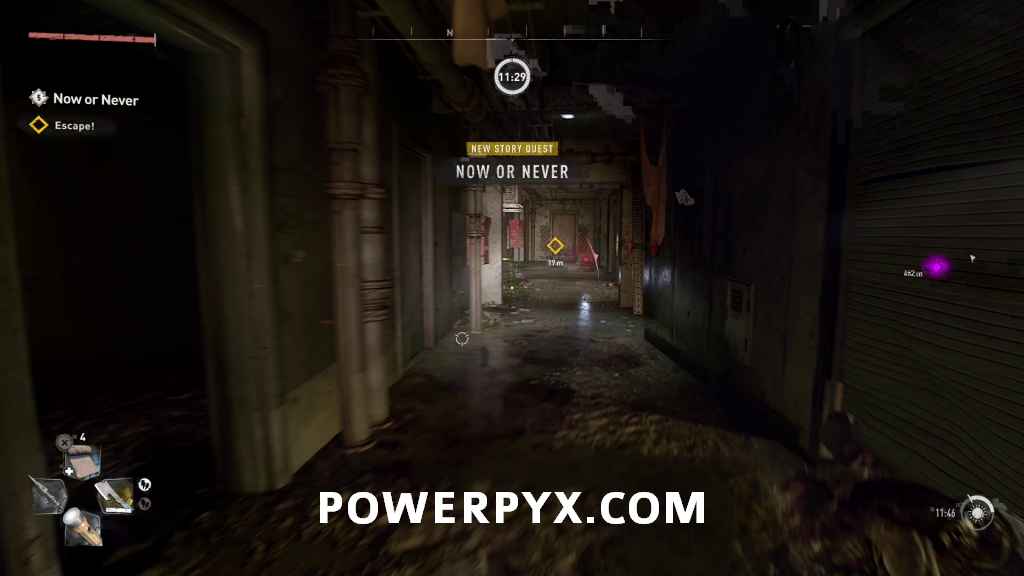
Follow the objectives through the hallways, moving through the areas and going up the floors as directed.
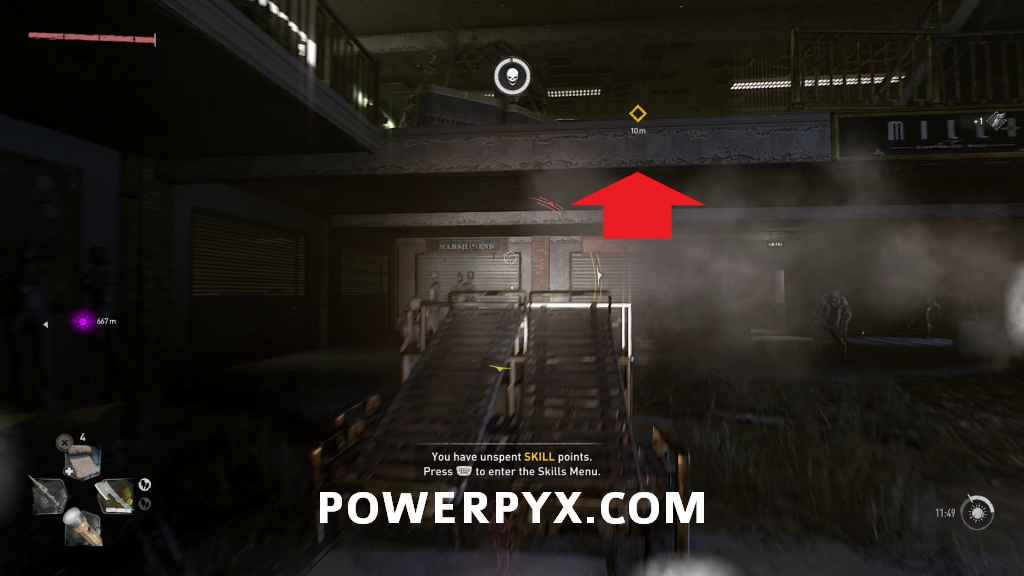
When you reach the section where you have to swing across the gap with the rope will be the end of the area you run through.

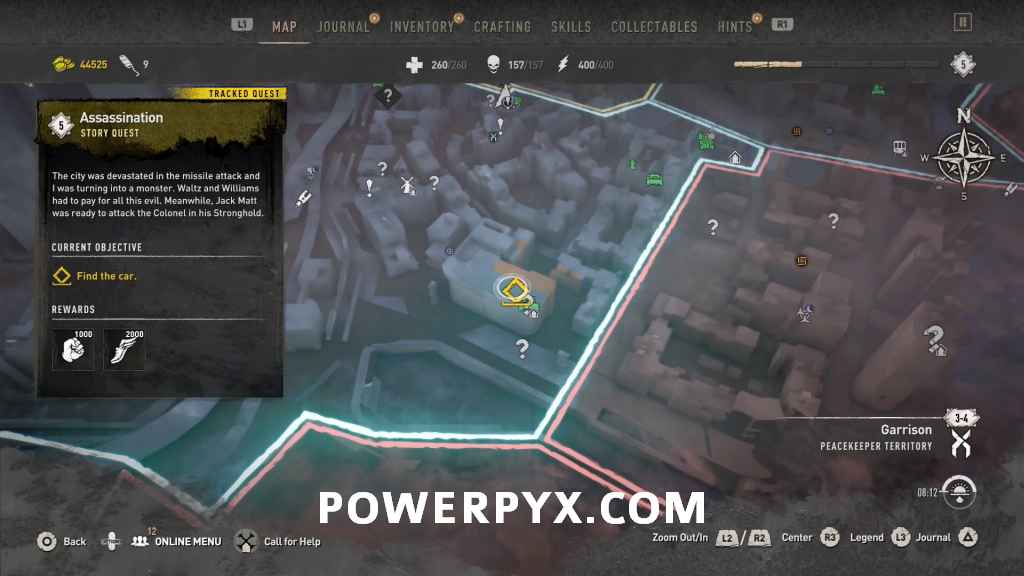
Find a way to the van
Head downstairs, and there will be a room where you have to deal with a number of Renegades hanging out.

Once dealt with interact with the elevator and drop down to the lower floor.

Kill the Renegades / Kill the Peacekeepers
Get out of the elevator and there will be another set of Renegades to deal with in the next room too, some melee ones on the lower floor and some guys throwing stuff at you from the upper floor.

If you started this quest on the Juan story path (had just completed The Colonel) then Meyer and some PKs will be here instead. You can respond to Meyer how you want, you will still fight them before leaving.

Get into the Stronghold
When they are all dealt with, go through the marked door on the lower floor.

Then go over near the van to automatically be taken to the stronghold.

Find the Colonel
Inside the stronghold, you need to find where the Colonel is. Your main goal is to get inside the large main building.

There are a few ways to do this, and you can do it stealthily or not, totally up to you.
You could choose to just walk directly into the front door of the building.

Or you can choose to go around the right side, which allows you to climb up onto the roof where there are fewer enemies and get inside in a more sneaky manner.

Whichever way you go in, you will eventually end up in a hallway with two enemies at the end. You can try to sneak around them using some vents, or just take them out and advance to the room where the Colonel is. Whether or not you actually kill any enemies on the way in doesn’t matter for your choices after this.

Speaking with the Colonel in the room, he tries to convince you what is going on while Matt is yelling at you not to believe him.

If you choose ” I believe Matt.” then you will end up fighting the Colonel and going along with Matt’s plan (see objective Kill the Colonel’s guards farther down).
If you choose “I believe the Colonel.” then you won’t fight the Colonel (the good option), and will basically end this quest very quickly without opening the bulkheads and draining the water in the flooded district (not required to get any of the items there).
Find Waltz’s quarters
Assuming you pick to believe the Colonel, he will have a bit more conversation with you about what happened, then direct you to go check for more information in Waltz’s quarters nearby. On the way, you can grab two collectibles in the room through the two barred yellow doors.

On the table in the center of the room is one memento.
Memento – The Kill Order

Then on the table under the stairs by the couch is the second memento.
Memento – Infected Playing Card – Ace of Clubs – Howler

Then head back out to the hallway and continue to Waltz’s quarters.
Search Waltz’s quarters
Head through the marked door to go into Waltz’s quarters.

BEFORE LEAVING THIS AREA, THERE ARE THREE MISSABLE COLLECTIBLES. If you don’t grab these collectibles now you can’t get back into this area later unless you join someone in a coop game (the two above you can get later if you miss them, but the yellow doors are locked post-game so you can’t get back into Waltz’s quarters).
Head to the left past the surgical equipment where you can find the first tape on the table at the end.
Tape – Waltz’s Chamber Recording #3

Then go to the opposite end of the room and through the wooden door, then you can find the second tape on the table in the back left.
Tape – Waltz’s Chamber Recording #1

Turn around from the table and you can find the third and final tape on the counter beside the bed.
Tape – Waltz’s Chamber Recording #2

Meet the Colonel outside
After searching the room you can go meet the Colonel outside by the entrance.

There is one final merchant out here you can use, then interact with the Colonel by the van to end this story quest.
Find Lawan
Inside the stronghold, you need to find where the Lawan is. Your main goal is to get inside the large main building to find her.
Note that if you are here while being on the Juan story path, then all the enemies will be dead because Lawan is already here, and you can just walk in.
There are a few ways to do this, and you can do it stealthily or not, totally up to you.
You could choose to just walk directly into the front door of the building.
Or you can choose to go around the right side, which allows you to climb up onto the roof where there are fewer enemies and get inside in a more sneaky manner.
However you go in, you will eventually need to drop down the shaft in the center of the building with the water in the bottom, then climb back up to the first level where there is the green gate.

Here you will find Lawan, who has made her way in on her own.

Find a way out
Regardless of which dialogue option you pick here, Lawan locks you in a side room, and you need to get out. You can do this by jumping up to a vent in the wall.

Follow Lawan
Follow the vent to the end, then go through the marked double doors to follow Lawan.

After some discussion, you then have a timed choice on what to do.

Selecting “Trust the Colonel.” and convincing Lawan to back down will lead to siding with him and not letting the Peacekeepers in (choices in the prior section).
Selecting “Side with Lawan.” will result in you attacking the Colonel, and being locked into letting the Peacekeepers in.
Kill the Colonel’s guards
The guards will now injure Lawan, then start attacking you. Deal with the ones in the room.

A couple of waves will spawn, but only in groups of able three guys.

Check on Lawan
Once all the current enemies are dealt with, go interact with Lawan who is sitting by the stairs.

Lower the bulkheads
Follow the objective over to the machinery on the side of the room and interact with it to turn it on.

Eliminate the remaining enemies
Some more enemies appear in the room that you now need to deal with.

Kill the Colonel’s champion
The Colonel’s champion is considered a boss enemy, but as he is just a normal human he can be dealt with using the typical “light him on fire trick”.
Plug in the pumps
Once this new group of enemies is dealt with you need to plug the power back in. This is done by interacting with the cord lying on the floor on the opposite side of the room from Lawan.

Lower the bulkheads
You can now go interact with the first machinery again, as well as the on on the opposite side of the room to finishing lowering the bulkheads.

Check on Lawan
After the scene showing the water draining from the flooded district, you can go back over and check on Lawan again.
Search for the Colonel in the stronghold/Investigate the screams
The game lists these as two separate objectives, but they’re the same thing.
Head through the marked door on the side of the room to head towards the location of the screams. On the way, you can grab two collectibles in the room through the two barred yellow doors.
On the table in the center of the room is one memento.
Memento – The Kill Order
Then on the table under the stairs by the couch is the second memento.
Memento – Infected Playing Card – Ace of Clubs – Howler
Then head back out to the hallway and continue to the marked room.
You’ll be confronted by Anna when you enter the room. You can respond how you want then she’ll leave.

BEFORE LEAVING THIS AREA, THERE ARE THREE MISSABLE COLLECTIBLES. If you don’t grab these collectibles now you can’t get back into this area later unless you join someone in a coop game (the two above you can get later if you miss them, but the yellow doors are locked post-game so you can’t get back into Waltz’s quarters).
Head to the left past the surgical equipment where you can find the first tape on the table at the end.
Tape – Waltz’s Chamber Recording #3
Then go to the opposite end of the room and through the wooden door, then you can find the second tape on the table in the back left.
Tape – Waltz’s Chamber Recording #1
Turn around from the table and you can find the third and final tape on the counter beside the bed.
Tape – Waltz’s Chamber Recording #2
Meet Jack Matt outside
You can now head outside and meet with Jack Matt at the entrance to the stronghold.

Find the Colonel in the drained district
Jack Matt tells you that the Colonel ran to the bunker at the end of the drained district, and you need to head there.
While moving through this area you need to be aware of the new type of exploding infected that are here.

They are fast like Virals are and explode instantly when they get near you if you let them get close. They also constantly appear on the rooftops, so while in this area you basically can’t stop until you reach the objective. Don’t worry about any of the airdrops or anything that are in this area for now, it’s easier to come back for them later.
A fun trick for dealing with these new infected is to grab them with your grapple. This stuns them for a second, dragging them towards you, but then causing them to explode after a short period so you can be sure you’re a safe distance.
Look for Matt’s people
Continue to the marked spot at the end to reach the bunker, where there will be a bunch of dead Peacekeepers outside.

Try interacting with the marked door, which will be locked.

Find a way into the bunker
To get into the bunker you need to climb up onto the roof, where there will be a hatch you can enter.

Continue through the bunker, dealing with the few Renegades that are inside.

Once they are dealt with, go through the double doors beside the Generator, then the set of wooden double doors.

You’ll now have your final conversation with the Colonel. Your choices here more or less don’t matter, your prior actions have already determined what is going to occur after this point.

Leave the Bunker
After the conversation with the Colonel, you can leave out the front door of the bunker.
Return to Jack Matt
You now need to make your way back through the flood district to meet Jack Matt back on the highway.
 |
 |
You’ll have one final opportunity to use a merchant, then speak with Jack Matt to complete the story mission.

This finishes Now or Never story quest in Dying Light 2 Stay Human.
For all other Main Quests and Side Quests, check out the complete Dying Light 2 Walkthrough.
Leave a Reply