
Let’s Waltz! is a Story Quest (Main Mission) in Dying Light 2. This walkthrough will guide you through all objectives of the Let’s Waltz! Story Mission.
Region: Quarry End
Quest Giver: Sophie or Aitor (depending on whether you completed Revolution or Into the Dark based on Water Tower choice)
Requirement: Complete Revolution or Into the Dark
Reward: 3000 Combat XP, 1000 Parkour XP, Pipe Bow weapon, Arrows blueprint, 20 Arrows, 5 Scraps, 1 Feathers
Mission Info: According to Hakon, Waltz was hiding in an old car factory. I couldn’t wait to face the son of a bitch.
Objectives:
- Get inside the tunnel
- Turn on the generator
- Get rid of the threat
- Find the utility room and restore the power
- Follow the traces
- Get back to Aitor
- Follow Waltz into the car factory
- Pursue Waltz in the car factory
- Escape from Waltz
- Follow the Sniper
Starting Location: Let’s Waltz!
 |
 |
Get inside the tunnel
After completing the prior quest, you will talk to either Aitor or Sophie, depending on which faction you had chosen to assign the water tower to. You’ll be directed to head to the tunnel on the south part of the map, heading to the old car factory where Waltz is hiding out.
Head to the marked objective, and climb up onto the vehicle and to the higher part of the wall to get towards the tunnel. There will likely be a goliath wandering around this area, but you can completely ignore it if you want and just proceed to the tunnel.

Interact with the marked button, but it won’t do anything because the power is off. You’ll need to climb up the cliff side to the left to reach the top of the wall.

There is a ladder you can kick down if you want, just in case you need to come back through later and want to skip the climb up the cliff, then drop into the tunnel.

Turn on the generator
In the tunnel, you will need to find the generator to turn the power on to continue. Head through the tunnel towards the back. On the left behind the metal building, you will find the first generator to interact with.

Now head all the way back to where you came in and you can turn on the second generator against the other metal building.

Get rid of the threat
After attempting to turn on the generator a new type of infected will appear through a door in the side of the tunnel. These infected have hard armor over most of their body and will charge directly at you to attack.

You need to wait for them to charge then dodge out of the way. If done near a wall this will cause the charger to stun itself by running into the wall, allowing you to attack the unarmored parts on its back.

Now you can go back and actually turn the second generator on with the infected dealt with. With the power now on the doors will open, and Aitor and some Peacekeepers will appear. This occurs regardless of the prior choices, the dialogue with Aitor just changes in this section depending on whether you were still friendly with him or not.
Find the utility room and restore the power
Someone has disabled the power in the tunnel, and you now need to get it turned back on. Follow the yellow cables on the ground to lead to a door to go through.

Follow the objective marker through the area, and you will drop down into a room where you can interact with a plug to turn the generator back on.

Follow the traces
Now you need to follow the footprints you can spot with Survivor’s Sense through this area of the tunnel. Jump across the water and climb up into the vent to get to another room.

Heading out the door in this next room leads back to the central tunnel. If you want to grab some items first there is another vent in the right corner that leads to a side room with a couple chests (which you might have spotted through the wall prior with Survivor’s Sense).

Get back to Aitor
When you’re ready to continue, head out the marked door to return to Aitor.

After some scenes and Aiden walking up from a long sleep you will be attacked by a group of Renegades. Deal with them all to continue.
Follow Waltz into the car factory
You can now continue out of the tunnel, continuing towards the car factory.

You will jump between the sections of the broken highway, using the beams and handholds to continue. Note that when you reach the wire suspended between the two sections you have to actually move across it manually, it’s not a zipline.

When you reach the final section you will drop down to the ground towards the blue bus.

Continue slightly past the bus and you can go down the large hill of solar panels to go towards the building with the green sign out front.

There will be Renegades hanging out in this outside area and inside the building. You can deal with them in stealth, or just alert them and draw them out to you.

Pursue Waltz in the car factory
Once all the Renegades are dealt with you can continue deeper into the building. From the car in the middle of the room you can jump to the ones on the wall, then to the fixture hanging from the ceiling, and onto the next platform.

From there you can continue using the fixtures to jump to the next platform, then to the next area on the opposite corner of the room.

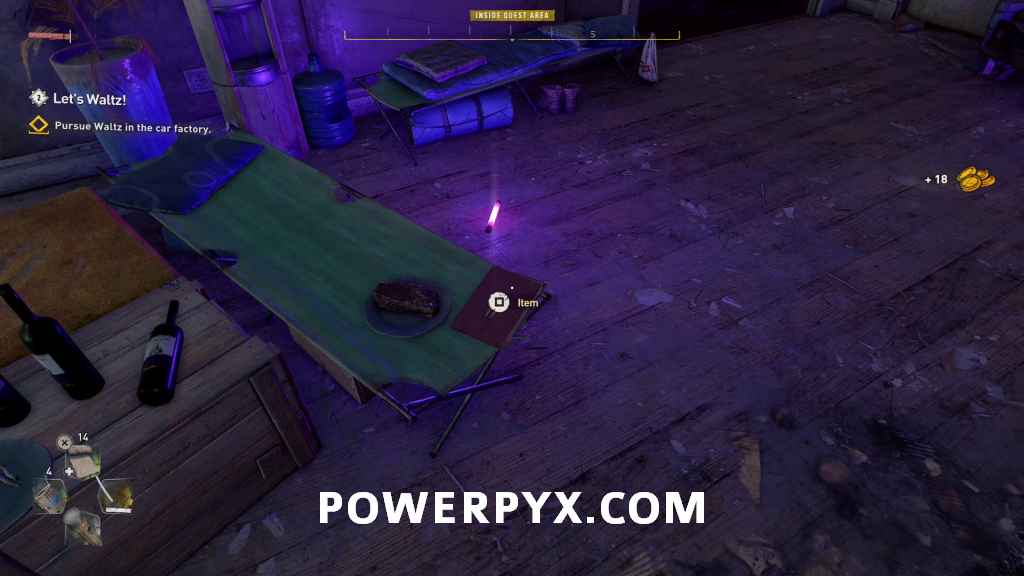
Continue up to the next floor and deal with the enemy crouched on the floor. Before continuing out of this room you should grab the Memento that is sitting on the cot.
Memento – The Tunnel Assignment
Continue through the building, dealing with the two final Renegades before reaching the objective.

Escape from Waltz
After meeting Waltz, you will now be running away from him. Follow the objective into the red building and through the door.

Continue running through the building, jumping through and on top of the train cars. Once you reach the broken part of the tunnel you can swing on the rope to reach the next part of the train.

Head through the doorway after the sniper, and you will be back into tunnels like before. You will need to keep running to avoid Waltz, until a point you jump to a ladder and Waltz falls into a hole.

Follow the Sniper
You’ll have a short conversation with the sniper now that you’re no longer being chased, then she’ll continue without you. There are some items in this area you can loot if you want, but there won’t be anything particularly good. Continue through the path until you reach a point you can have more conversation with the sniper.

Aiden will have a short nap, then you can continue through the tunnel. Speak with her again when she stops, and she will eventually reveal that she is Lawan, the person that your contact at the start of the game told you to meet. After the next conversation is over you will complete this story quest.
This finishes Let’s Waltz! story quest in Dying Light 2 Stay Human.
For all other Main Quests and Side Quests, check out the complete Dying Light 2 Walkthrough.
Leave a Reply