
Just a Social Call is the 74th main story mission in Red Dead Redemption 2 (RDR2). This walkthrough will guide you through all objectives of Just a Social Call Main Quest including all Gold Medals for 100% completion.
Just a Social Call is unlocked after completing Icarus and Friends and That’s Murfee Country.
Quest Giver: Micah
Chapter: 6
Region: New Hanover
Gold Medal Requirements:
- Headshot 3 mounted enemies
- After killing Cornwall, reach the horses within 2 minutes 45 seconds
- Complete the mission without taking any health items
Starting Location: Annesburg, New Hanover
Talk to Micah
Meeting up with Micah and Dutch in Annesburg, you’ll learn of Dutch’s crazy scheme to make a deal with Cornwall to let everyone go.

The sad thing is, that it will only be the second craziest plan that you hear about today. Follow Dutch and Micah to the docks, and hide behind the indicated crates.

- GOLD MEDAL: Complete the mission without taking any health items
- GOLD MEDAL: After killing Cornwall, reach the horses within 2 minutes 45 seconds
Important: Please read the following paragraph in its entirety before continuing
From this point until you reach the horses, the key is to keep moving and kill enemies while on the go. You have a very small margin for error to complete this section in only 2:45, but it is possible as long as you don’t get hung up in firefights and know where you’re going. While you can’t use healing items for the gold medal requirement, paradoxically the best way to keep your health intact is to play aggressively on this mission and to keep advancing rather than shooting from cover. I’m going to say that again. Always be moving and firing at your enemies, only taking cover when you are reloading under heavy fire and have no other choice. Since accuracy is not a factor, it is better to fire three times at your target’s center mass and keep moving ahead while you do so. After all, they can’t shoot you if they’re too busy being shot. Luckily you can count on Dutch to take out some of the guards along the way too, so you don’t have to do all the heavy lifting. Pay attention to dialogue queues from Dutch that indicate when you can advance safely.
When Cornwall’s ship arrives, watch the cinematic and see Dutch’s other plan in action. With Cornwall dead, you will immediately be thrust into a firefight.

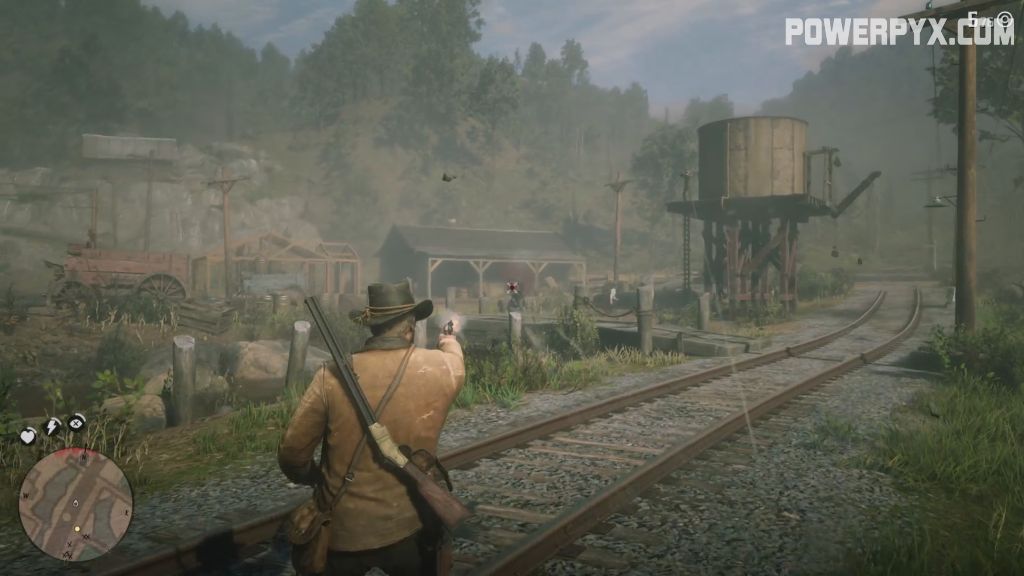
The clock starts as soon as the cinematic ends. Take out the two guards on the ship and one on the dock to your right.

When all three are dead (or Dutch says “Oh, shit, Pinkertons!”), turn around and start moving back up the dock. There will be four Pinkertons to eliminate, though usually Dutch will kill half of them. Reload and fire while moving at all times; accuracy is not a concern, just keep firing till they go down.

When the four Pinkertons are dead (or Dutch says “Come on, Micah’s gone after those papers!”), turn to the north and run towards the footbridge near the water tower. There will be one Pinkerton on the tower and one on the bridge. Kill them both as you run.
Across the bridge will be three more Pinkertons that take cover among the barrels.

When this group has been eliminated, Dutch will say “They’re shooting from that building”, which will signal the arrival of several waves of Pinkertons. There will be two at ground level near a pile of logs and crates…

…as well as two more firing from the open walkway above.

Dutch will say “Look out up there, on the left!” At this point, you should run up the wooden staircase that leads to the walkway above. You have to enter it from the west side at ground level.

Go to the top of the stairs to meet up with Micah, but also be prepared to kill two more Pinkertons that have appeared on the walkway next to him. You will have to take them out to trigger Dutch to advance (“Come on! We gotta move.”)

Follow Micah through the door, and up the stairs to the left (east). At the top of the stairs, go into cover behind the low wooden wall ahead of you and look to the west. There will be two paths, on either side of a conveyor belt. Dutch and Micah will travel down the south side, while you should go up the north to divide up the kills. Once you have your bearings, pop out of cover and advance up the path shooting continuously as you go.

Since there are a lot of straight lines of fire in this section, you can be a bit more cautious here but don’t get hung up in cover. Sometimes its better to take a bullet or two while advancing and eliminating your target. There will be a group of four Pinkertons, usually one on the south and two on the north with one hanging back on the platform to shoot at all of you. Start advancing when the two on your side are dead, shooting any of the four that remain as you go.

Dutch will shout “Up ahead, there’s more of ’em!” as more Pinkertons appear on the stairs to the west.

Typically there will be two on the stairs and one taking cover behind a beam to the right.

Once they’re dead, climb up the stairs but be careful before you advance outside.

There will be a Pinkerton at the top of the stairs on the left side. Once they are dead, head up the right side of the stairs.

There will be several more Pinkertons on the ground who will shoot up at you with sniper rifles while on the stairs outside. Do not even bother returning fire, just get up the stairs as fast as you possibly can to avoid taking a major hit. Dutch and Micah will provide covering fire anyhow, hopefully causing the enemy to keep their heads down.

At the top, keep right and keep moving.

Go up the stairs, and get ready. You are in the home stretch. Back outside, there will only be a few enemies left to eliminate.

The key to doing this quickly is to listen to Dutch when he says “Shoot that oil wagon!” and take his advice. The oil wagon is behind a tall stack of crates but is visible enough from both sides of the conveyor to get a hit on it.

In fact you can do this as soon as you’re outside, catching several enemies in its blast immediately.

Clean up any remaining enemies quickly.

As soon as the next objective comes up (Free the horses to escape), immediately run towards the yellow objective area. All you have to do is reach that area before the 2:45 elapses to fulfill your gold medal objective.

All that remains is to escape on horseback, so mount up. You’re almost done.
- GOLD MEDAL: Headshot 3 mounted enemies
There will be about 12 mounted enemies in this next section, but the main problem is that Dutch and Micah will eliminate them quickly if you don’t get to them first. Keep up with them at all times so that you have an even chance, and make use of your Dead Eye to get there first.

Watch out for two from the left…

…two from ahead…

…two more from the left…

…two from ahead at the fork in the road…

…two more from the left after you cross the river (skip these for now, see below)…

…And finally two ahead as you ride alongside the river. It’s best if you ignore the previous two from the left before you ride along the river, because they will follow you. If you concentrate on them first, Dutch and Micah will eliminate the final two riders before you reach them, depriving you of an additional chance for headshots. After they are eliminated, all you have to do is slow down to let the other two riders catch up with you.
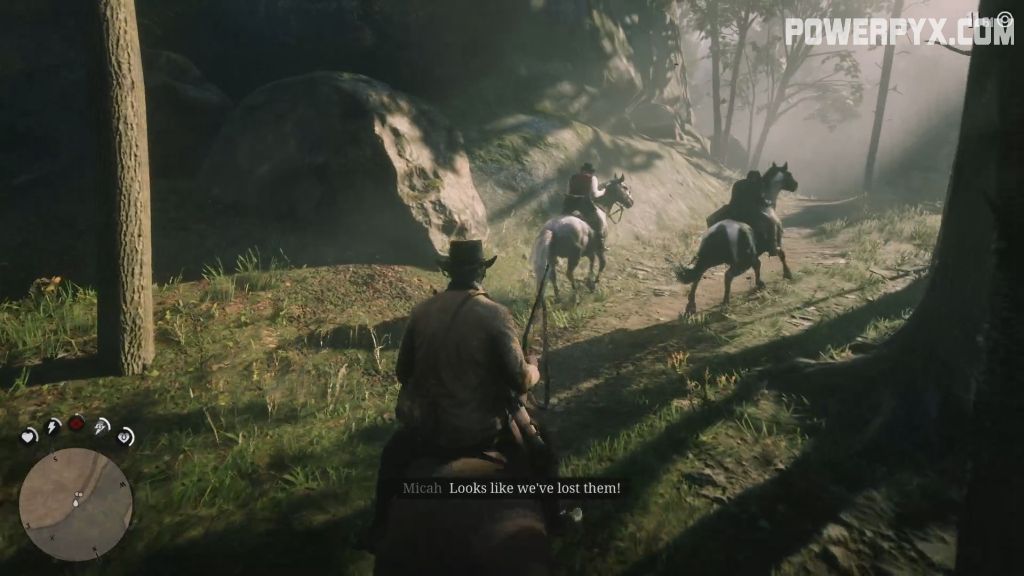
Once they have all been eliminated, ride for the end of the area and the ending cinematic will play to close out the mission.
This finishes Just a Social Call main mission in Red Dead Redemption 2. Now the next quest A Rage Unleashed starts.
Next Up: A Rage Unleashed
For more Walkthroughs with all gold medals, check out the complete Red Dead Redemption 2 Story Walkthrough.
Lee says
I did this mission flawlessly and still didn’t get that time limit. I don’t even think I got hit. Just like the getting the captain to the boat mission in Guarma. No way I took longer than 2 minutes 45 seconds.
William says
I got it on my second try. I’m pretty sure the time spent in dead eye doesn’t slow down the timer. I even messed up losing about ten seconds running around on a lower level. Minimize dead eye and you got this!
Pulling my hair out says
Gold on second play through (Dutch got shot and failed me but I didn’t care, chuckled as a matter of fact). A tip if you are on a second play through and not a replay from a finished game. Eat Mint, Oregano, and Thyme Big Game and take a Potent Tonic before starting the mission. Will make this much faster as you can absorb way more bullets and not rely on Dead Eye as much so you can keep moving. Also I ran double S’fields maxed out with high velocity ammo. If you are on replay i suggest you stop it and restart a new game with this guide open because it’s gonna suck.