
Automatic Love is the 10th main story mission in Cyberpunk 2077 (CP77). This walkthrough will guide you through all objectives, paths, dialogues, choices and endings of the Automatic LoveMain Job.
Area: Watson (Kabuki)
Quest Giver: Takemura
Requirement: Complete Playing for Time
Reward: XP / Street Cred
Mission Info: So you’ve decided to find the chick who put on this first-class shitshow. She had a job and you took it ’cause there was no one else to knock some sense into your gonk head. I’m here now, but so what? This search and rescue bullshit’s a dead end, but that’s not about to stop you. Maybe Evelyn will, who knows? Sure seems like she doesn’t wanna be found.
Objectives:
- Find Evelyn at Lizzie’s Bar
- Call Judy [Optional]
- Meet with Judy
- Leave Lizzie’s Bar
- Talk to Judy
- Take the cigarette case
- Leave Lizzie’s Bar
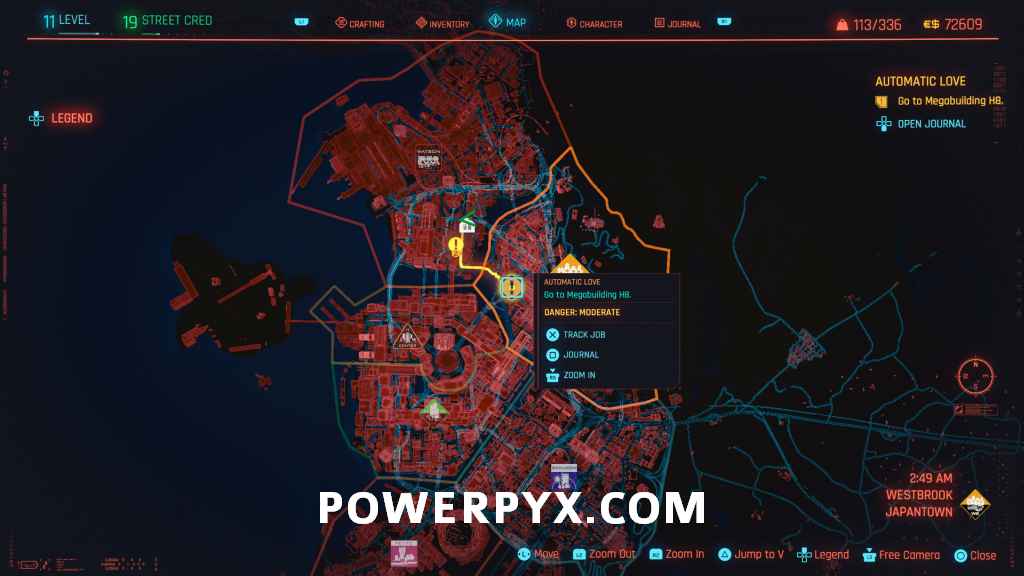
- Go to Megabuilding H8
- Take the elevator to Clouds
- Head to Clouds in the evening
- Check in at the Clouds reception
- Jack in at reception
- Deposit your weapons
- Go into booth 6/9
- Ask the doll about Evelyn
- Get inside the VIP Area
- Find Tom
- Ask Tom about Evelyn
- Head to Woodman’s office
- Get inside Evelyn’s Booth [Optional]
- Examine Evelyn’s Booth [Optional]
- Interrogate Woodman (If you reach his office without combat)
- Confront Woodman (If you were in combat before reaching his office)
- Defeat Woodman (If Woodman starts attacking you)
- Gather more info about Evelyn (If you fought Woodman)
- Leave Clouds
- Collect your weapons from the locker
- Take the elevator to the ground floor
- Talk to Johnny [Optional]
Starting Location: Automatic Love
 |
 |
Find Evelyn at Lizzie’s Bar
At the start of the mission, you’re meant to be heading to Lizzle’s Bar to look for information on Evelyn. You can go there right away, or you can call Judy first to talk to her.
Call Judy [Optional]
Pull up your phone and select Judy Alvarez from your list.
Dialogue:
- Wanna talk to Evelyn.
- So did I. > Optional
- Heard about the heist? > Optional
- So did I. > Optional
- Let’s meet.
- C’mon, you’re the only lead I got. > Optional
After the second progression dialogue Judy will just hang up on you, but then you’ll have the objective to meet her at the bar.
Meet with Judy
Head to the bar, and talk to the bouncer outside.

If you hadn’t called Judy prior, you’ll get this dialogue:
- Wanna talk to Evelyn Parker.
- How’s business? > Optional
- Where’ll I find Judy?
- Evelyn – who else might she have trusted? > Optional
If you called Judy first, you’ll only get this dialogue:
- Judy around?
- Looking for Evelyn Parker. > Optional
Either way, go downstairs to meet with Judy.
Talk to Judy
After Susie leaves, you can speak to Judy about the info you’re looking for.

All options through this set of dialogue with Judy end up at the same place, but how you interact with her here apparently has some effect on how she interacts with you later on. This doesn’t affect anything related to her romance options though, that is only affected by how you deal with her during her side quest chain and nowhere else.
Dialogue:
- Lookin’ for Evelyn.
- What was that all about? > Optional
- That your boss? > Optional
- Not your concern.
- If you don’t know just say so. Don’t waste my time. > Judy gets mad, bad option.
- Sounds to me like you two talked. > Leads to the three options below.
- Sounds like you two talked.
- Played your part, too.
- Quit playing the victim. > Leads to the “Who are you to Judge?” pair of choices.
- Just tell me where the hell she is. > Optional
- Quit playing the victim. > Leads to the “Who are you to Judge?” pair of choices.
- [Show bullet wound] Took a hit myself.
- She knew what she was getting into. > Leads to the “Who are you to Judge?” pair of choices.
- Just tell me where the hell she is. > Optional
- She knew what she was getting into. > Leads to the “Who are you to Judge?” pair of choices.
- She comished the heist, not me.
- Who are you to judge? > Judy gets mad, bad option.
- Yeah, I’m pretty much fucked. > Judy doesn’t appear to be mad, best option other than just choosing the COOL option right at the start.
- Played your part, too.
- 5 COOL: Just need to know who hired her. > Immediately tell Judy what you’re looking for, doesn’t get mad. Likely the “best” option in this dialogue.
Take the cigarette case
After the dialogue, regardless of what you chose and whether Judy gets mad at your or not, you grab the cigarette case off her desk to get the address you need to go to.

Leave Lizzie’s Bar
Now that you have your info you can leave the bar. Judy will stop you are going out the door and you have three more dialogue options.
Dialogue:
- Sure, give you a call. > All three options have the same outcome, and you can call Judy about what goes on later no matter what.
- Sorry, no promises.
- Better if I didn’t.
Go to Megabuilding H8
Your next objective will be to drive to the locations of Clouds over in the Westbrook area.
 |
 |
Take the elevator to Clouds
Go up into the lower floor of the building, then take the elevator to Clouds. In the elevator Johnny comes out and you can have some dialogue with him.

Dialogue:
- Why don’t you believe Judy?
- Tyger Claws have ties to Arasaka… > Optional
- Someone’s in a great mood. > Optional
Head to Clouds in the evening
This might pop up for you in the elevator, but Clouds works the same as Lizzie’s Bar and is only open at a specific time (after 7 PM). If you go there when it’s not after 7, you can interact with a bench nearby to wait until 7 PM.
Check in at the Clouds reception
When Clouds is open, go inside to the reception desk.
Jack in at reception
You’ll speak to the receptionist, and have some different dialogue options. You can object to jacking in in the optional dialogue, but you have to regardless to progress. The doll you choose also doesn’t matter for progression, and you need to pay the $500 fee no matter what as well.

Dialogue:
- [Jack in] All right.
- 7 INTELLIGENCE: Jacking in the personal isn’t safe. > Optional
- Looking for Evelyn Parker. > Optional
- I just want to talk to her. > Both options have the same outcome
- I’m not a customer.
- Meaning? > Optional, directed at Johnny who appears after picking one of the above two dialogue
- You know why I’m here? > Optional
- How does this work? > Optional
- Afterlife. > Safeword choice doesn’t matter.
- Samurai.
- Angel. > Male doll, your choice of doll doesn’t matter, the interactions are all the same.
- Skye. > Female doll
- Looking for an Evelyn Parker. > Optional, appears here if you didn’t ask about Evelyn earlier.
- [Jack out] Don’t want to pay. > You have to pay regardless to progress, so this basically just exits the dialogue.
- Changed my mind, I’ll pay.
- $500 [Pay] Here. > Required to pay $500 to progress, there isn’t any way around this.
- [Disconnect] That it?
Deposit your weapons
Before you can enter the club you will have to interact with the locker by the door to deposit all of your weapons, so you go in with nothing other than what you have equipped as your cyberware.
Mission Continuation Info
Once you enter the main club floor your options for how to proceed are pretty much entirely open. Your objective will be prompting you to go interact with your selected Doll first, but the way this mission is set up you could just entirely ignore the main objective of talking to the doll, ignore all the investigating you can do downstairs, and just go directly up to Woodman and talk/threaten/kill the information out of him.
For this walkthrough all the investigation steps will be run through, then there will be info about if you attack the guards or Woodman at the end because the way to get upstairs to the VIP and his office is basically the same regardless (check the Get inside the VIP area objective)
The information you find (if any) prior to talking to Woodman only affects what you can say to him when you are speaking to him in his office. Interactions after this mission are only dependent on whether you deal with Woodman peacefully and leave without violence, or whether you end up fighting Woodman and need to fight your way out of the club.
Go into booth 6/9
Depending on which doll you selected you will be directed to a different booth, 6 for Angel or 9 for Skye. Whichever you selected isn’t important, the dialogue outcomes are the exact same for both of them, though the wording of the options is slightly different.
 |
 |
Ask the doll about Evelyn
If you want to exit the “connected” part of the conversation you can select the [Safeword] option at any none of the dialogue before that point is actually important for progression, it’s just
Dialogue:
- [Sit] Fine. / This’ll be interesting…
- It’s just “V”. > Optional
- I’m looking for a girl. / Looking for someone.
- How do you know I’m dying. / How do you know what’s happening to me? > Optional, even though it’s colored like the normal progression dialogue.
- There’s something in those mirrors. > Optional
- What’m I afraid of? / Just… what happened, exactly?
- I died and now I’m dying again. Happy? > All three of these options lead to the “Still wanna be the best” options.
- We’re not having this conversation. / Don’t wanna talk about it.
- I’m alone, got nobody left. / I got fucked over.
- Still wanna be the best. / Doesn’t everyone? > These two options lead to the [Lie Down] set of options.
- Pure fantasy, that. / Wanted too much at once.
- This is what “fulfilling my deepest desires” looks like?
- You can’t come to terms with something like that. / Need to find out what happened first. > These two options lead to the “Still wanna be the best” options.
- So I just give up? / So I should just give up and die?
- Tell me where Evelyn is. > Optional, might not appear for you.
- Just gonna talk in circles, in riddles? > Optional, might not appear for you.
- [Lie down] Not gonna die completely. / I’ll live on in people’s minds, their memories. > Both [Lie down] options and their two syb options both lead to the “So what now” dialogue and have the same overall outcome.
- I’m scared of the unknown, of dying again. / I’m scared of what’ll happen to me.
- Can’t imagine what it’s like to become someone else. / Rather not think it’ll all disappear.
- [Lie down] The void freaks me out. / Death’s the end. The very end.
- I’m not grieving. / Not really.
- Grief doesn’t begin to describe it. / Sad is an understatement.
- So what now? / What now?
- Don’t have to worry about a thing anymore. > Optional, might not appear for you.
- [Touch] Not sure I can manage… / Can’t keep up with what’s happening around me anymore.
- [Safeword] Samurai/Afterlife. > “Disconnects” the session with the doll, basically just ends the soul searching style dialogue and puts you right at the point where you ask them for strait information. If you exhaust the connected dialogue you reach this point automatically.
- Thank you. / Thanks… > Optional, appears once you reach the end of the connected dialogue and you only have the [Safeword] option left.
After selecting the [Safeword] option is when the important dialogue starts for actually getting information. You get the information no matter what you select though.
- [Stand] What do you know about Evelyn? / Tell me what you know about Evelyn.
- This wasn’t what I expected. / Not what I expected. > Optional, still need to select the [Stand] option to proceed.
- Thanks for the chat. That was refreshing. / Enlightening conversation, that. > Optional
- [Stand] Need your help. Please. > Leads directly to the “Who’s Tom?” option, which would be considered the “best” option here.
- [Stand] You’re good looking. It’d be a shame to lose that. >Both this and offering to pay for info lead to the “Start talking” set of options.
- $900 [Stand] I’ll pay for info.
- Start talking. / Talk or I’ll report you. > Both options have the same outcome.
- Notice anything unusual? / Anyone ‘sides me come around lookin’ for her?
- Who’s Tom?
- Tell me about this “incident” / A customer attacked her? > Optional
Get inside the VIP Area
After you have finished the conversation with the doll, they will have told you about Tom who was friends with Evelyn and can be found upstairs in the VIP area. You aren’t allowed up there right now, you either need to sneak up or obtained a VIP token to go past the door. The easiest way overall is to obtain the VIP token from one specific enemy. To start, go towards the VIP room where you should see a bouncer talking to a customer about how they can’t enter the VIP room. If you wait for a moment, a Tyger Claws gang member will come from upstairs.

Follow this enemy into the bathroom, where you can safely perform a takedown on them.

Loot the “VIP Token – Clouds” item from the body, which allows you to get upstairs without the guard attacking you. You can then hide the body in a bin just outside the bathroom door so that no one else might happen upon it later.

An alternative method to obtain a token, you can force your way through the door to the right of the bathroom where there is another enemy, which you can loot a token from. There is also an elevator you can take up to the VIP area through there.
Find Tom
In the VIP area, you can head to the back right corner to room 02 where Tom is.

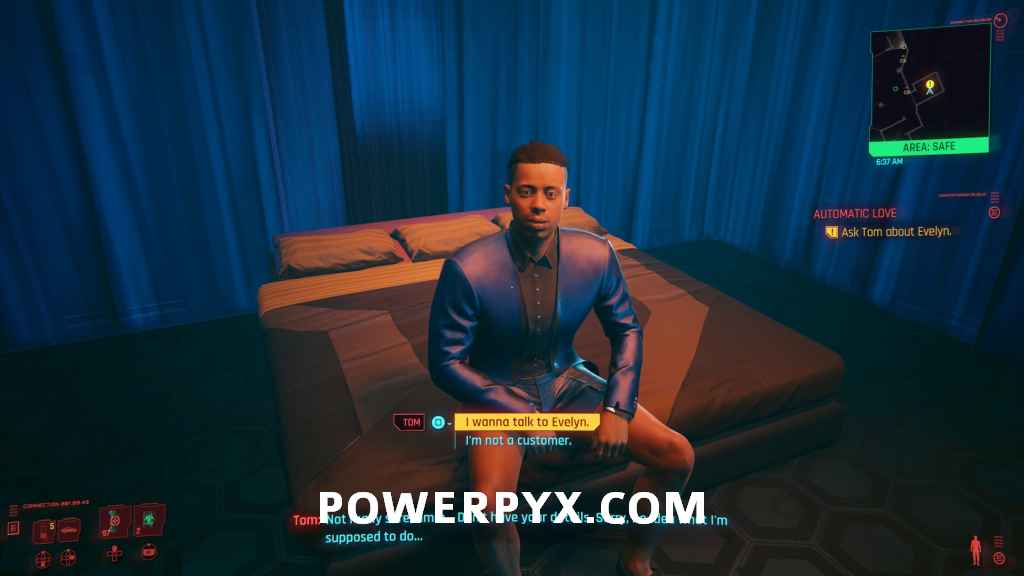
Ask Tom about Evelyn
Inside, speak to Tom for more information. If you have triggered combat in the area already and you still want to speak to Tom to follow the objective, his dialogue options are the same.
Dialogue:
- I wanna talk to Evelyn.
- I’m not a customer. > Optional
- She tell you she was leaving?
- 5 REFLEXES: Osaka or Osla – which is it? > Optional
- I’m familiar with the accident > Optional, only appears if you had looked in booth 11 before speaking to Tom.
- Who is this Woodman?
- Where can I find this Woodman? > Optional
Head to Woodman’s Office
Now that you know Woodman is the manager, you are meant to talk to him for the next main objective. There is some option searching you can do first though to get different dialogue options with him that allow you to get information about Evelyn without combat.
Get inside Evelyn’s Booth [Optional]
The main extra objective to gain info to use against Woodman is investigating booth 11 where Evelyn worked. For the “long” way to get into it, you need to sneak into the back area bear Woodman’s office to the security room. To get there, go through the door to the left of the bar in the VIP area, watching for the camera and the guard that will walk back and forth in the VIP room. If you have the BODY or TECHINCAL ABILITY stats to force the next door you can, or you can cut through the private lounge to the left, watching out for the one enemy sitting in the chair. Go to the door to the far left to enter the dressing room.

In here there are some optional items you can find, such as Evelyn’s Coat on the ground, which is implied to be a clue of some sort but doesn’t really help. Slightly more of interest in this room there is a katana on a table which gives you the Cocktail Sick crafting spec when picked up.
 |
 |
To continue, go out the window on the other side of the room, then follow the path clockwise back into the building. You’ll reach the spot where on the left is the main objective to go into Woodman’s office, but on the right you can find the security room.

In here you can take out the one enemy, then interact with the computer to their right. Check the Files tab to learn about the attack on the room, then switch to the Local Network tab, then the Door option, which allows you to unlock the door to booth 11 downstairs (this door can also be opened at any time if you have 5 TECHNICAL ABILITY level). You should also turn the cameras off while here to get back out easier.
 |
 |
Backtrack downstairs again, making sure to watch for the guard who will still be wandering around and might be in front of the door.
Examine Evelyn’s booth [Optional]
Inside Evelyn’s booth there are a couple items you can exam, but the main one that actually helps is the large case in the corner. Interact with it to play a recreation of what happened during the incident.

Once the recreation is finished, you can go back upstairs and enter Woodman’s office.
Interrogate Woodman
When you enter the office, you start a dialogue with Woodman. How this goes depends on what options you pick, and different options are available to you depending on prior clues you found, along with some amounts of your abilities or even if you are playing as the Corpo lifepath.
This dialogue set gives the options you should pick if you want to peacefully obtain information from Woodward, based on information obtained in Clouds from checking Evelyn’s booth.
The way the options generally work is the more you antagonize Woodman the more likely he is to start fighting you, so you want to pick the options specifically related to threatening him with your obtained information. If you continually select the options like “Tell me where Evelyn is” or “Sorry, done playing nice” then he’ll eventually start fighting you.

Dialogue choices to make:
- Looking for Evelyn Parker > Only option to start
- You look like a reasonable man – let’s make a deal. > Select this option
- You don’t understand what’s at stake.
- Tell me where Evelyn is.
- I’ll pay for info. > Select this option
- Sorry, done playing nice.
- You look worse than that…
- Just wanna make a donation. > Select this option
- Sorry, done playing nice.
- Wanna end up like Jotaro Shobo? > You can select this option if you’ve completed the Gig “Monster Hunt”.
- I’ll tell the media everything. > Select this option, this is the one related to finding the clues in booth 11.
- Gonna take this to the news > Select this option
- Could end you with my bare hands.
- Your bosses should know how to treat customers. > Can select this option if you’ve not selected anything aggressive in the prior selections.
- Could end you with my bare hands.
- Let’s not make this harder than it has to be. > Can select this option if you’ve not selected anything aggressive in the prior selections.
If you successfully convince Woodman, then he’ll give you the details on what happened to Evelyn without a fight.
- Get to the point.
- Evelyn stopped bringing in profits? > Optional
- Dolls often malfunction? > Optional
- Evelyn stopped bringing in profits? > Optional
- Name and address.
- Why’d you do that? > Optional
- Better than a bullet to the brain. > Both options have the same outcome.
- You’re repulsive.
- You invested eddies in Evelyn? > Optional
- Why’d you do that? > Optional
Confront Woodman
If you reach Woodman’s office after engaging in combat, he will have locked himself in to start.
Defeat Woodman
If you either are attacked by Woodman during dialogue or if you came up in combat, you will then need to defeat him to obtain information off his computer.
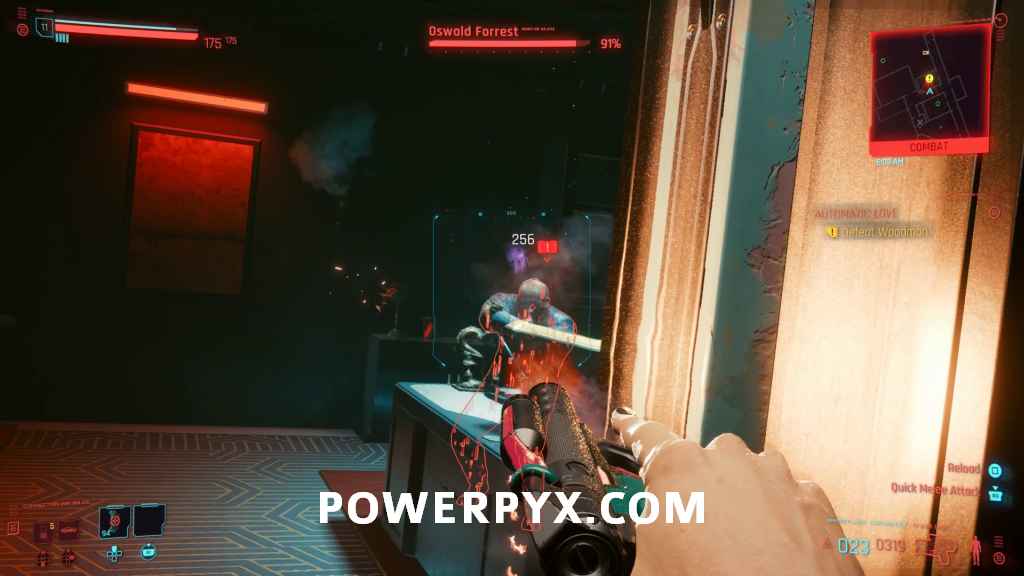
If you start fighting him during the dialogue he’ll pull a knife to start, then switch to a gun at 50% health. If you start fighting from outside the room he will use a gun the entire time. Depending on how you are set up fighting him can be a little annoying depending on what items you picked up on the way up, as you won’t have your regular weapons. If you grabbed any of the purple knives on the way here you can basically just knife him the whole time, because he doesn’t do a huge amount of damage, or alternatively just take potshots at him around corners because he hides quite a bit. Once he drops to about 25% health he’ll use one healing item, then won’t again.
Gather more info about Evelyn
With Woodman dealt with, you can now access his computer. The specific item you want to look as is the “Broken Doll” email, which has the information about the ripperdoc that Woodman sent Evelyn to.

Leave Clouds
Once you’ve obtained your information, you can leave Clouds either using the back elevator as directed by Woodman, or by fighting your way back out if you were in combat.
Collect your weapons from the locker
Make sure to grab your items from the locker on the way out, you are able to just walk past them if you forget.
Take the elevator to the ground floor
Go out of the club, then towers the elevator in the middle of the building to leave.
Talk to Johnny [Optional]
Johnny appears when you get near the elevator and you can engge in some dialogue with him if you want.

Dialogue:
- Think we’ll find her there?
- See dollhouses still aren’t your thing. > Optional
Midway through the elevator ride the mission will end, and the next mission immediately starts.
This finishes Automatic Love main quest in Cyberpunk 2077 (CP77). Now the next quest The Space In Between automatically starts.
For all other Quest Walkthroughs, check out the complete Cyberpunk 2077 Walkthrough.
Bri says
not sure if it works with both dolls, but for Angel, after the main conversation is over and the optional dialogue “A customer assaulted her?” leads to where you can ask “Where did this all happen?”, he’ll tell you her booth number and you can ask him if he can get in, so he unlocks it for you (without moving) so when you walk up to it after exiting his room it’s already unlocked and you can enter it automatically, no guard near it or anything. so then you don’t have to the do entire thing with sneaking onto the computer and unlocking it there. just wanted to add that in case you didn’t know, since it isn’t written about on this page.
Aure says
Can confirm that this was the same for me while confronting Skye with the same options
DeviantOldMagic says
Is it true that after retrieving your equipment from the locker, some (I`m not sure exactly which ones) will get an exclamation mark, making it impossible to sell, move to stash or even drop them?