
Play It Safe is the 24th main story mission in Cyberpunk 2077 (CP77). This walkthrough will guide you through all objectives, paths, dialogues, choices and endings of the Play It Safe Main Job.
Area: Japantown, Westbrook
Quest Giver: Takemura
Requirement: Completed Main Story mission Gimme Danger
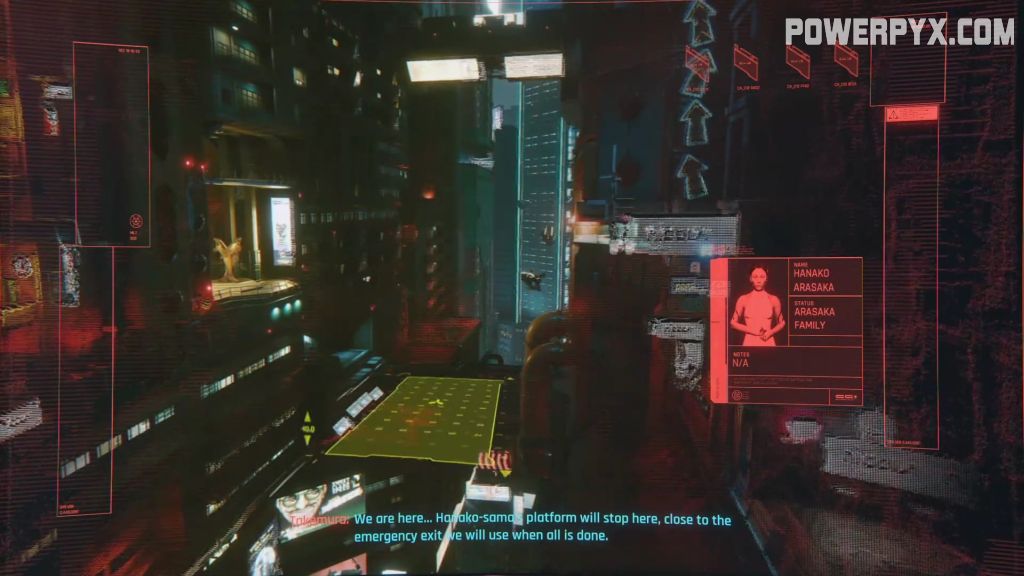
Mission Info: Since I obviously wasn’t invited to Saburo Arasaka’s funeral, I guess this sad little parade will have to do – I’m just missing confetti. But in all seriousness, Takemura must have a death wish. He’s just gonna jump onto Hanako’s platform? Be my fucking guest – we’ll deal with the snipers. Meanwhile, keep an eye out for an escape route. This is gonna go all kinds of wrong – I can feel it.
Objectives:
- Go to the bazaar in Japantown
- Talk to Takemura
- Neutralize the snipers
- Reach the first sniper
- Reach the second sniper
- Talk to Johnny (Optional)
- Reach the third sniper
- Talk to Takemura
- Reach the netrunner
- Disconnect the netrunner from the net
- Defeat Oda
- Talk to Takemura
- Connect to the Access Point
- Wait for Takemura to make his move
- Escape the parade grounds
Starting Location: Play It Safe


Go to the bazaar in Japantown
Some time after the completion of Gimme Danger, you will get a call from Takemura to say that he will be waiting for you at the bazaar in Japantown to launch the next phase of your plan. You will probably want to have a fairly strong silenced pistol, one that favors a high damage per hit rather than a high ROF (Rate of Fire). A power revolver with a silencer is ideal, such as an Overture fitted with an XC-10 Alecto. Even though their DPS (Damage per Second) is lower than other pistols, their damage per shot is much higher leading to a much more likely headshot kill. If you have to shoot twice, you’re probably going to be in trouble. Plus spend a perk point on Silent and Deadly in the Stealth tree to offset the damage reduction on the silencer.

Talk to Takemura
Takemura will refresh you on the plan, and then you will skip time to the start of Arasaka’s Funeral Parade.

Neutralize the snipers
You will begin standing among a crowd in a public area. Follow the waypoint as it winds through the spectators towards your first target.

Reach the first sniper
Once through the first doors, you’ll see that the hallway has been booby trapped with trip mines. They can be disarmed with Technical Skill (6), or you can detonate them from a distance by shooting them but this will attract attention. A much easier solution is just to jump over them. Carefully.


Climb up the ladder at the end of this hall, then jump up to the next area.


You’ll find yourself right behind a billboard that the first sniper is using as a vantage point. Go around to the right side of the billboard and jump up to the catwalk at its base. Crouch walk up to the sniper, grab them from behind and kill/choke them out.


Reach the second sniper
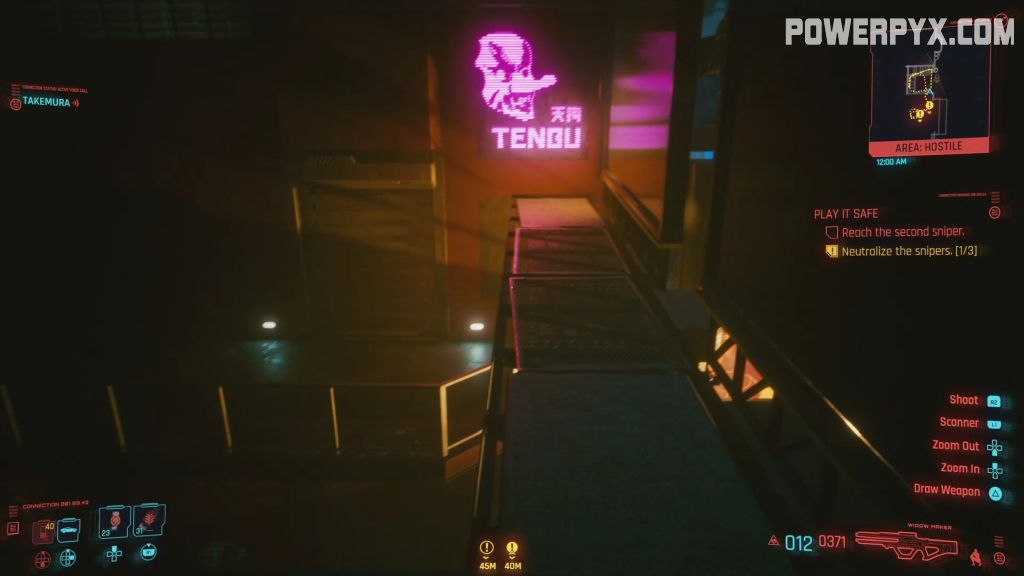
Jump down from the billboard walkway and keep going to the right to see a path leading you to the next crowded platform.


Best to stow your weapons before you start moving through the civilians though, so you don’t draw attention. Head for the elevator and go up to the balcony level 21. Along the way you’ll be given the option to stop and talk to Johnny about Adam Smasher to get some more backstory, if you feel like being distracted mid-mission.

At the end of the path, climb up a ladder to reach the maintenance area. There will be a truly rickety catwalk up here that you will have to platform across to reach the other side. When the first section breaks away, jump across to the second walkway rather than trying to make the longer jump straight ahead.


Drop down where there is a break in the barricade and drop down again through a roof access hatch.

Down a short hallway, you’ll find a narrow U-shaped space between buildings with catwalks and conduits along the sides below you. Takemura will helpfully inform you that you’ll have to get down to the floor where the sniper is without killing yourself.


Watch out for Arasaka wyvern drones patrolling the area. They are patrolling almost every level below you looking for intruders, so wait until they are behind the billboards facing the street before you proceed. Unless you are very sure of your quickhacking levels, I wouldn’t take the chance of doing anything more intrusive than a memory wipe on the wyverns just in case you raise the alarm or attract the attention of the Arasaka netrunner.

Go around the catwalk to the other side where you can drop down to the catwalk below you, being sure that the coast is clear before moving from the cover of one billboard to the other. Drop down again, continuing your counter-clockwise circle around the outside of the area.


Eventually you’ll drop down to a broken catwalk.


At this point, turn around and go clockwise around the platforms until you drop down to a larger area right above the waypoint.


Continue forward to the edge of this rooftop and you’ll find a staircase heading downward. At the bottom of the stairs, turn left and there will be a section of the railing missing that lets you drop down to another space between buildings onto some duct work. There is an Arasaka soldier that is patrolling the area directly below you. To avoid attracting his attention crouch walk, be careful to avoid hard landings when descending, and avoid direct conflict through quickhacks or silenced weapons unless absolutely necessary.


Jump across to the duct across from you, then turn left and drop down to a catwalk beside you.


Behind the cover of the railing, check the position of the Arasaka soldier before you continue. If you drop down to the next pipe while they’re inside the building to the left, there’s a high possibility that they could see you out in the open if you move at the wrong time.
While he’s at the railing, drop down to the pipe and then down to the ground, crouch walk behind him and take him out. Technically you could avoid him entirely or pop him with your silenced pistol but you’re least likely to raise an alarm by using a takedown instead. Pick up the body and move it behind the stack of crates at the back of the room before you continue.


In the next room, there is another trip mine across your path which you can hack, disarm, avoid or blow up. Be careful about jumping over the laser or blowing up the mine however, as the second sniper is in the very next room and could be alerted by your movement/explosions. Sneak up behind him and take him out.


Reach the third sniper
Opening the door to the next room will reveal another trip mine blocking your way. Look to the left and deal with it before climbing the stairs.


When going up the second flight of stairs, crouch walk slowly and look to your right to see an Arasaka soldier blocking the stairs to the level above you who will see you as you reach the top of the stairs. Again, if you have a strong silenced weapon you can take him out, but a Reboot Optics quickhack will be enough to let you pass through the area if you move quickly.


At the top of the next flight of stairs you’ll find a second Arasaka Soldier sitting on a couch right in front of you. Kill/blind them and keep moving down the hall to the left.

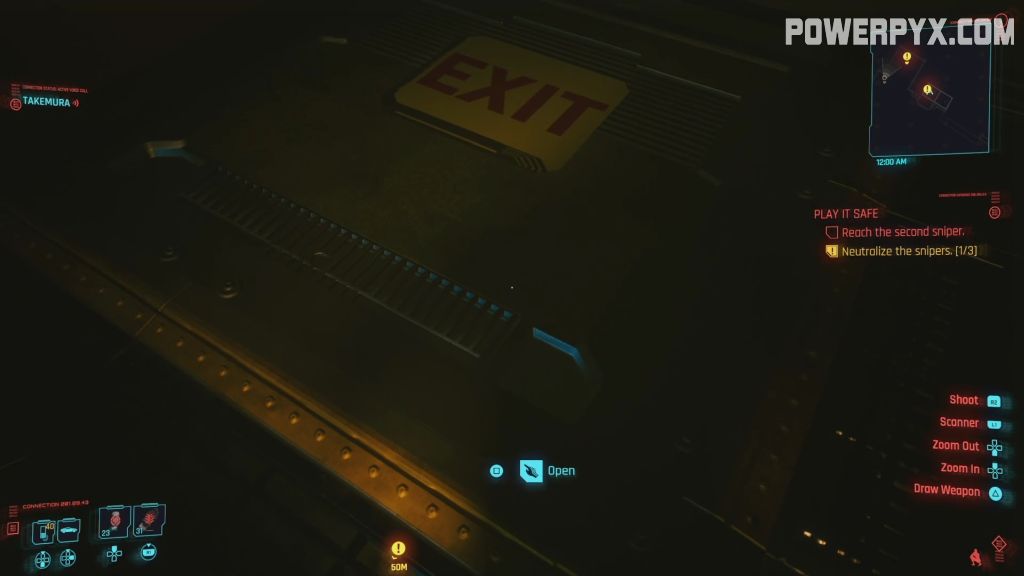
At the end of the hall you’ll exit into the open air again, and yet another Arasaka soldier will be in the area watching the parade go by. You’ll be forced to deal with this soldier, since he is carrying the access token needed top open the door behind him.


Open the door and go inside, climb the ladder to the level above, then climb the air conditioner unit directly in front of you.


Turn right and climb up to the next level. Look to your left in this small area to find an elevator which you will take up to the Foyer on level 30.


This area splits into two paths, but the one leading straight ahead to the footbridge is a dead end. Instead turn left and go down the stairs carefully. There are two soliders in the area below the stairs, one on the couch and the other patrolling the far side of the room.


If you move carefully you can slip past both of them without engaging. You can try to eliminate them, but even if you have a silenced pistol, the other solider is close enough to hear any shots which will shift him into a heightened alertness state.


Also be aware of wyvern drones patrolling outside the nearby window, which could complicate any action. It is far safer to just slip by in stealth.

Go through into the next area, and you’ll see the sniper at the end of the footbridge. Crouch walk carefully up the left side of the passage, but don’t approach without using your optics to spot the multiple mines laid around to protect the sniper from approaching threats. Disarm them before getting too close.

Talk to Takemura
With the third sniper down, Takemura will call you and tell you that the last remaining threat is an Arasaka netrunner that controls all the networks. You will have to neutralize her before you will be able to hack the floats.
Reach the netrunner
Backtrack to the room with the two soldiers then turn right and enter the elevator at the far side of the room. Head down to the level 21 balcony. Follow the path the the waypoint, which leads to the netrunner you’ll find sitting in a large, boss battle sized room. Hmm.


Disconnect the netrunner from the net
Pull out the netrunner’s connection just as Oda climbs through the window and attacks!


Defeat Oda

Oda is a rough fight. He is incredibly fast, uses devastating mantis blades attacks, an SMG with a smartlink, and he has adaptive camo to turn invisible when he retreats to heal his wounds! His mask has the ability to disrupt any smart munitions you have from tracking him as well, so your best bet is a good tech precision rifle that will let you shoot through objects as he bounces from location to location. Alternately if you have the Weapon Glitch quickhack, this will disable his mask letting you use smart weapons again, or if you can somehow sneak up on him, a takedown action will also destroy the mask.
Generally he will attack in close quarters using the mantis blades in a three hit combo, or a jumping attack that does a significant amount of damage. You’ll want to keep him at a distance and pour fire into him while dodging melee attacks at the last moment by double-tapping  /
/  . If you get too far away, or if Oda retreats to heal, he will usually attack with his smart SMG. The Weapon Glitch quickhack will prevent this attack, or you can simply get behind cover and continue to wail on him with your tech rifle.


When Oda has taken about 50% damage or more, he will usually use a flashbang, activate his adaptive camo and get someplace safe so that he can heal. If you don’t keep up the pressure while he’s invisible, he could potentially heal back to full health. He is not completely invisible however (think Predator camo), and you’ll be able to see hints of him as he moves, or green health numbers as he heals. Keep up your attacks and supplement with quickhacks like Short Circuit and Reboot Optics to make your life easier.
Talk to Takemura
When you manage to defeat Oda, he will fall to the ground and Takemura will call you to ask you to spare Oda’s life. One more shot while he’s on the ground will kill him, or you can leave him be. If you leave Oda alive, he can show up again later during a sequence in one of the Endings. But this doesn’t change anything about how the story plays out – it’s just a small extra appearance of this character if he lives.

Connect to the Access Point
Return to the netrunner and connect to the access point nearby.

Wait for Takemura to make his move
Watch as Hanako finishes a call with Yorinobu, and Takemura enters stage left. In case you’ve somehow managed to avoid bungling this mission, Takemura calls an audible and everything goes sideways.

Escape the parade grounds
Drones outside the window have located you, and they’re now firing into the room indiscriminately. Follow the waypoint to the right, and go through the double doors here. Turn left and go across the balcony, then down the stairs on the other side and drop down from the platform into the courtyard below. Note that there will be one Arasaka guard that you might want to eliminate before you do so.


Follow the waypoint to the elevator, and take it down to street level. Note: In some cases there may be a bug here which makes you unable to call the elevator (can’t interact with elevator panel). If this happens, reload one of the previous autosaves and return, then it should work.
The mission will end, just as Takemura calls you to make sure you’re okay.

This finishes Play It Safe main quest in Cyberpunk 2077 (CP77). Now the next quest Search and Destroy becomes available.
For all other Quest Walkthroughs, check out the complete Cyberpunk 2077 Walkthrough.
Daniel says
I have gained about another 20 in-game hours just waking for this, “pursue other leads or wait for takemura to call” he is not calling. there are no other main quests. please tell me why you say, some time after gimme danger, when I have been waiting and doing side quests for AGES and he still isn’t calling me.
charles says
Open menu do “wait time” 24 hours , youll get a call , if not your game is bugged. The game is really trash anyway
Paul Alexandru Cazacliu says
I just got in a most stupid bug after doing this mission, losing all my creds, around a hundred of them. If I knew that could happen I would have purchased items with them. At course, I could reload a manual save just before this mission, but I’ll have to pass it again to the same routine in the same playthrough, to be forced to stay idle for all the same boring “visual novel” style parts, so I’ll pass. Damn you CD Project Red for releasing such bug-infested a game.
RYAN M DALLING says
I am way under leveled for this mission and can’t beat oda… I wonder how far back I have to go in saves where I can bail on the parade for a while.
rsk says
I have beaten him up very easily with a good telescopic truncheon. Just a couple of hits and he was down.